

Our daughter's beloved, plush headphones went silent. Here's how I did a quick and easy repair to get them back in action.
Read MoreMore Washer Repairs?!!! Repair #3 with the LG
This is the third major repair on our LG washing machine. Now, it won't drain anymore. I'm opening the case and doing a DIY invasion to fix it,...again.
Read More
Remove Paint from Metal Hardware - 3 Quick and Easy Steps
Here's how I stripped the paint off these hideous, painted-over hinges with some Bernzomatic firepower.
Read More
Cold at night! A DIY Heating Repair Aventure
Ahhh, wintertime in Phoenix. Although it's considered a paradise this time of year, the nights do get a bit chilly in the desert.
At some point during the winter, we finally give up and turn on the heat. When it dips down in the 30's at night for a few hours, our tender carcasses simply can't handle the frigid, Arctic rush of cold. Live here and you basically become a cold-blooded reptile. My 28 years of Michigan-tempered, icy-veined fortitude are long gone. Nowadays, we're bone-chilled cold at temperatures where mid-westerners would be happy swimming in a lake.
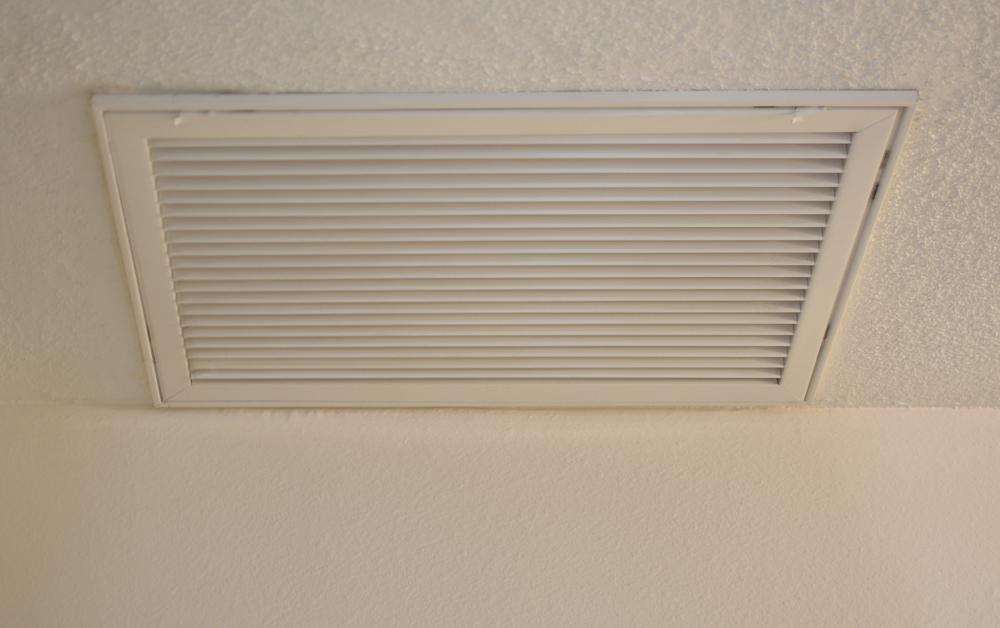
During these recent chilly nights, it started getting getting colder and colder, inside the house. Coincidentally, throughout the week, we noticed the sound coming through the vents from the attic was getting steadily louder. Louder airflow-ish sounds, nothing alarming, yet.
During an extra cold night, the noise got downright ridiculous when the heat kicked on, like the sound of a box of silverware tumbling in a clothes dryer full of rusty nails.
That sound was alarming. Nothing could be done at 2:00 am on a work night, so I turned off the heat, pulled up the blankets, and dozed back off to sleep.
HVAC = Heating, Ventilation, and Air Conditioning
Our heat comes from a heat pump rather than a classic gas or electric furnace. As I understand it, in simple terms, it's our air conditioner running in reverse. Heat and cold come from the same unit, up on the roof of the house. I guess it's more efficient in our weather environment. (Here's the scientific mumbo-jumbo , if you care.)
Give me the choice between attic work and working on the roof and I'll choose fresh air and open spaces, free of crawling in the dust and scratchy insulation, every time. I'd be checking this problem out, up top.
You too, eh?
In an incredible coincidence of crazy timing, I had just read a blog post by Sarah at The Ugly Duckling House where she had successfully fought back a furnace failure with the help and advice of an HVAC knowledgeable friend. I won't spoil her story, but she got through the ordeal relatively unscathed. Go ahead and pop over there to read her post . I'll wait.

Back already? She got lucky, right? I was hoping that I was facing some sort of pulley, wheel, or bearing that needed some quick lubrication, 'cause I really don't have an HVAC friend.
A quick fix (?)
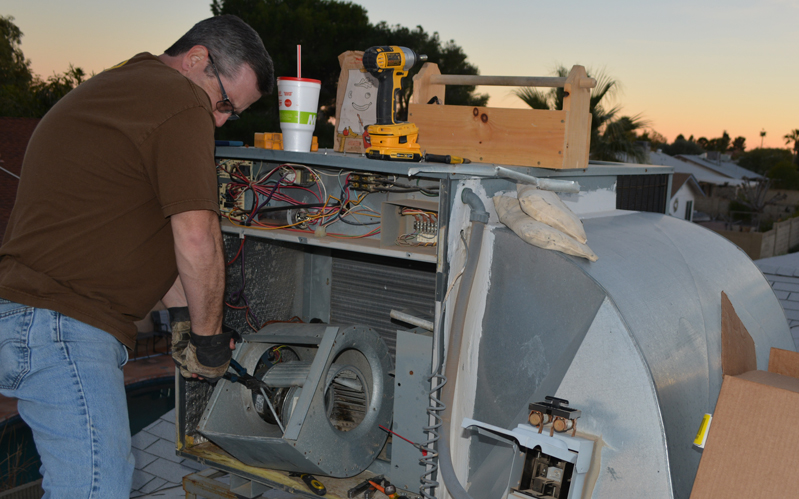
When I got home from work the next day, I turned on the heat, grabbed some penetrating oil and a can of WD-40, and tugged a ladder to the front of the house.
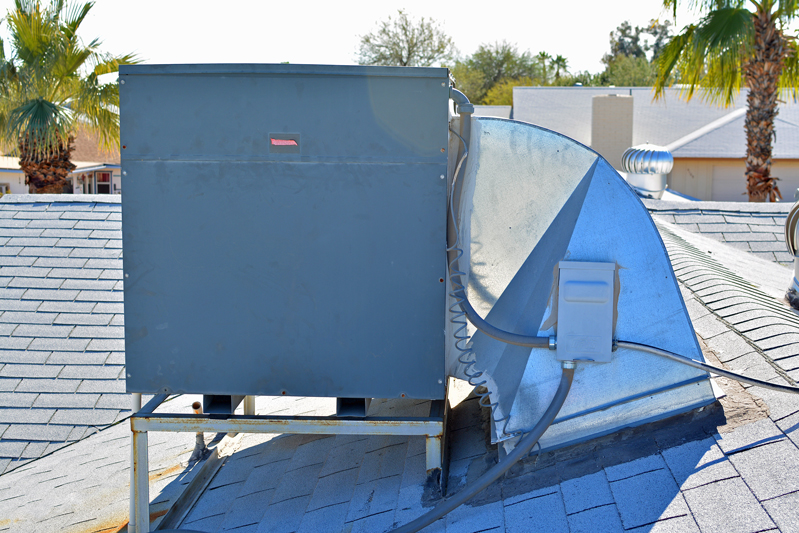
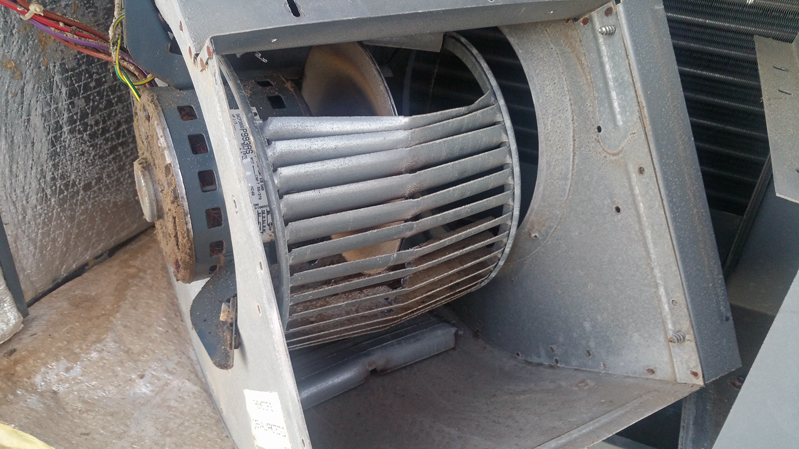
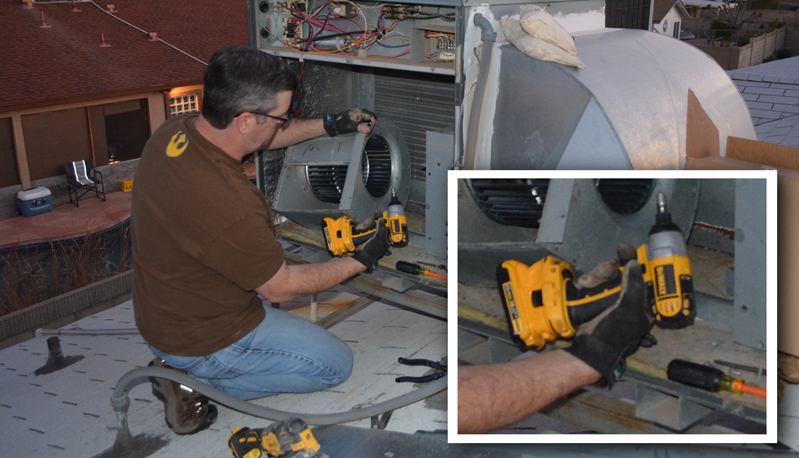
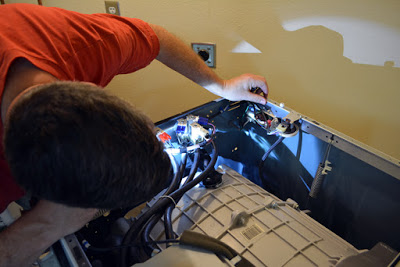
I scuttled up on the roof and opened up the side of the big metal box the noise was coming from, our AC unit. Inside was a blowing unit that looked a lot like the squirrel-cage floor fans that had filled our house after a big water leak a few years ago. I didn't need any expertise to tell that my pitiful, little can of WD-40 was not going to be the rescue hero I'd hoped it would be. The fan wasn't moving at all, but its central mounting hub(?) was completely detached and howling in fury. It was hard-core, metal-on-metal action, the hub was cutting into the inner edges of the fan vanes like a circular saw. Crap.
I pulled the fuse block, killing the power, removed the screws holding the fan unit to the duct-work, and pulled it back for examination. The fan was clearly destroyed, no fixing it. Some of the vanes were completely ripped off, others were bent, and then there was that whole thing about the central mounting hub being detached.
I buttoned the unit back up, climbed down, and started online research. Some sources recommended the complete replacement of the entire blower unit, motor and all. Best guess prices ranged from $400 - $1,000 to have a contractor do the work. Nope. Surely I could do it, right? Maybe I could even find the squirrel cage fan locally and perform the surgery myself.
Your Money is No Good Here
The next day, I spent my lunch hour driving around Phoenix to HVAC supply stores. What a freaking racket. While initially helpful, it was made clear that I couldn't get what I wanted because the supply stores wouldn't sell to the public. Apparently, I had to be a licensed HVAC contractor to buy parts; my money wouldn't be good in their fine establishments. One of my inquires was overheard by a grizzled HVAC tech slumped on a stool at the parts counter. This delightful gentleman treated me to a loud diatribe about how selling direct to "goddamn homeowners" took money out of his pocket!
I guess HVAC parts are distributed through a cartel or secret society that us bumpkin homeowners dare not be allowed to access.
Why is it you can buy electrical or plumbing parts at hardware stores, home-centers, and even grocery super-stores, but trying to buy parts for an HVAC system that you own, is somehow robbery? Heck, you can even buy automotive parts direct. I don't have a license to prepare and sell food, but I can sure go to any grocery and buy it to prepare in my own house. Old school, good old boy, supply-chain horse-crap, outdated in today's world, in my opinion.
Sorry dude. My house. My risk. My money.
If I hire you to do something and you bring your expertise, sweat, and disdain for handy homeowners, you can buy the parts. Otherwise let me fix my stuff. PS - I'm not calling your company anyway, Prince Charming.
Finally, I found a place that would sell me the fan. They still gave me a little trouble about the direct sale, but I talked them into it. It was just a fan, for God's sake, a few pieces of stamped metal. Forty bucks and I was out the door, in proud possession of my brand-new "blower wheel." If I could pull this repair off successfully, I'd save a bundle, as well as the time off work, waiting to meet a contractor.
Racing the Sunset
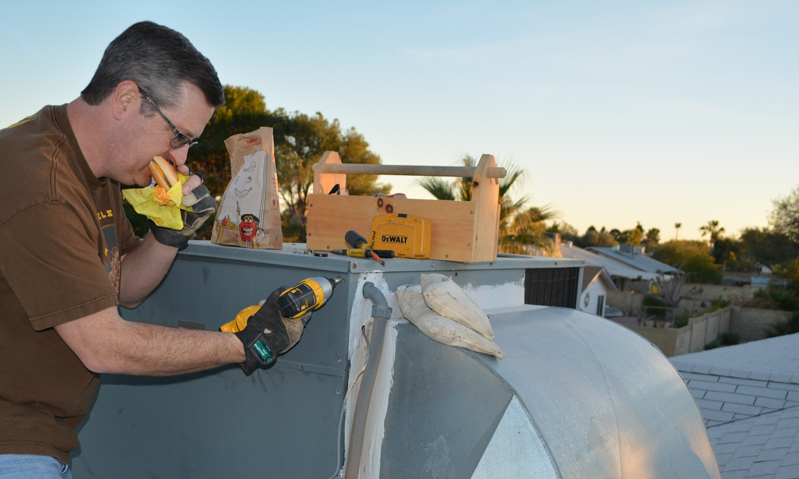
After work, I ascended the ladder again. This time I was loaded with the new fan, as many tools as I thought I might need, and a sack of the finest rooftop dining cuisine I could purchase through the closest drive through window. The sun was going down; I didn't have time to waste.
Rather than climbing up and down to flip breakers to disconnect power, I pulled the fuse block, right next to me.

AZ DIY Guy Scary Electrical Warning time

I buzzed the screws out of the side panel with the quick rat-tat-tat of my impact driver for the second night in a row. This time, however, there were cheap cheeseburgers and a big iced tea... so it was better.
McLovin' it
The mountains to the west, were looking hungrily at the sun, already starting to swallow it. Time was not on my side.

With the bent-up fan flopping around inside the housing, I had trouble getting the hub off the motor shaft. I put some muscle into my heavy linesman pliers and cut through the edges of the fan and pulled the beat-up thing out of my way.
Pro Tip:
The precise condition of our original fan is what a true professional may refer to as "toast."
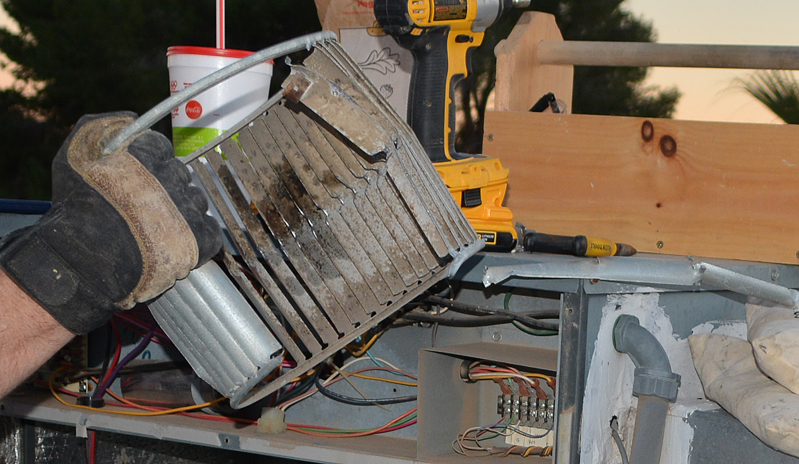
"This damn thing is toast!"
- AZ DIY Guy
I still had a heck of a time getting that hub off the motor shaft, even with the set screw completely removed. Somehow, inexplicably, beating on it with the linesman pliers didn't do the trick. I finally doused the shaft with the magical elixir, and member of the holy trinity of DIY , WD-40. After a brief hit with 220 grit, fine sandpaper I slid the thing off the shaft.

Beating, pulling, prying, bending,...
At this point, I'll take a moment and share a couple of AZ DIY Guy's fans, young and old:
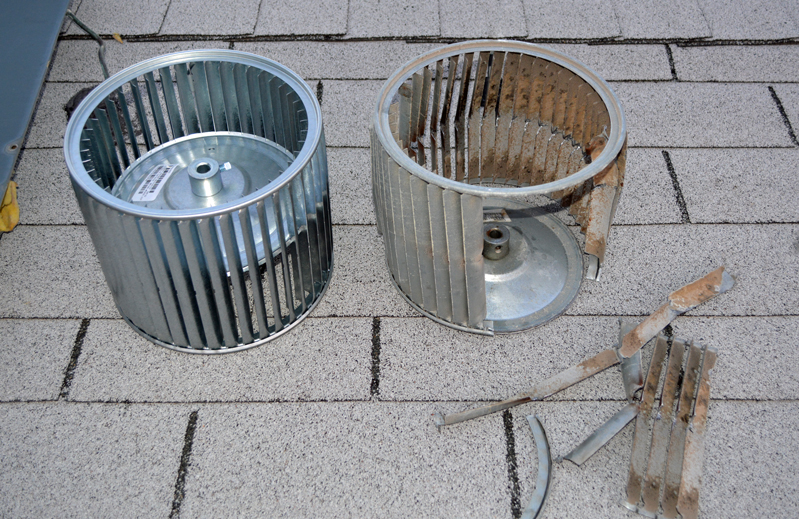
OK, technically, it's a couple "blower wheels", not fans.
I had to completely remove the motor from the housing to install the new fan. It's incredible that I can hold a motor in one hand that's powerful enough to blast air throughout the entire house.
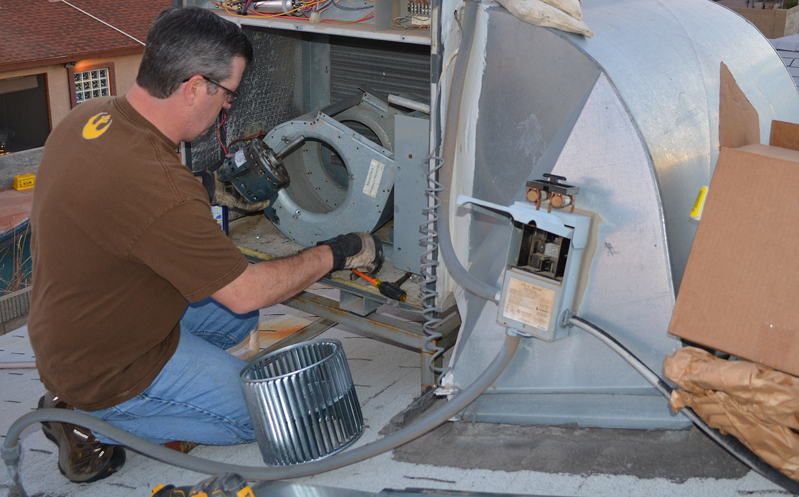
With the new fan slipped on the motor shaft, the motor got reattached. The fan hub's set screw tightened to a flat edge on the motor shaft. I snugged it up tight.

There were sheet metal baffles and brackets to reattach before I screwed the unit back on the duct work. This was one of those tasks where an impact driver simply shines. The time saved by using one with a magnetic driver tip, versus a screwdriver is incalculable. It gets the job done quick, nice and tight, without stripping any screw heads.
Wait, what the heck is that?
I'm not going to insult my eagle-eyed readers and assume my fellow tool-drooling, DIY lovers didn't notice the odd, bulbous protuberance on the hilt of my beloved impact driver. My nine-year-old, Dewalt Impact Driver has run on beefy, 18 volt, NiCad batteries since the day I took it out of the box. Now, DeWalt sent me a 20V MAX* Battery Adapter to try out. It allows me to run the compact, powerful Lithium Ion 20V MAX batteries that powers DeWalt's current line of high-end tools. I'll have a review up soon, but so far, it's awesome. The adapter should be available through retail very soon.
UPDATE: You can buy the 20V MAX* Battery Adapter now, an Amazon best seller. Here's my review!
I was still worried. Was the shaft bent, the motor damaged, unbalanced, whatever? Luckily, after a quick hand spin, the fan spun smoothly. I could feel a good push of air. So far, so good.
I pushed the fuse block back into the disconnect and fired the unit up. It worked. Smooth as silk. Air blasted.

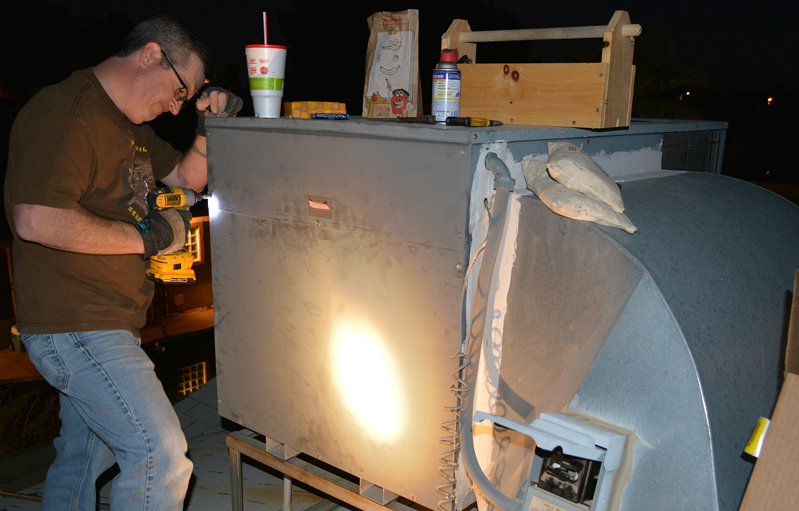
By that point, my reality, not illuminated by camera flash , was pretty dark. I fumbled the screws I could find into place with the LED on the impact driver for a while.

Finally, I couldn't see enough to finish. Stupid in the dark. I gave up and climbed down to fetch a flashlight. Illuminated, I buttoned up the side panels, gathered my tools, parts, and fast food debris, and made several trips across the roof to the top of the ladder.
As the last, feeble glow of the setting sun slipped softly behind the mountains, I managed to avoid falling off the edge in the dark to spend the night in a broken heap in the flowerbed. I didn't trip over any vent stacks or fall through the skylight as I cleaned up. Nighttime on rooftops should be reserved for Peter Pan and fairy-dusted children, not middle-aged DIY guys.
By the time I was done, the air was already chilly; I was more than ready to enter the freshly warming house.

The silly thing is, I had rushed to complete the repair after work, risking rooftop darkness, to avoid any more cold nights for the family. It turned out to be the last cold night anyway. As of this posting, we've had record breaking, warm temperatures for mid February. Today should hit 87 degrees with night in the mid 50's. Paradise. I could have waited for the weekend.
How about it? Would you tackle something like this, or fork over possibly hundreds of dollars?
10 DIY Tips for Troubleshooting and Repairing Appliances
One of the best things about being a rabid (crazy) Do-it-Yourselfer is the confidence slowly gained to tear things apart and repair them (or attempt to). Home appliances are no exception. They can be expensive to replace or have repaired. Why not save some money and DIY it if you can?
I just worked through a repair and have some general tips that can help with whatever busted appliance you may need to tackle.
For the second time, our washing machine needed the fix-it treatment. Of course, a problem appeared right in the middle of the closet renovation project, so it was another weekend lost to on that project.
The first time I'd cracked open this washing machine, the inner drum had leapt off its hanger springs and smashed two of the three stabilizing pistons. It wasn't a physically easy repair due to the massive, heavy drum, but it wasn't all that complex to figure out either. It's been two and a half years and that fix is still holding.
This time, it was a leak, indicated by a peculiar, growing stain on the concrete. By the time we realized it was an honest to goodness leak and not a spill, it had destroyed a framed painting stored beside the stackable units.

Water Damage
I'm not the Maytag Repairman, or anything of the sort, but I do have at least four, serious household appliance repairs under my belt over the years. I've saved thousands of dollars in the process. As a result, I'm not afraid to take a crack at a repair, even if I don't know 100% what I'm doing.
Risk vs. Reward
When considering if I'm going to DIY a repair, I look at risk versus reward. In the case of the washing machine, I figured that a new, front-loading washing machine costs somewhere between $650 to $1,200. Home Advisor states that professional repair costs normally range from $120 to $500. My thought is that, as long as I don't damage or destroy anything worse than it is, I can still fall back and call a real repair service,.. and make an appointment,... and hope they show up,... and don't try to scam us. Of course, I could also just run out and pick up a new machine. After all, that is why we have credit cards, a right?
My usual approach is that I am at least going to try to DIY it first. I'm going to share a few of my tips that have led to several, money-saving success stories.
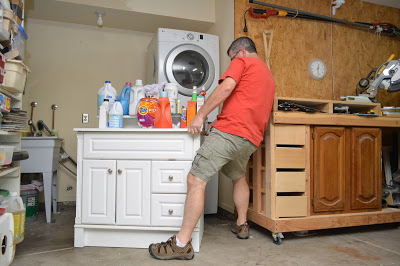
Tip#1: Clear the area.
Seriously, open up the area where you are going to work and give yourself some elbow room. Don't waste any mental energy worrying about bumping into or climbing over stuff. A cluttered work area wastes time, too. It's so easy to lose parts and tools as you mindlessly set them down on or around piles of stuff that are simply in the way.
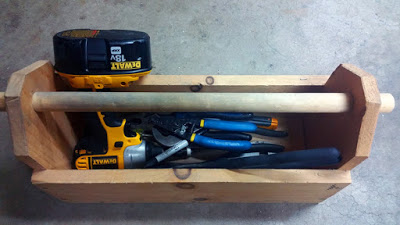
Tip #2: Centralize your Tools
It's bad enough that I cannot do any home improvement project without misplacing at least two tape measures per hour. I think half my time is spent looking for where I set them. It's the same for these repair projects, I set tools down everywhere, even leaving them in the kitchen when I go in to grab a snack.
I've started keeping an empty tool tote under my workbench. When I'm off to another location around the house, I'll load it with what I think I may need and take it all with me in one trip. It saves a ton of back and forth wasted time. Also, I try to get myself in the habit of dropping tools back into the box every single time I set them down, instead of scattering them around me on every horizontal surface I can reach.
Tip #3: Turn off / Disconnect
Unless you are specifically testing a particular system (electricity / water / gas), turn it off and / or disconnect it. None of this stuff is good to mess with in an unknown troubleshooting situation.
Electricity: It's important to unplug an appliance before working on it. Electrical terminations inside are not always shielded from contact. It's usually a big, electrically-conductive metal box you're working on. Trust me, electrical shock isn't cool.
With your hands inside a machine, it's best that the chance the machine turning on be prevented. Surprise moving parts could cause injury.
Water: At the very least, turn off the valve feeding the machine. There's no reason to be faced with a geyser of scalding, hot water. I disconnected the feeds too. I'd have to hook them back up later to ensure I found the leak, but initially, I wanted the area clear without stuff to tangle me up.
Gas: I don't have any gas appliances, but it stands to reason that it's a good idea to turn off the gas to an appliance before you start monkeying around inside. I can imagine a host of disasters that can be caused with live, flammable gas.
Tip #4: Nothing but the 'Net
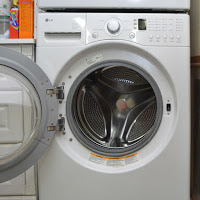
Nowadays, it's just the dimwit, living in a van down by the river, that doesn't do a little online research first. In my search, I found common sources of leaks for our exact brand of LG washer. The most likely culprit was a bellows looking piece of plastic in the drain area. There were even step by step videos and part numbers.
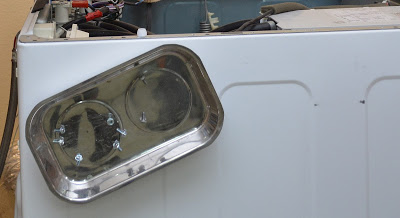
According to the videos, that repair could be done through the rear access panel, which meant I wouldn't have to disconnect and remove the heavy dryer, stacked above. That was one pain-in-the-ass maneuver I really hoped to avoid.
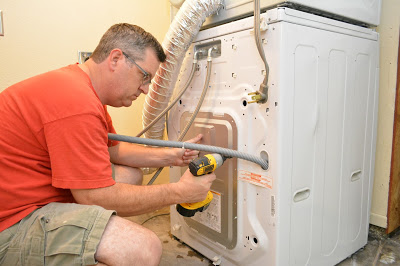
The access hatch to the detention level
Unfortunately, when I started poking around inside, I realized the water was not coming from that commonly failing drain piece in the lower front, but dripping down from above. It was coming from the vicinity of the water connections, but I couldn't see where.

The effects of gravity on water.
That was an awesome discovery. Just awesome, because,.. this...
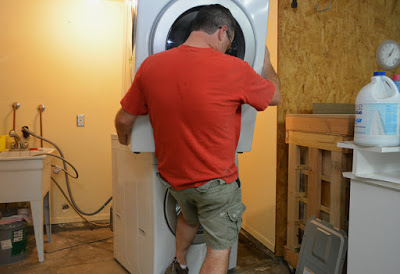
Do it yourself back-pain.
Searching the web, I found the exact way to easily open the exterior case without breaking anything. Most appliances have a specific order of things that have to be done, like one of those wooden puzzle boxes. Trying to figure it out on your own is time consuming and can lead to busted plastic tabs, bent metal, a surprising amount of scraped knuckles, and the spewing of remarkably filthy language.
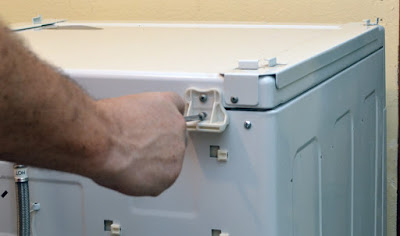
This particular front loading LG opens up by removing some screws from the back, sliding the top backwards a few inches, then swinging it up and off. With the right instructions, I didn't waste time taking too many screws off, just the couple I needed.
Tip #5 - Speaking of Screws... Don't lose them.
There is nothing worse than the losing small parts as you work.
Whenever I'm taking an appliance apart, I always use a magnetic metal bowl / dish thing.
to keep my small metal parts in. It's not a sexy power tool, but trust me it will save you more heartache than you can imagine by avoiding lost screws and metal parts. The one I use has a rubber padded magnet so it doesn't scratch a painted surface. I just slap it on the side of the appliance and toss the screws in it.
Tip #6: Sherlock Holmes time
Take your time and do a thorough inspection looking for clues to the problem. Take your time.
Think.
If there had been a mechanical problem, I'd be looking for rub marks, dents, or something bent or out of place. Remember when this very same washer tried to self destruct? That didn't take much sleuthing with the drum laying on the floor of the case.
Read about that fun repair from 2013 here:
An Emergency Washer Repair Challenge.
If it was a suspected electrical or electronic problem, I'd be looking for heat damage, burned wires, scorch marks, or damaged circuit boards. Years ago, I found what I think was a over-heated sensor, obviously burned-up in a dead dryer. I replaced it and the problem was solved.
This time it was a leak. I was looking for the highest point I could find any evidence of water, because water is always going to flow down right? It could of course be a red herring, if I found moisture too high in the case. It was possible that there was enough pressure from a leak to spray upwards.
A flashlight and and inspection mirror are handy in this step. Even sticking a cell phone camera into out-of-sight areas is a good trick. Snap photos and zoom in on them to see hidden problems.
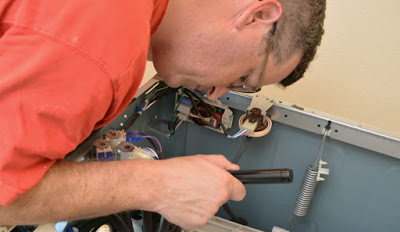
Elementary, my dear Watson.
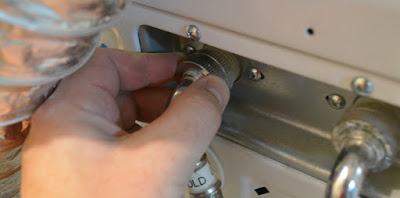
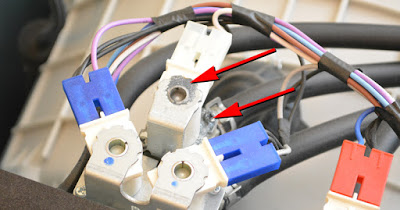
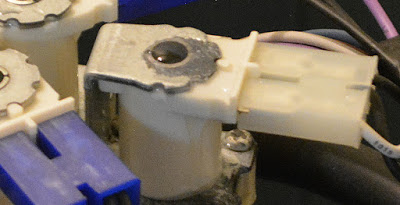
In this case, right up at the top, I noticed some discoloration in the metal on one of the parts. It really didn't look right, compared to the other pieces in the area,
That had to be it. I re-attached the water lines and turned the water on, thinking I'd run a test wash cycle.
As soon as the water was on, the leak appeared. This thing leaked under standard household water pressure,
constantly. I hadn't even plugged the machine in yet and rivulets of water were already streaming down the side of the plastic cylinder.
Tip #7: Decision Making Time - To DIY or Not to DIY?
Up until this point, I'd just opened up the outer shell and poked around. No real parts had been monkeyed with yet.
This is the time for a gut check and decide if it's time to call in the professional. It's a decision you have to make for yourself, based on your level of confidence, tolerance for risk, and understanding of what you've found. If you decide to call in a professional, no shame in that.
At least (in this case) I'd located the problem. I could snap a photo and show it to a repair technician, lessening the time they'd be troubleshooting. Heck, I could even email photos to repair companies and ask for a quotation.
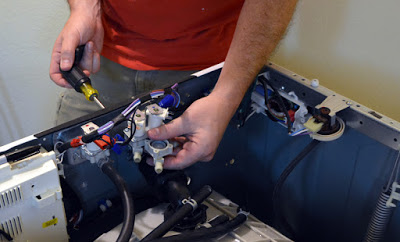
Of course, my loyal readers know my tolerance for this stuff. Be it confidence or stupidity, I reach for the tools and start pulling stuff apart. In this case, it was a couple screws that held the part in place.
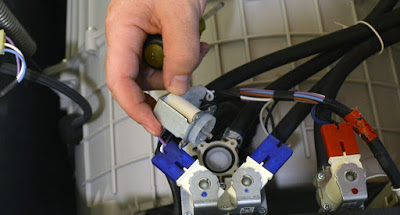
With the part in hand, I had the advantage of my brief career as an electrician to recognize it as a "solenoid."
A solenoid is a simple concept, it's simply an electromagnetic plunger. Basically, some control function sends a flow of electricity to a coil of wire inside the part which magnetically drives a piston in one direction or another. Usually there's a spring holding it down in an unpowered situation. This particular manifold of solenoids had control wiring to each one and a rubber water line leading away. All three were grouped against the cold water source. So this little bugger was supposed to be pushing down on a small water valve keeping water from flowing through until it was needed for whatever part of the wash cycle that needed it.
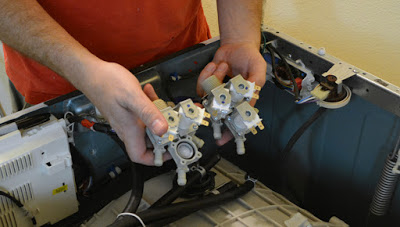
With water leaking out of it constantly, the part was in a condition known amongst the well informed as "broken" or "messed-up." I'd have to replace it. I popped the simple little wiring harness off and headed back inside to find the part online.
It didn't take too long to learn that I could not buy a replacement solenoid after all. I'd have to buy the whole cold water inlet valve assembly. I found them all over the place with various prices and shipping options.
This time I made a couple calls and lucked out and supported my local economy. I guess it doesn't help to give Art's Parts a shout out, since they are closing the location. They were great though, staying open a few minutes late, on a Sunday! with the part waiting for me when I got there.
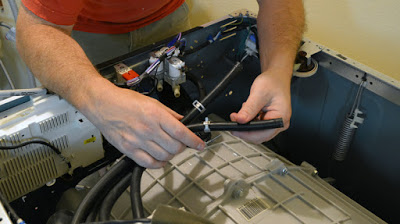
Tip #8: Label, Label, Label!!!
When you are taking stuff apart that can go back together in different locations, it's a good idea to label it so it doesn't get crossed later. I like to number them from left to right.
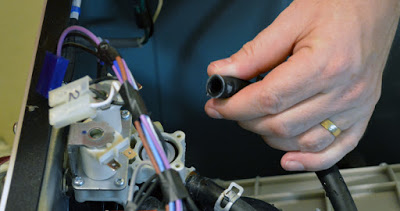
I took a sharpie to the wiring harness clips.

I did the same with the water hoses as I removed them. I could read the black marker on the black tubes,...
while it was fresh. In hindsight I wish I'd wrapped them in masking tape to write numbers on.
Tip #9: Plan for the mess
Water spills, greasy hands, steaming capacitor juice , or just trash, it's good to think ahead for the mess. I try to have a trash bucket nearby, some rags, and, as in this case, a catch cup for removing water lines.
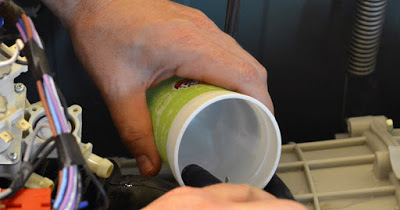
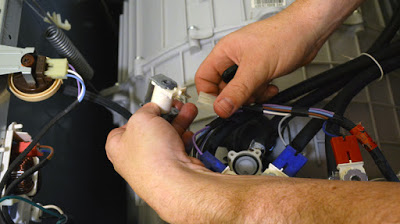
With the wiring and hoses disconnected, the act of removal was a piece of cake that took about one minute. I just had to take out a couple screws holding the assembly in place.
Tip #10: Double check new parts
If you didn't take the old parts with you to the store, or you ordered your parts online, it's always good to make an eyeball comparison of old and new before opening the package. If you open the packaging, you may not be able to return an incorrect part.

Even out of the packaging, I make a good comparison. There's no sense in installing an incorrect part that might cause problems.
Refresher: Remember that Label, Label, Label thing?
The black marker on black hoses disappeared of course. Even though I could see it when I wrote it, it was gone by the time I got to putting everything back together. I really had to make a guess, fitting them back on by length and the existing curves in their shapes. I got lucky.
Tip #11 Test and Check BEFORE Closing Up
I was fairly confident I'd put everything back together the way I'd found it, but there was a possibility that the new part was faulty, that I'd damaged a water line, or screwed something up. I hooked the water lines up and turned the valve.

With full, city water pressure pushing against the repair, I spent a few minutes closely watching and feeling around for leaks. Now would be the time to find a problem, not after screwing everything back together. In this particular configuration, I certainly didn't want to go through the hernia inducing, back-breaking act of stacking the dryer back on top if I wasn't sure the fix was a good one.
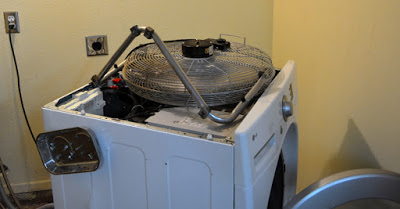
Luckily, it was a good one. Thank goodness, no more leaks. Before I sealed up the case and restacked the two units, I left it overnight with a big floor fan blasting downwards. Both the concrete floor and the washer guts needed a good drying out. This repair was a success.
Tip #12 Know When to Throw in the Towel
Despite my successes, I've had failures too. I've also decided to purchase new, rather than attempting a repair.
I've irreversibly destroyed an expensive Keurig coffeemaker by poking around inside trying to find a blockage. Now, we've switched over to exclusively using distilled water in the replacement Keurig, it simply does not get clogged up.
I've torn into an old refrigerator too, without ever being able to find anything obviously wrong. I don't know anything about refrigeration and I certainly don't have the specialized tools. The unit was old enough to be worth replacing anyway. I posted it on Craigslist for free and got rid of it.
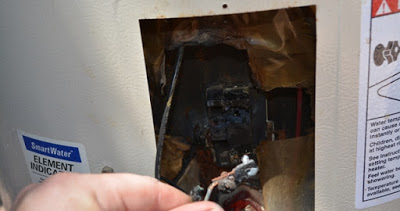
I've cracked open an old water heater to find the damage too extensive and beyond my skills. Even a professional would recommend replacement. After I replaced it, I performed an autopsy and confirmed I'd made the right choice. The thing was toast.
That's it, tips for my approach to repairing appliances. Again, I'm not an expert and I'll certainly call in the pro's when I'm uncomfortable.
In my home-owning life, I've saved thousands of dollars by tackling these repairs myself. I've fixed more than big appliances with this approach. I've repaired garage door openers, video game controllers, a vacuum cleaner. a treadmill, a vehicle audio jack, and other stuff. I have a friend that even repaired a flat screen TV, just by figuring out which circuit board had a burned spot on it and replacing it.
Let me know if you have any luck, next time an appliance threatens an early demise.
Breaking My Own Rules: Irrigation Repair Fail
I broke my own rules. Again. One of the AZ DIY Guy's Pillars of Wisdom is to always buy more material than necessary to complete a task. Otherwise when something goes wrong, (and it always does), it's another trip to the store. It adds up to serious, wasted production time.
In this case, it was the dang drip irrigation system that failed, again.
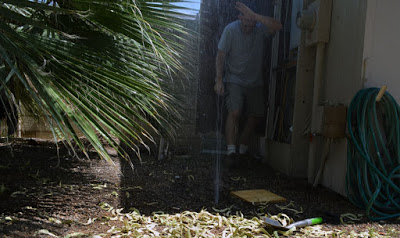
I've replaced most of it over the years, but the older sections continue to break. I ran out to grab breakfast, prior to attacking the window install project, only to return home to find a geyser spewing in the front yard.
Of course. The flowers in the front beds had been looking dried out and crinkly lately. Lantana's usually do great in the Arizona summer, as long as they have water.
The leak must have been there for a while, escaping our attention, since the watering schedule happens when we are driving to work. Walking by the flowerbed multiple times a day, I didn't notice the absence of flowers indicated the plants were screaming in thirst. Their precious water was being diverted into our side-yard geiser.
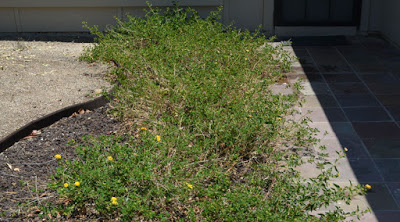
Seriously, dried up and crinkly flowers.
I hauled out a mini spade and started shoveling. I knew the flexible line was buried shallow. I'd tied onto it a couple feet further along when I'd installed the flowerbeds last year.

The patented AZ DIY Guy's Kneeling Square of Plywood in action.
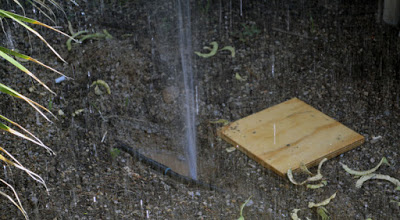
In the mud, I couldn't easily find the hole in the line, so I triggered the irrigation controller in manual mode.
Found it! I wouldn't get too hot for a while after a front yard shower.
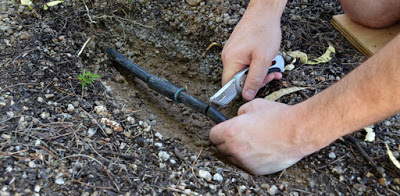
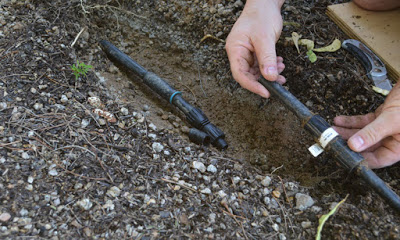
There was the leak alright. It was a small slit, probably where a rock had worked its way down through the soil and eventually rubbed through the tubing.
Do you see the leak? It's in low in the center. Look closely.
No problem. A compression coupling would be longer than that cut. It was just a quick trip to the hardware store away and I'd soon be back to regularly scheduled weekend DIY'ing.
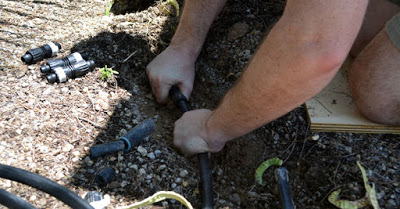
I took the liberty of humming a merry tune to myself when I returned from the store 15 minutes later and started the quickest little fix in all of DIY-dom. I cut the split section out with a razor knife.
I slipped the coupling on and tightened it down on the feed side of the line. A cake walk.
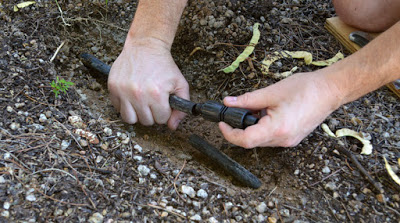
When I slipped it into the downstream side, the tubing split. Dang it! I pulled more of the run out of the ground thinking I could re-dig the trench and shorten it by pulling in a little of the curve.
But it was not to be the case, that brittle section was too long. It included two single-use couplings within inches. I'd need to replace the section, which would require a second coupling.
I searched the garage desperately for just one more coupling... please?... just one?... nope
Alas, it was time for...
Another trip to the hardware store...
Another conversation with a clerk to say I didn't need help finding anything,..
Another time poking around in the irrigation parts bins to find parts that still had the bar code stickers attached to a void a price check at the register.
Another side-tracked visit to the tool department to see if there was anything interesting, that wasn't their 20 minutes earlier...
Another wait in line,...
Another, "yes, found everything I needed,.. yes, I was just here,... yes, I am a club member, no,.. I lost my card,.. here's my phone number,... oh, that's right, the other phone number,...right, no debt button? push credit... here's my ID,... can I have a copy of the receipt?,...no I don't need a bag,..."
Another drive home, burning more gas...
Another big waste of time.
I came home with three-times the couplings I needed. I wasn't going down without a fight. Luckily, I had a fair amount of leftover tubing in the garage from redoing the back yard system. I cut out both single-use couplings and inserted some new tubing.
It was over in seconds. This is a very easy fix that should have taken a few minutes, if I had just followed my own advice and bought more than I needed on that first trip. What's a couple bucks to save a bunch of time? What's my time worth? Plus, there's two trips of fuel to consider.
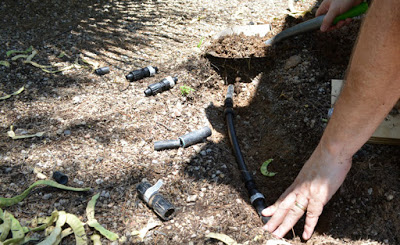
Either way, I now have two couplings in reserve and plenty of tubing. Next time, I can do a repair and be on to the day's normally scheduled programming without a trip to the store.
Less than a week later...

All was right in the world again.
Buy more than I need. Keep a stash for later.
Yep, Next time.
On another note, one of my projects was featured on a podcast this week.
If you aren't already aware of it, check out the
Home Repair Tutor Podcast

. In addition to two websites, great YouTube tutorials, and a huge Facebook group, my blogging buddy, Jeff Patterson, puts out a new, short podcast episode
every weekday
(!!!) I really enjoy his positive energy and great info. He shares tips, techniques, tricks, and deals on tools and materials. He also routinely features cool projects from other DIY bloggers.
This week, I was humbled to learn he featured one of my posts, along with a great project by Woodworking for Mere Mortals Check out the mp3 here, or iTunes here. Give him a good review over on iTunes too!
Thanks Jeff!
Rewiring Reindeer and Decorating in the Desert
How to rewire a burned-out Christmas deer yard decoration with efficient LED lights.
Read More
The Mini Blitz Fail
I have a mini-blitz of weekend projects to knock out. It does not go as planned.
Read MoreWall Repair II - Electric Boogaloo
Installing a cut-in electrical outlet box, protecting the receptacles, and some mudding and taping on the wall repair.
Read MoreFixing a Big Hole in the Wall - Two Times
Repairing a hole in the drywall, with pallet wood(?!!), a diminutive photo-bomber, and the Pink panther.
Read MoreThe Magical World of Electrolysis - Salt Water Swimming Pool Cell Maintenance
I'm cleaning the pool's salt cell, with muriatic acid. It's an interesting project you can DIY, if you are careful.
Read MoreFix It! An Easy Trick to Fix a Flat Utility Tire (Tubeless)
How to re-fill a flat tubeless tire, for wheel barrows, utility carts, lawn mowers, hand trucks, and etc.
Read MoreInstalling the New Shower / Bath Hardware
It was easy to freshen up the bath tub / shower with a nice new valve handle, shower head and faucet.
Read MoreReplacing a Tub / Shower Valve - Scald free after all these years
I replaced the old "flush the toilet and scald the hell out of you" shower valve with a new pressure regulated, scald free version. Plus, I got to try out PEX tubing for the first time.
Read MoreLeak No More - Replacing the Backyard Drip Irrigation System (Finally)
I'm replacing the patched up drip irrigation system. No more repairs!
Read MoreMurphy's Law: The Day of Days - An Adventure with DIY Irrigation Repair (again)
Day of Days. A very simple irrigation system repair project became a horror show.
Read More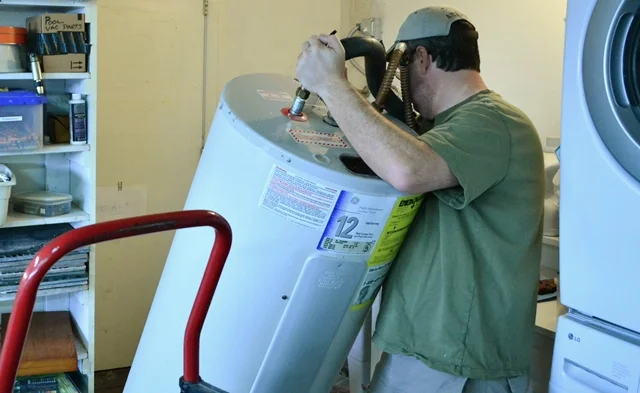
Replacing a Water Heater - New Energy Saving Features
The exciting tale of how I replaced a Water Heater and gained modern energy management features. Bonus - I replaced the supply valve too! Now with 100% more George Costanza.
Read MoreFix It: A "Quick" Repair with Heavy-Duty Double Sided Tape
I'm repairing a magnetic latch with heavy duty double sided tape by ECHOtape. It only took 7 years!
Read MoreFix-It: The Fantastical Powers of J-B Weld - Repairing the Vanity Mirror
I needed to repair a broken hinge on our bathroom vanity mirror. I unleashed the rack hard repair powers of J-B Weld epoxy.
Read MoreCleaning and drying out after a plumbing leak isn't as fun as it sounds
After an in-wall plumbing leak, I start the clean-up / dry-out. I have to cut an access hole and treat for mold and mildew. Fun fun fun!
Read More