

So the washing machine wouldn't drain. It wasn't going to be a simple fix.
If you've been around a while, you know this particular front-loading washer has been a leading source of surprise DIY emergency repairs for me over the last several years. Not counting a few clogged drain filters (easy enough to clear and don't require cracking open the outer case), I've had what I consider major issues.
Before this current crisis, I've had two occasions where I found myself spending my precious weekend disassembling this beast and using online videos to help figure out what the heck is going on.
Previously on AZ DIY Guy...
Episode 1: Crash and Smash
The first time I invaded the machine was when the springs holding the big, round washing drum popped free and the whole thing dropped internally, smashing the hell out of the lower shock absorbers. The machine kept going, bouncing around, pounding and denting the sides of the washer body. I wonder now, if that first breakdown actually weakened other internal parts, causing the future problems.
Here's the story of first time I opened the thing up, 3 years ago: AN EMERGENCY WASHER REPAIR CHALLENGE
EPISODE 2: DRIP, Drip, Drip
The next adventure involved the floor around the machine hosting a growing pool of water, creeping out from the dark innards of the washer.
It turned out to be a corroded and leaking solenoid valve. I had to replace an entire assembly of three valves. Luckily, the fix worked and it's not leaking to this day.
I wrote the post about the steps I use to troubleshoot an appliance repair. I'm not an expert, but I've learned over the years that most repairs can be DIY'd, with research and some good work habits. Here's the post from a year ago: 10 DIY TIPS FOR TROUBLESHOOTING AND REPAIRING APPLIANCES
... and today it's another visit to the guts of this mechanical menace in..
EPISODE 3:Why Won't this #@%$! thing Drain?

This time, there was a boatload of sopping wet clothes inside the unit. It took an eternity to dry them. Running a quick, empty cycle confirmed it wasn't draining. The tub retained all the water.
I pulled the front filter basket out to see if there was something lodged in there. Of course, this particular operation resulted in a torrent of cold water blasting into my jeans and flooding the area. I managed to snag one of those color catcher sheets out of the basket before jamming it back in to block the geyser.
Triumph!!! That was surely the culprit, plugging the drain. Right?
The filter basket drain site.
Wrong.
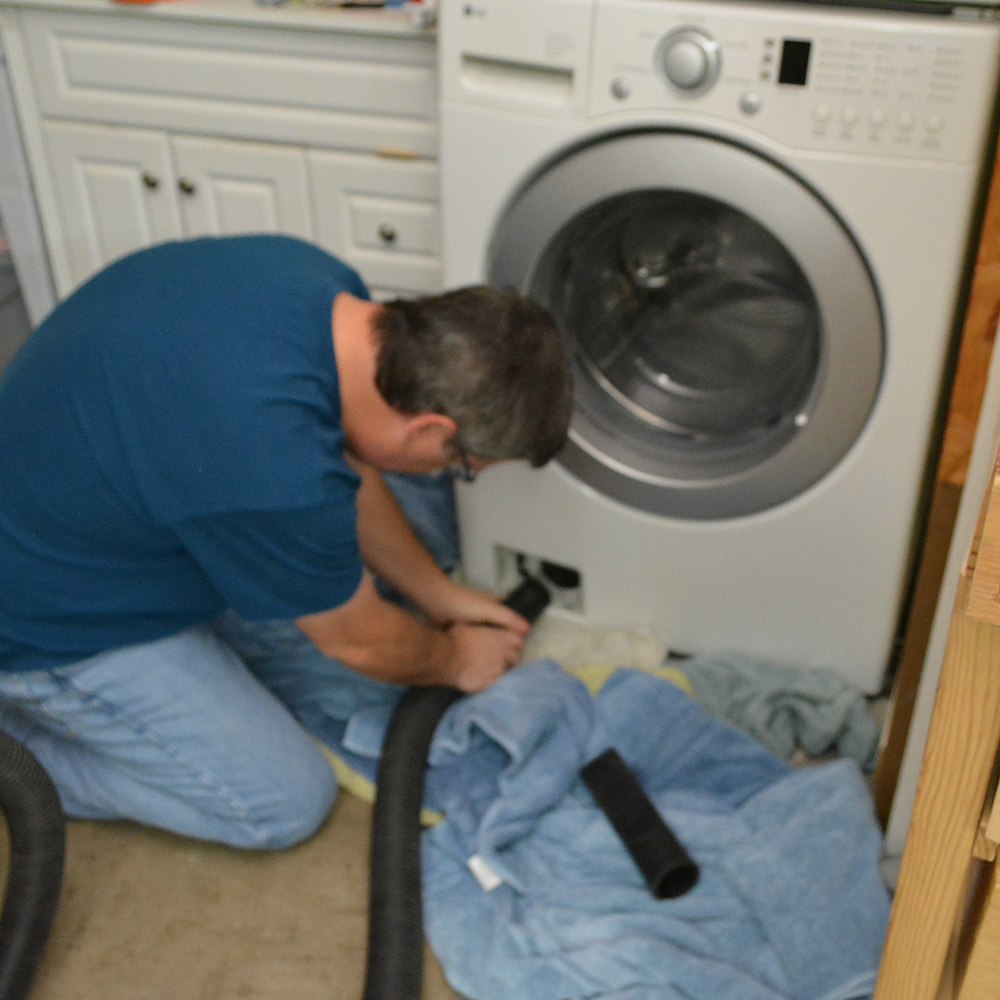
I piled towels around to soak up the mess and ran another test load. Nope. There was even more water trapped inside. I had to figure out just how much to unscrew the filter basket to control the rush of escaping water and the sweet spot to hold my wet / dry vac hose to slurp the stuff up. It's a 14 gallon vac. I figure I sucked about 7 gallons of water out of the machine to empty it. At least it wasn't one of the old-school top loaders which would have used a bunch more water.
Tip: I learned years ago the hard way that one should take the paper filter out of the vacuum and empty it out before sucking up water. Trust me, you do not want to deal with cleaning that mess up. Don't be an idiot.
Once again, I regret the decision to stack the units. I'm not getting any younger; I'm probably one bad maneuver from injuring myself. To get inside the washer, the dryer has to be brought down. Every time. Dang it.

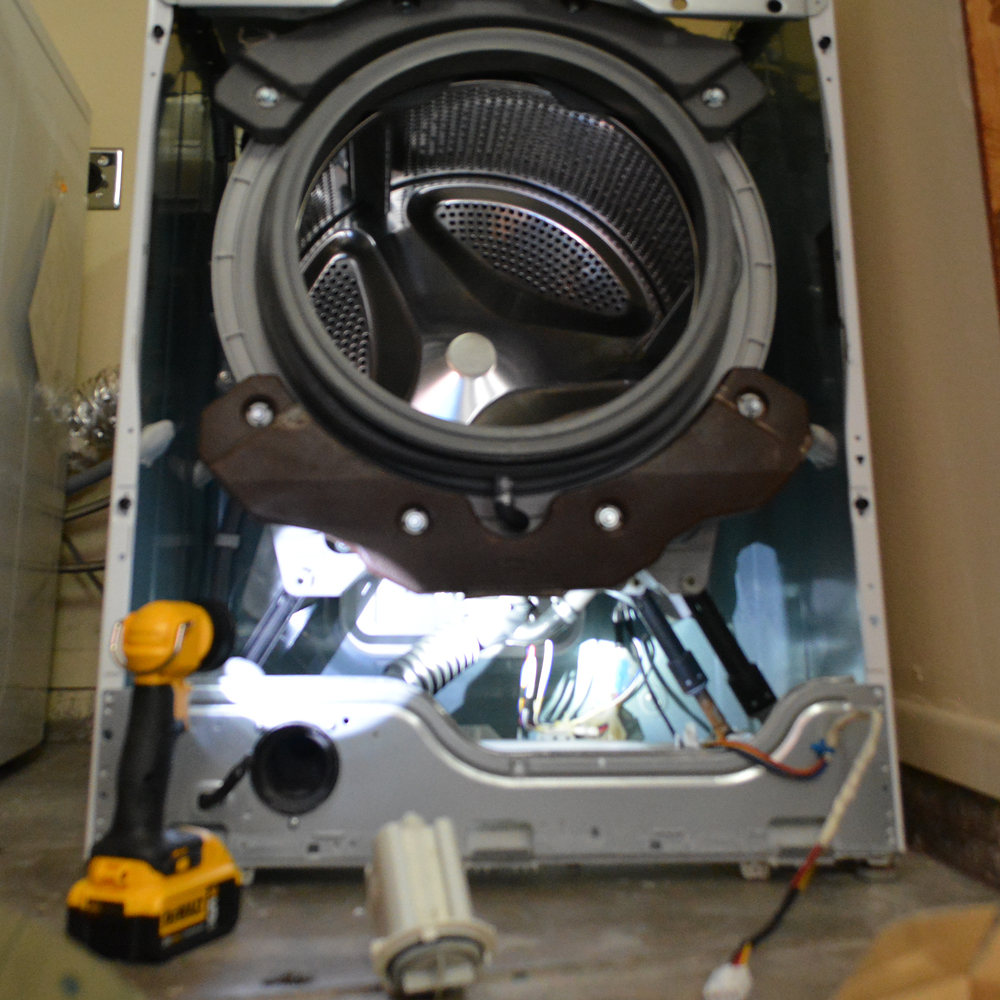
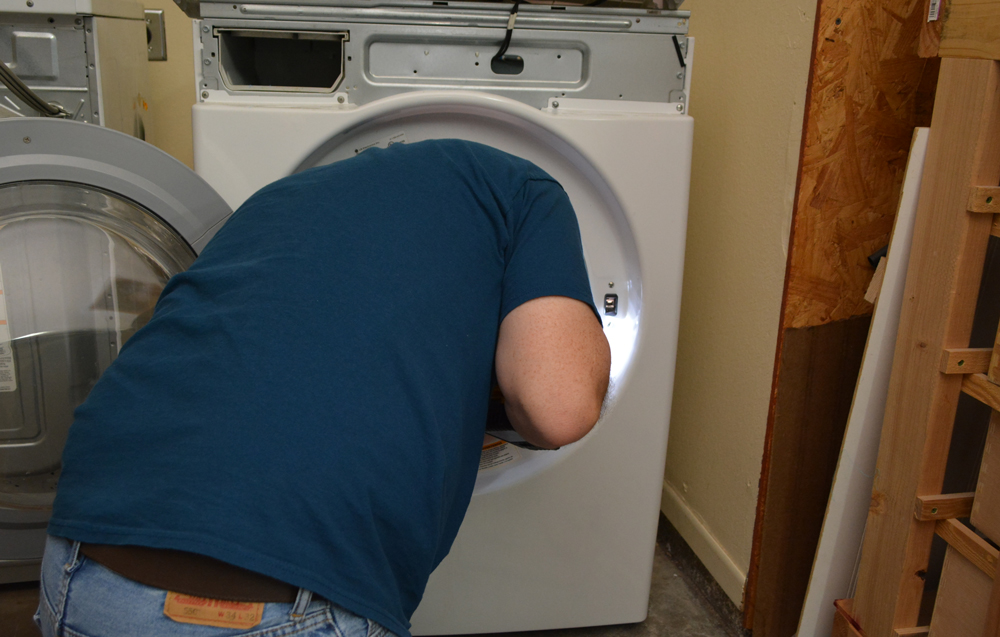
I'm not going to bore you with the step-by-step on how to get into this unit (especially since I screwed up the focus on my camera). There are plenty of videos online. Don't try to figure it out on your own. There's too many hidden fasteners and clips to defeat, like a diabolical puzzle box. It saves a ton of time to have the know-how up front.
From the videos, I was pretty sure it was a blockage in the drain line or in the pump, or even a bad pump altogether. I figured I could probably fix that stuff. If it was electronic circuit board problem, that would be pretty tricky to figure out.
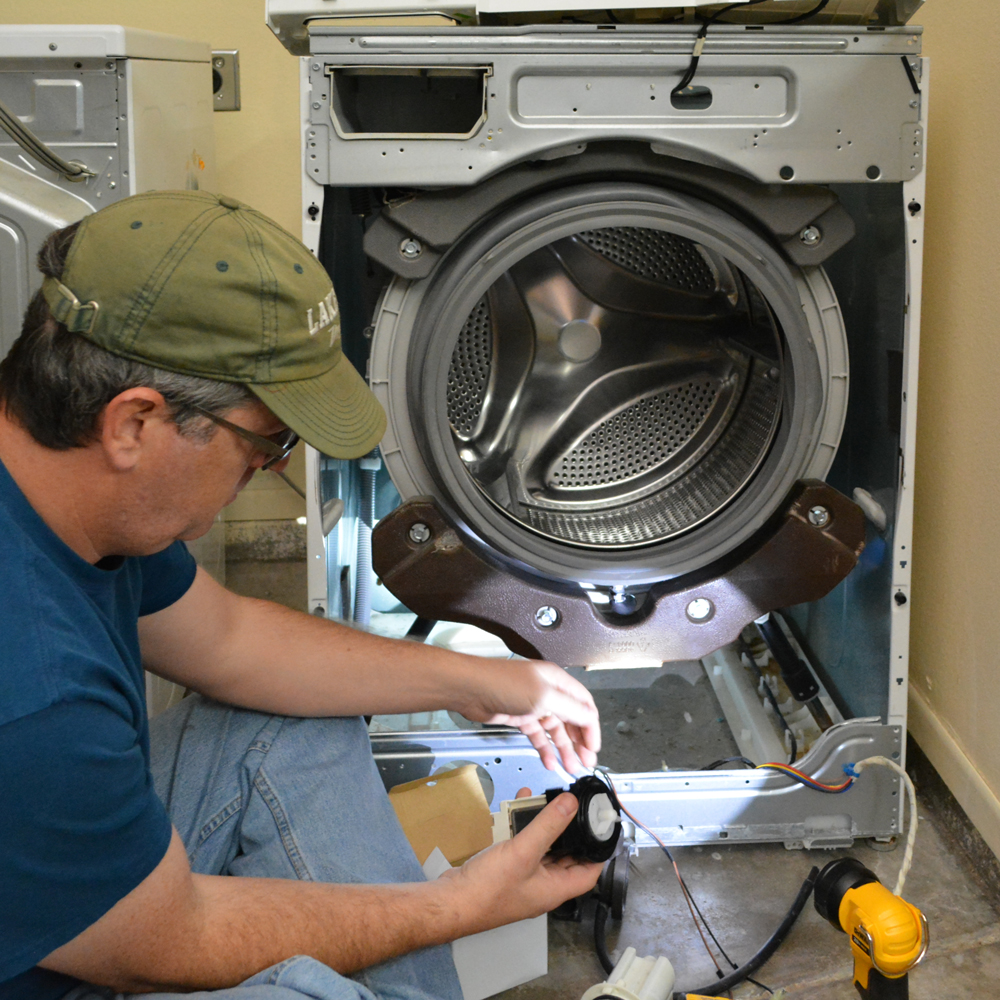
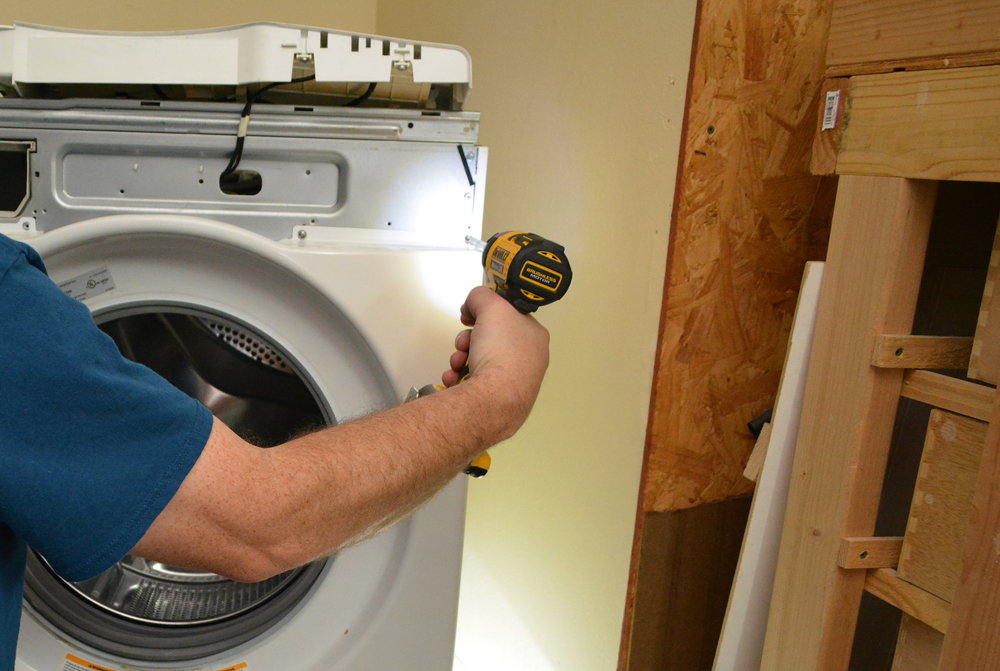
To get to the area were the drain and pump sat in the front left, I had to pull off the top of the unit, the control panel and the entire front cover with the door assembly. I did this with the unit unplugged and the water valeves shut off.

I blew through the drain line and could tell it didn't have any obstruction, so I pulled the pump assembly.

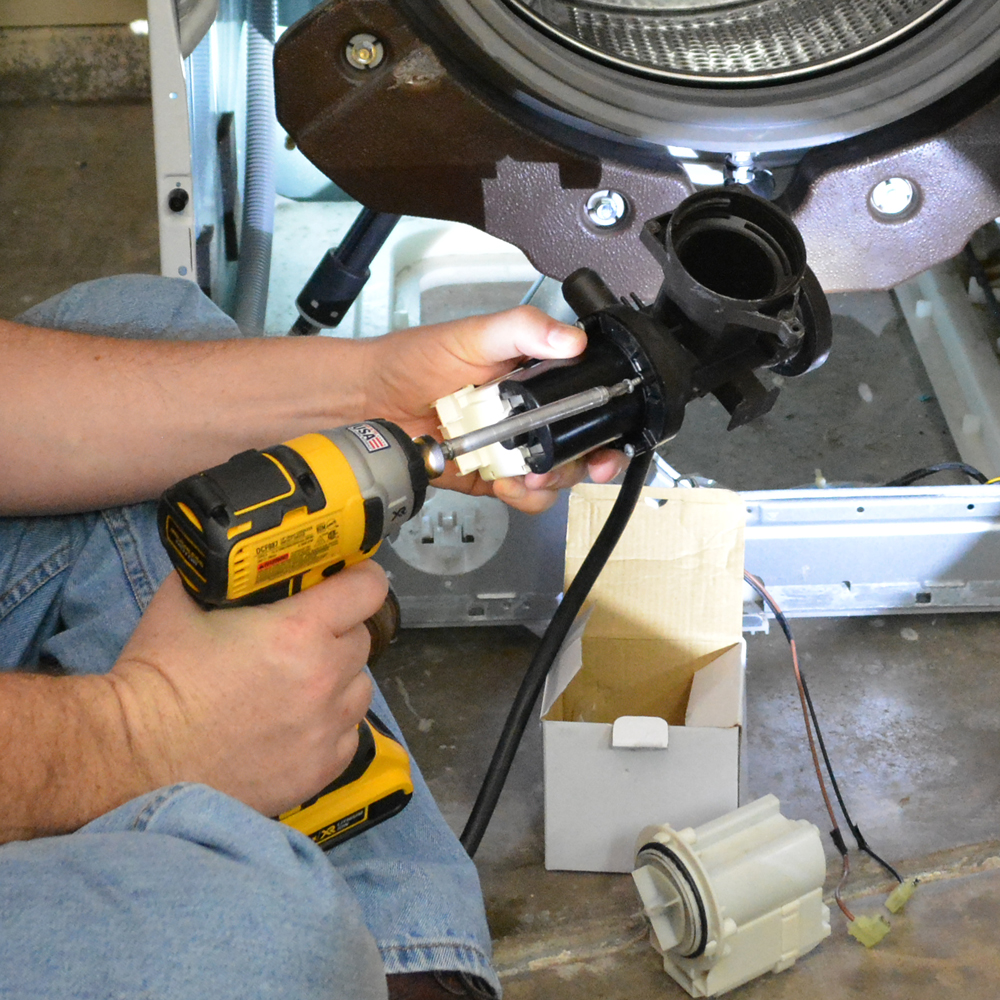
Tool Update: This is the first time you're seeing my new impact driver in action since I upgraded from my aging 18 volt Ni Cad to the brushless 20 volt Li Ion. It's too early to do a full review, but so far, it's damn sweet. This one has a 3 speed gearbox; low gear is perfect for this stuff and the LEDs really help in the low light. It's super powerful, long lasting, and is smaller and lighter than its predecessor in my tool cabinet. I look forward to putting it and its buddies into action in the coming months.
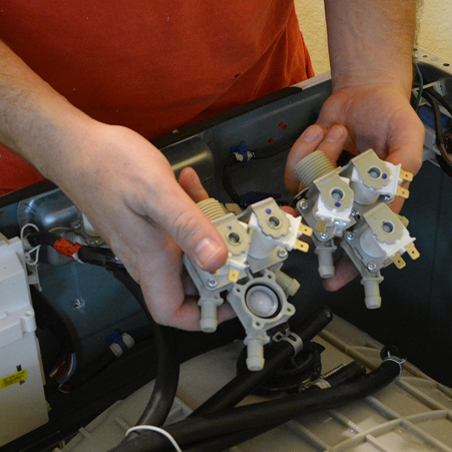
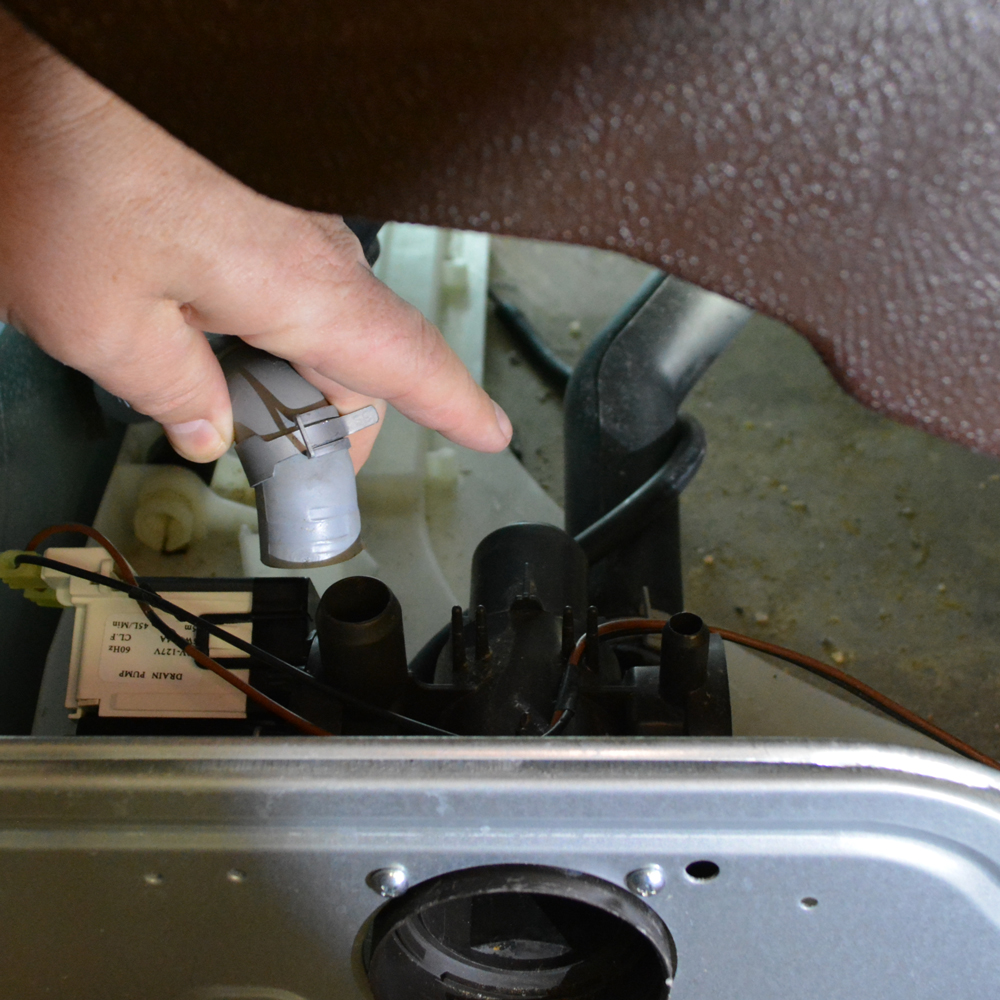
The pump was connected to a manifold that enclosed the filter basket and provided connections to the drain lines. I didn't see anything foreign wedged in there to block it. I was was getting a little worried I wouldn't be able to find the problem. Would it be a call to the repair service or a trip to the appliance store for a new washer?


It's the doohickey.
Posted by AZ DIY Guy's Projects on Saturday, December 17, 2016
The motor looked good, pristine in fact. I gave the paddle-wheel looking propeller blade thing a spin. Ohhhhhhh... It didn't have that springy, bouncy magnet feel I expected. It was rough, grindy feeling, difficult to turn in both directions. It was clearly toast. I'd have to replace it. I could surely find it online for a good price, but I couldn't wait for delivery. The family's laundry was barely started for the week. I needed clean socks!
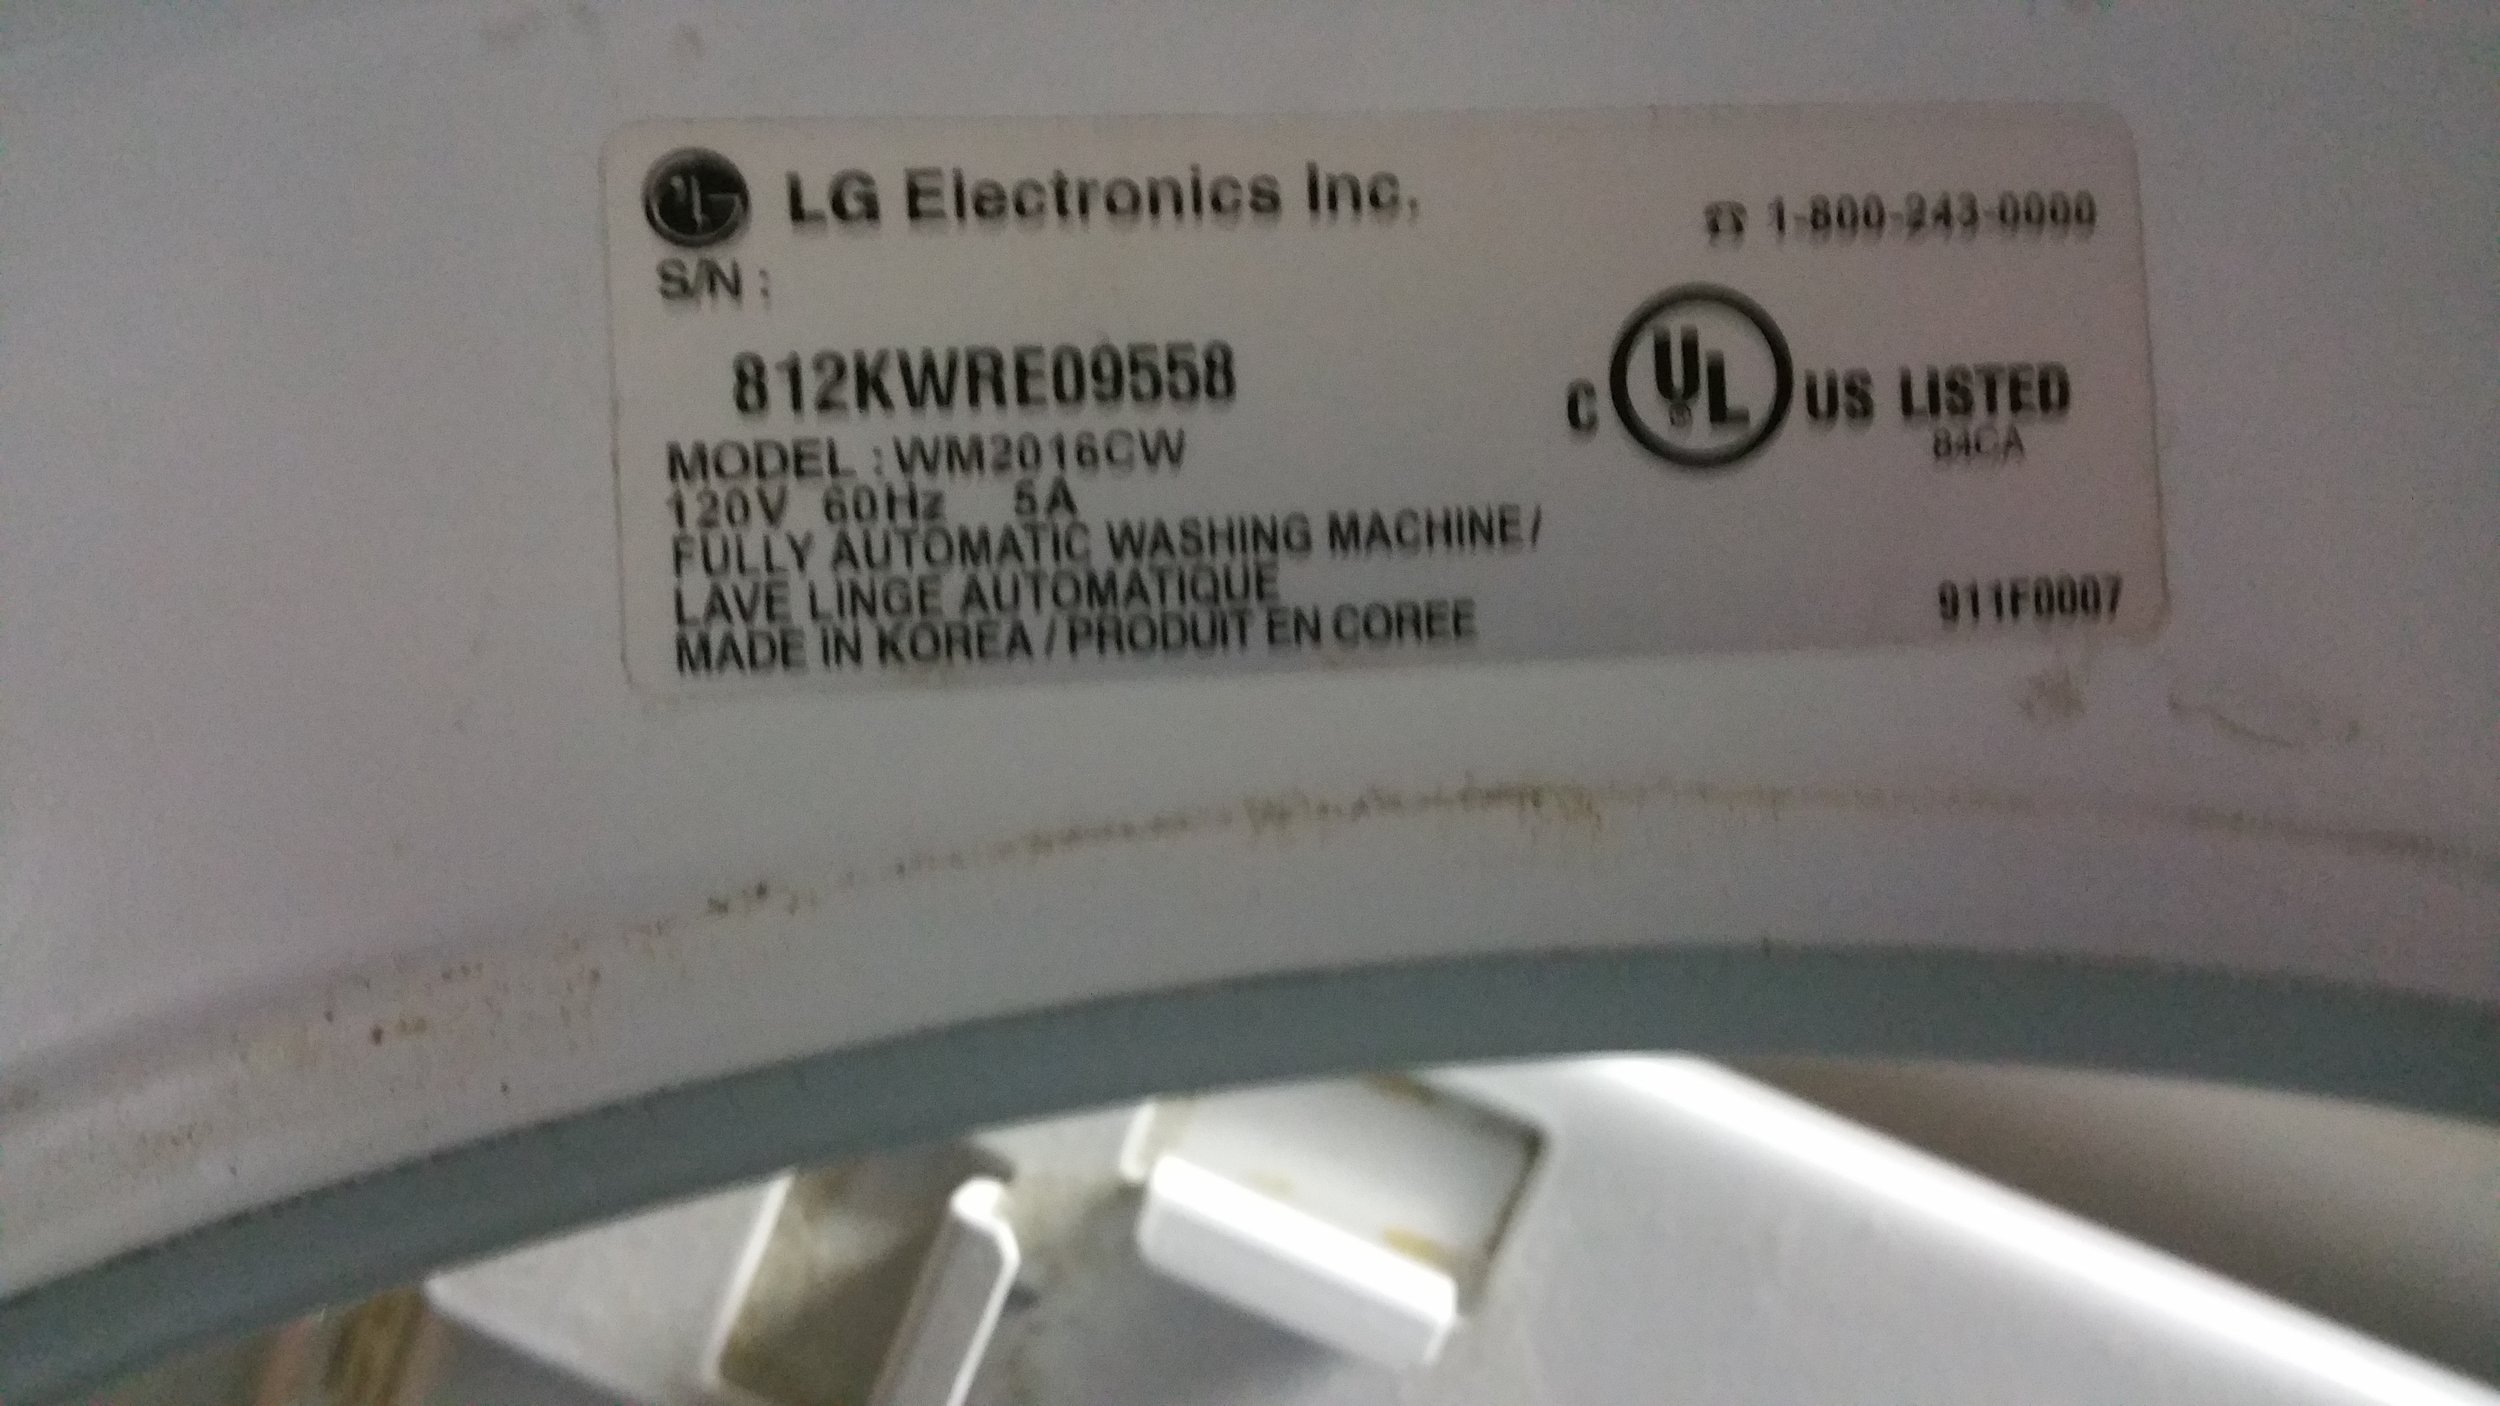
I snapped a cell phone pic of the tag with the model number and drove to North Phoenix to the only appliance parts store that I could find that stocked LG washer parts. The new motor looked different but the dude told me it was the replacement for our old version which is no longer made. It set me back 80 bucks. Merry Christmas indeed.

Back home in the laundry room / garage / AZ DIY Guy workshop, I screwed the new motor onto the manifold and reattached the drain hoses. Although the motor looked different, it attached perfectly. I eased the screws in on the low speed setting so I wouldn't overdrive and strip them out. Who knows if I could pick up a new manifold locally if I managed to destroy this one.
Everything is back in place. Nice and tight.
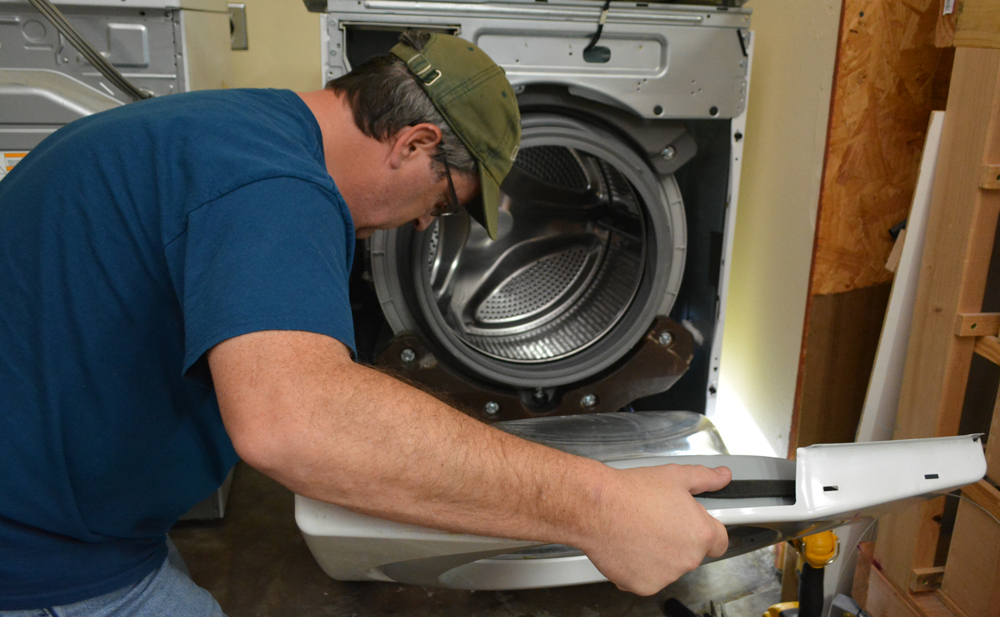
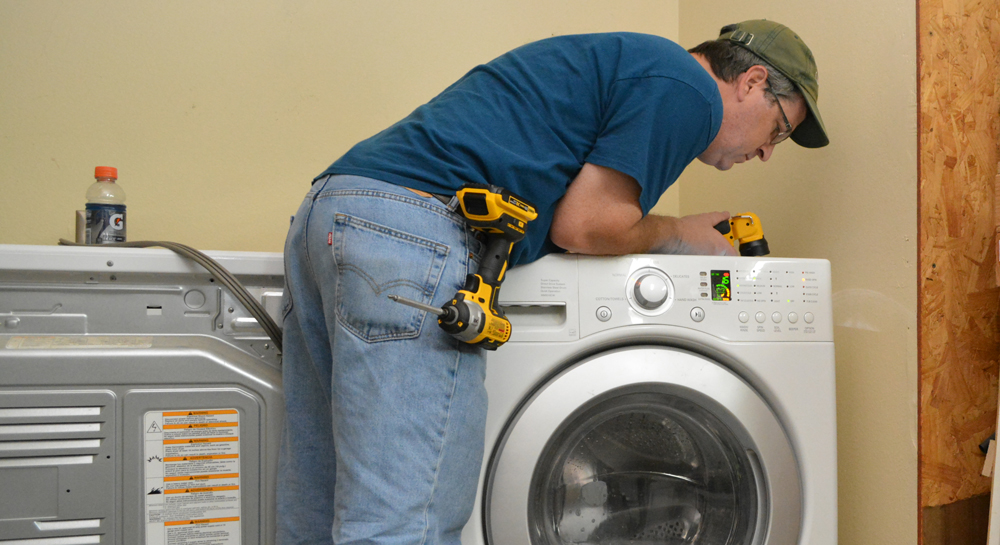
It stinks that I had to reassemble the whole thing just tor try it out. There's no way it can hold water or function electrically unless everything except the top panel is completely put back together. It was a simple job of re-screwing the fasteners and connecting a few wiring clips.
At least it was simple until I got to attaching the round, rubber boot thing. That's a royal pain. It's not the boot itself, it's the retaining clamp. The clamp is a round wire thing with a spring to connect the ends. Keeping it in place while stretching the spring from end hook to end hook, without damaging the boot, is a super challenge. After six attempts, I managed to pull it together with a couple pairs of pliers.


I fired up the third test load of the day, treating myself to another mini-gusher when I left the filter basket plug out of the reassembly. I slammed it back in place and watched an 18 minute cycle run through it's paces.
I'd removed and reattached the motor, two drain lines, four electrical / control connectors, the rubber front boot, the control panel and the entire case. There were plenty of places for a leak.
I kept the top cover off throughout the whole cycle, poking around with my flashlight, looking for any sign of leaks.
It was fine. Everything was fine! The whole cycle ran without any issues. I was able to screw the thing together, restack the units (Uggggh!), and clean up the mess. Using my brains this time, I called our 16 year old son out to help me restack the unit.
I'm thinking about unstacking these beasts in the future. We're not loving lifting wet clothes from below and jamming them in the dryer above I'm sure I can build a decent countertop over them and maybe add some sort of shelving.
I think we've had these units for about 5 years and started having issues about 2 years in. The dryer's been perfect; Obviously, I'm less pleased with the washer. I'm really glad I've been able to DIY the repairs myself so far, but damn; It's never a good time when it does. When's major issue number 4 going to pop up?