

One of our bedrooms needs an extra Air Conditioning boost in the summer. We’re adding a window AC unit up high, through the wall.
Read MoreHow to Control any Electrical Outlet with a Switch
We wanted to be able to turn on a light in the dining room when we enter from different directions at night. Here’s how I added a switch to control a table lamp.
Read MoreInstalling LED Kitchen Lighting Fixtures
Kitchen Remodel: Episode 35 I’m replacing the old,.. boob light, with some modern LED can light / down light fixtures. This kitchen is getting lit up!
Read More
Finishing the Kitchen Walls
Kitchen Remodel: Episode 26 Mega Post I’m finishing the north wall of the kitchen! We’re cutting a big opening, drywalling, trimming electrical, taping and texturing. It’s getting ready for cabinets!
Read More
The new door location
Moving the Electrical Pipe blocking our New Door
Kitchen Remodel: Episode 23 There's an ugly conduit blocking the new door space at shin level. I have to reroute the electrical up through the attic and back down again.
Read MoreKitchen Remodel - Progress In the Corner
Finally, progress is visible with the kitchen remodel. This time I'm making headway with the prep work on the first corner. I'm doing a little more demolition, solving the electrical, and installing drywall. It's getting fun!
Read MoreWiring A New Stove - Part 2: End to End
I'm installing a big, exterior conduit to the electrical panel get power to the new stove through the attic.
Read MoreThe Mystery of the Wires to Nowhere
Mysterious wires were sticking out of the attic into the kitchen. Where the heck do they go and what controls them? I'm cutting into the wall to solve this mystery.
Read More
Wiring A New Stove- Part 1: Up and over
We're moving the stove location and I'm installing to install a complete, new circuit, up the wall and through the attic. I've got this.
Read MoreBathroom Light Upgrade with Classic Look LED Bulbs
Replacing a bathroom light fixture is an easy fixup. I found some cool LED light bulbs that look like classic glass bulbs.
Read MoreFlat Panel LED Light Fixture Install - with a Challenge (of course)
Replacing an old Granny fixture with an energy-saving LED flat panel fixture should have been super easy. The challenges left by former DIY'ers required a bit more work Here's how I did it.
Read More
How to Make Easy Electrical Repairs with a Torch
Last fall, while doing routine maintenance, I managed to damage some of the wiring for our pool equipment. It was a small control / sensor cable to the saltwater chlorination cell. I slapped a band-aid fix on it to get it working, and, of course, promptly forgot about it for the next few months.
Now that daily temperatures are spiking up above 100° F in Phoenix, the pool is getting heavy, summertime use. When I fired up the squirting water jets to delight our youngest, I noticed I'd never gotten back to doing a proper repair on the wiring.
I'd simply twisted on a couple wire nuts and wrapped the thing in electrical tape. My haphazard fix was still hanging there, suspended like a cocoon. Electrical tape isn't a long term fix, especially when its exposed to the elements.
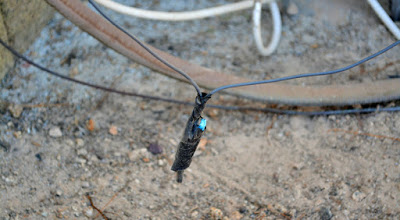
Soon will come a beautiful butterfly!
Since this is a tiny, exposed cable, it didn't make sense to install some sort of slice box. I couldn't even replace it because it is attached directly to the sensor in a water pipe. I decided I'd solder the wires together and protect them with some heat shrink tubing.
I gathered my tools and went out early; I could work in the shadow of our block fence and not get sun baked. I unplugged the little control wire from the salt chlorination control box, the one end I could disconnect easily.

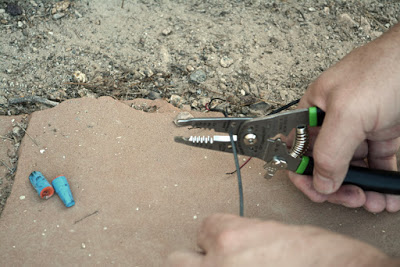
I cut the power to the system to keep it from running and removed the now crispy electrical tape and wire nuts. I cut and stripped the cable back to expose the two wires within, being careful not to nick any protective insulation.
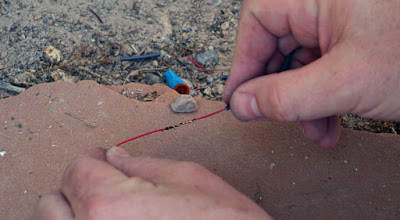
My splice would be protected by heat shrink. These little straw shaped tubes come in various sizes and can be found in the electrical section of the hardware store or home center.

I slid a couple up the cable for later. Once I joined the wires, it would be impossible to get the heat shrink on.
Full mighty moron disclosure: Looking forward to the next steps, I actually twisted the wires together and forgot the heat shrink. Luckily, I remembered, just in time, and spared the neighborhood a torrent of choice language that would have inevitably spewed from my spot behind the block wall.

Installing Heat Shrink Tubing
After stripping back the insulation to the bare, copper conductors, I twisted them together, like an "X," winding them tightly.

Do the twist!
Together, the two pieces without insulation were roughly the same diameter as a strand, with the insulation still intact.
Give it a little tug to be sure it's tight
They make a special solder for electrical / electronic use.

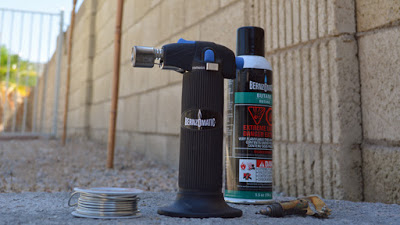
Bernzomatic Electrical Solder
I'd used a similar micro-torch to do the pencil flame detail work on my Burned Pallet Wood Pirate Flag project. This time, I chose the Bernzomatic Trigger Start 3-in-1 Micro Torch.. It also features an open pencil flame if desired, but for electrical repair, I installed an included fine soldering tip.

The Bernzomatic ST2200T-Trigger Start 3-IN-1 Micro Torch
This little powerhouse runs on butane, like a cigarette lighter. Unlike an electric soldering iron, I was able to go cordless and work out in the backyard.
I found the trick that works for me was to heat the wire for a bit and then touch the solder to it, right up against the tip of the iron. It melts and flows into and around the strands of the wire. If I got a little too globby with the solder, I could shave excess off by reheating it with the tip of the iron.

I'd offset the splices to keep the diameter down and reduce a chance of the conductive metal from touching together. I wrapped both of the soldered joints tightly with electrical tape to hold them in place and offer a bit of insulation.
When the torch cooled down, I unscrewed the tip to convert it to hot air blower mode.

After removing the point, it becomes pointless.
I topped up the reservoir with a fresh dose of butane.

I slid the heat shrink over the repaired section and pushed the trigger button. Inside, the flame blew HOT but didn't shoot out the end, torch style. There's a screen in the tip that diffuses the flame into a blast of heat.

Full of Hot Air
I slowly fanned the torch along the length of the heat shrink. This ¼" tube started about the size of a fast food straw. It slowly shrunk, tightly around the cable, nice and snug. I overlapped two of the pieces to fit the entire length of my repair. You can buy the stuff in a roll and cut it to size. In hindsight, I should have taken that route, but this overlap should hold up fine.
"There was significant shrinkage"
- George Costanza
Nice and snug. The heat shrink fit perfectly around the cable. It would be much better suited to resist errant splashes from the pool and weather than my half-baked, wire nut cocoon.
I wrapped the cable up to keep it off the ground, plugged it back in, and fired up the system. The final, most important step involved parking my posterior on a deck chair under the umbrella with a frosty beverage. I had to put my feet up and watch my work for a while. Don't forget this step.
"Cannon ball!"
- Gracie

This is a sponsored post. I am a proud to be a Bernzomatic Torch Bearer, though all opinions expressed are 100% my own. I won't recommend products I don't believe in.
The Torch Bearers are a group of tradespeople, DIYers, culinarians, adventurers and artists brought together to create projects using Bernzomatic torches and share their knowledge and ideas with you. Check them out here and get inspired to create with fire.
Visit the other awesome Torchbearers and see what they are up to on the Bernzomatic Torch Bearer Site.

Steampunk Table Lamp
I love the techno-industrial, sci-fi look of Steampunk design. Check out this DIY construction I created with copper tubing and a Bernzomatic TS-4000 trigger start torch.
Read MoreMichigan Trip DIY Blitz
Part of my recent trip to Michigan to spend time with my parents resulted in a mini-blitz of small projects around their home. I absolutely loved the opportunity to help my folks and work on the house I grew up in. This isn't much of a step-by-step, how-to post, since I didn't shoot nearly enough pictures, but you might pick up some nuggets along the way.
As an old cottage, the home is a Frankenstein blend of decades and decades of expansions, renovations, and repairs done well before my parents bought the place in the mid 1970's. Like my own home, it's still full of surprises.
It was a challenge to use someone else's tools. I enjoyed the game of figuring out what to use from my Dad's collection, and where he stored it. He had everything I needed and if I asked, he' d send me to the right location, but I really enjoyed poking around in his workshop and using different tools than I am accustomed to. It was fun.

This particular species surfaced just after the extinction of the dinosaurs. (Craftsman-icus Seven-point two volt-us)
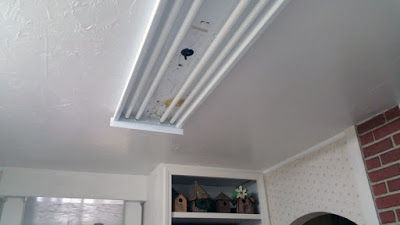
I started the blitz with a florescent, four-tube light in the kitchen. My brother had already been by and replaced the lamps, but it still wasn't working. It turned out ballast needed to be replaced.
The wiring conditions were scary.Through the small metal mounting strip for a globe style fixture poked the hot and neutral wires, with no insulation.
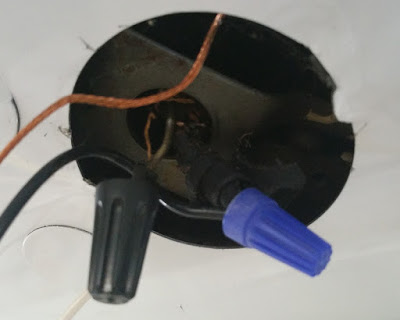
The original wiring was so old that the insulation had simply disintegrated, leaving those two wires within a quarter inch of each other. In electrical terms, I call that "not good."

"Not good"
After my Dad and I grabbed a new ballast and a few supplies he didn't have in stock at the home center, I pulled the whole fixture down to clean up the wiring. I trimmed it back a little and wrapped the remaining insulation with electrical tape to prevent further decline before adding brand-new wire to extend it safely into the fixture.
Oh yeah, remember friends, before you play with electricity, be sure to visit...

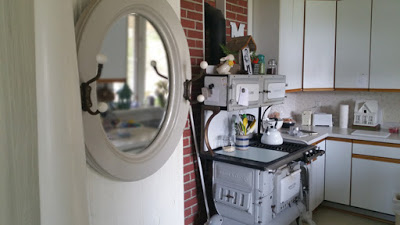
Rather than unnecessarily work overhead, I replaced the ballast while the fixture was still on the ground. Yes, my folks do cook on that stove. I'd learned to fry potatoes and make omelettes on that ancient, gas powered beast as a teen.

The old Detroit Jewel
I zapped the fixture back up onto the ceiling with fresh toggle bolts and wired it in again.
Next, I replaced the broken hanger wire on a mirror / coat rack that my little nephew had pulled down. He'd yanked on an apron a couple nights earlier and narrowly missed being cracked on the head. Luckily the mirror didn't break.
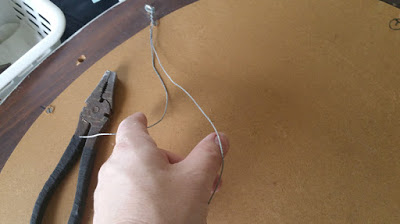
That was a super easy fix. Hung and done.
The light switches in the basement stairwell were next. My mom wanted them replaced with fresh white switches.

Unfortunately, the local handyman had cut the opening too big to mount the switches properly. The ears wouldn't reach the edge of the drywall for support.
I used these neat little outlet spacers. They slip behind the mounting yoke of a plug or switch so they can be supported properly against the box.

You just cut off what you need and fold them, accordion style, snapping them together like Legos. They slip right around the 6/32 mounting screw.

Decent wiring here at least.
With the switches in and working, I moved down the stairwell to replace a dark brown receptacle, halfway down. It was old school, with no grounding prong. If there was no grounding wire in the box, I'd have to install a GFCI to be legal. You cannot simply install a standard three prong outlet where there's nothing to attache that third prong to.
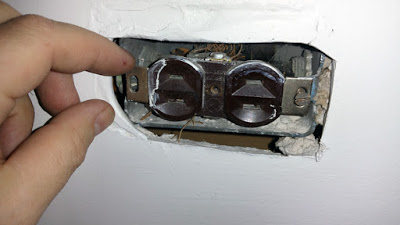
It was the same messed up wiring I'd found in the kitchen. It was a mess. The conductors were entering from opposite sides of the box and they were seriously worn out. There was no grounding wire either. I think it's old knob and tube wiring.
Rather than replacing the receptacle I removed it. I cleaned up the wiring, taped it up good with fresh wire nuts and sealed the box with a single-gang blank cover. With an outlet at the top and the bottom of the stairs, there's no point in having on halfway, plus an extension cord from there is just a trip hazard.
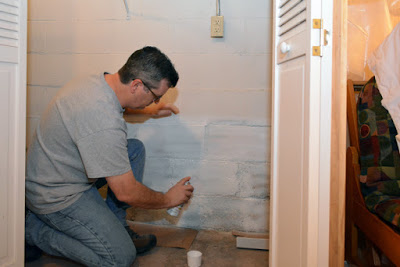
Continuing down to the basement, I worked on a wall where the paint keeps peeling off. Apparently there had been some sort of water softener discharge issue years ago that had leeched salty water against the outside wall and eventually caused the paint to peel. Subsequent paintings were unsuccessful.
I took a wire brush to it and cleaned off everything I could, tasting saltiness in the dust, There was a slight sparkle in the block and grout, probably salt, not a good sign for success.
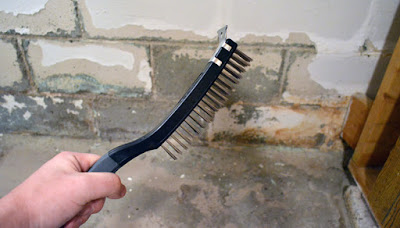
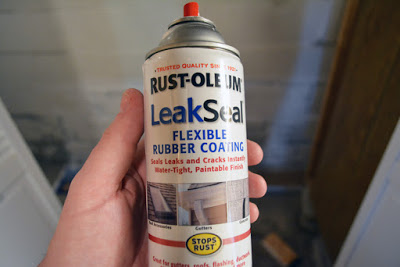
The wall had been sealed / primed at some point. It didn't stick though. Rather than repeat the same thing, we decided to experiment with a flexible rubber coating. I've seen similar stuff on TV turn a screen door into a watertight boat, surely it would stick to this salty wall,.. right?
I put the stuff on initially in a thin coat and let it dry. After that, I blasted it on fairly thick. It ran a little bit, but nothing too noticeable for a basement wall,
Arrr,... take that ye' salty wall.
- AZ Pirate Guy
The fumes were staggering in that enclosed space, so I had to open up some windows and set up a box fan to exhaust that foulness outside. I closed the upstairs doors to keep the nastiness away from my Dad's lungs.
It looked great!
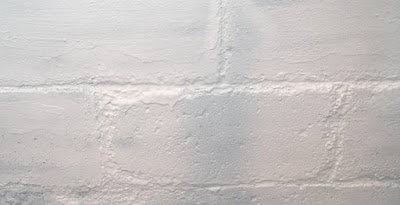
The next morning, it was already peeling slightly. This one is a fail.
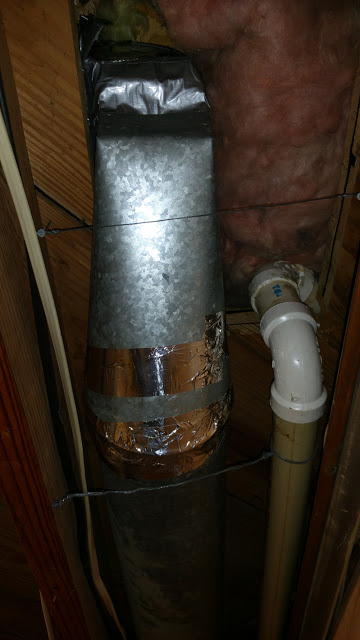
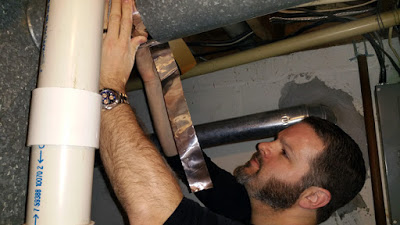
The last big project was a falling run of duct work, in the basement ceiling. I think the run had been stretched out a bit, back when they'd had the kitchen remodeled about 20 years ago. It finally started to drop in recent years.
My brother Jim and I pushed it back together and wired it up again. We wrapped the loose joints with foil faced tape and ran a few new screws into place.
On one end it was actually hanging from a wire twisted around a drain pipe. We lifted it up with a fresh new piece of hanger wire, screwed into the framing.
The ole drain-pipe hanging trick eh?
It was fun working alongside Jim and his legendary sideburns again.
There were plenty of other little things that got tackled before the trip was over. A tripped breaker that knocked out a kitchen receptacle got reset, the water softener was reloaded with salt, and the snow blower was put away, just a handful of little things 3,000 miles of continental United States normally prevents me from helping my parents with.
Jim and I ran into town to pick up some supplies for one last project...

Tube-steak heaven.
That's right, honest to God, authentic, Detroit-style coney dogs.
Chili.
Mustard.
Onions.
Period.
That's how it's done.
Rewiring Reindeer and Decorating in the Desert
How to rewire a burned-out Christmas deer yard decoration with efficient LED lights.
Read MoreInstalling an "In-Use" Outdoor Electrical Cover
Installing an Outdoor, Electrical In-Use Receptacle Cover is easy. Put one on before you put up your holiday decorations!
Read MoreThe 10+ DIY Ways We Cut Our Electric Bill
We've done a lot of projects, big and small that have actually lowered our electric bill. We're saving money every month!
Read MoreWall Repair II - Electric Boogaloo
Installing a cut-in electrical outlet box, protecting the receptacles, and some mudding and taping on the wall repair.
Read MoreInstalling a Humidity-Controlled Switch for a Bathroom Fan
Installing an automated Leviton Humidity Sensor / Fan Control in the bathroom to control the exhaust fan.
Read MoreThe Water Heater Forensic Autopsy - Not for the Squeamish!
What killed the old water heater? More importantly, what do they look like inside? Could I have DIY fixed it?
Read More