


I absolutely love easy, home-automating gadgets. I'm drawn to devices that offer convenience, energy-savings, affordability, and a simple cool factor. So when I saw a switch to control a bathroom fan, activated by humidity, I jumped at it.
Leviton Manufacturing liked my Ultimate Workshop Power Strip post where I had used their devices, so they sent me their Humidity Sensor and Fan Control to try out. I've always liked their stuff and really looked forward to this one.
Why?
Here's my reasoning. Humidity is never a good thing in the house, right? Mold. Mildew. Bacteria. Fogged mirrors. Turning on a bathroom exhaust fan during a shower (especially a lobster-boiling, steaming-hot one like I enjoy) is a good way to control it. Unfortunately, I'm often mid-shower when I remember to turn it on, leading to the classic soapy-headed, slip-'n-slide stumble to the switch (kids never turn it on). Later, when leaving the room, turning the fan off immediately leaves residual humidity in the room. Leaving it on for a few more minutes does the trick, but "a few minutes" generally means forget and let it run all day.

Fan-tasticI
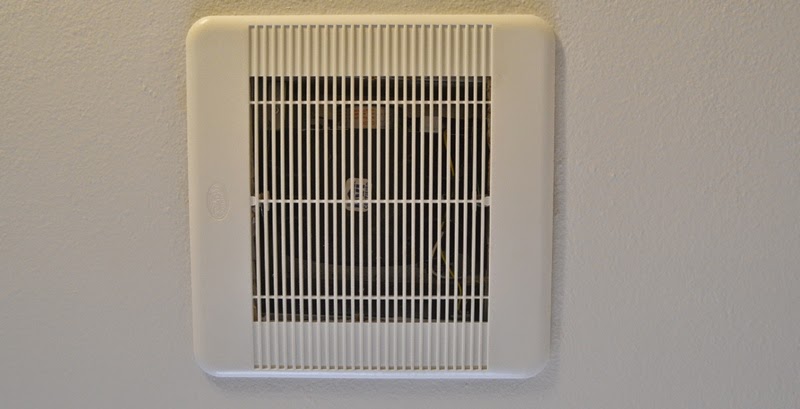
I installed a new bathroom exhaust fan last year, so thank goodness I didn't have to venture into the attic for this project. Trust me, attic work in Phoenix, in July, is not a pleasurable endeavor. Luckily, this project takes place in sweet, air conditioned goodness, at the switch location.

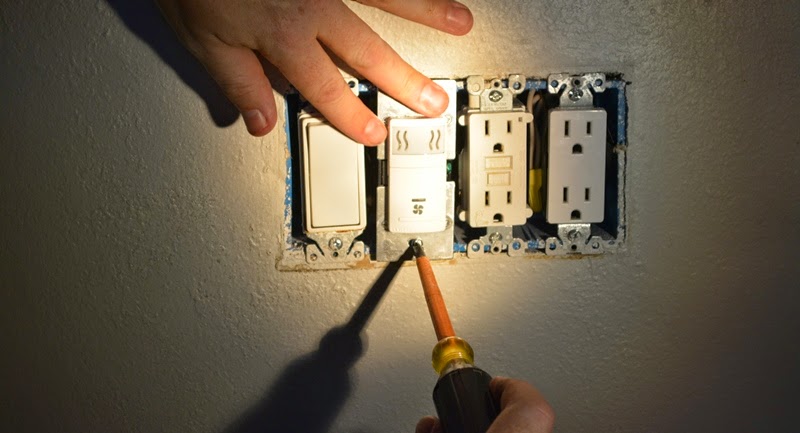
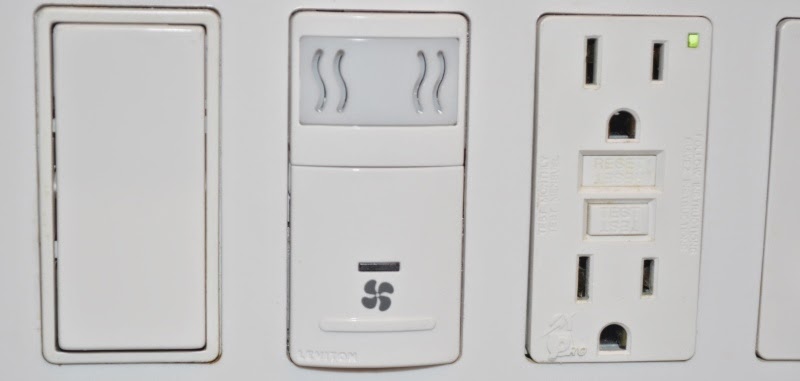
Our existing 4 gang set-up included a light switch, a fan switch, a GFCI receptacle , and a spare receptacle (with slaved GFCI protection). The humidity sensor switch can control the lights as well, but I can't imagine wanting lights to turn on and off based on humidity. If there had been an existing switch controlling both, I would have had to make some modifications.

The gang of four.

Before we start, remember to visit AZ DIY Guy's Scary Warning: Electrical Edition
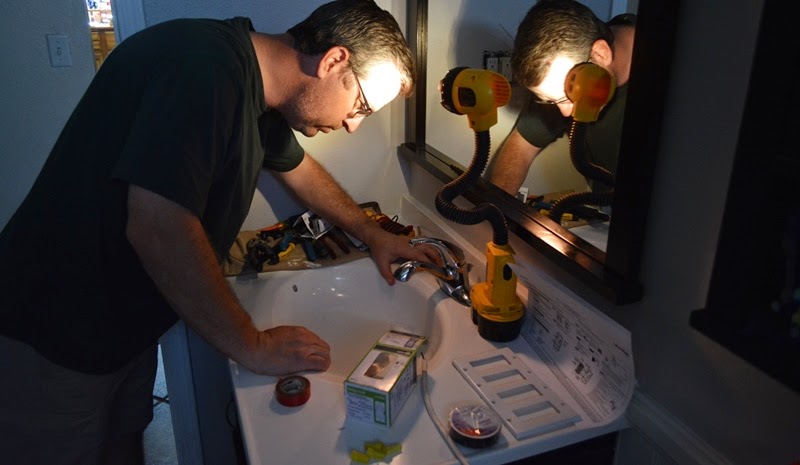
I removed the 8 tiny screws to get the cover plate off. Of course, those got safely set aside where they wouldn't get lost.*
*Disclaimer: I actually set them in a loose pile on the back of the sink.

Life's the same, I'm moving in stereo
With the cover off, I carefully pulled out the existing fan switch.

With the power on, I only handled the device by the yoke, the outer metal part with the mounting ears. The terminal screws were taped over, but I made sure not to bump them against anything. I wanted to positively identify which wire was the hot, or "line" side of the switch and which was the "switch-leg". With the switch off, only one wire sets off a non-Contact Voltage Tester; with the switch on, they both set it off. We want the one that is always live.
I marked the live wire with some red electrical tape. There's no point in getting confused later.
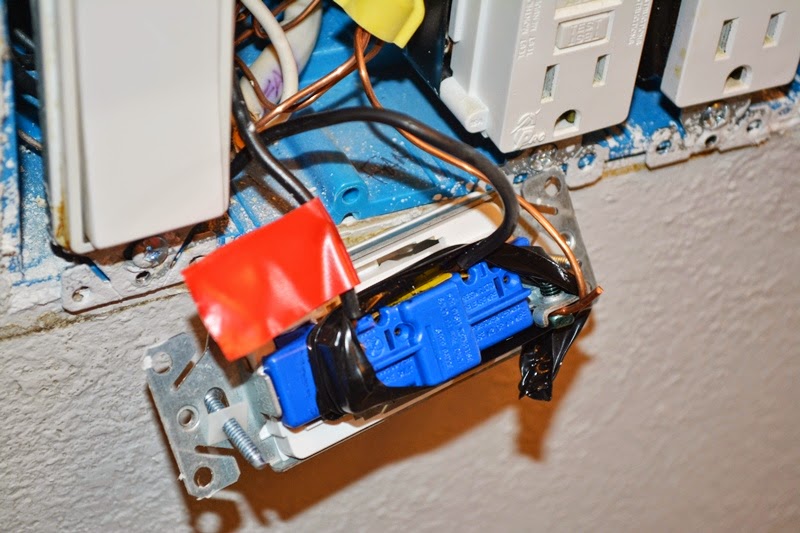
The old red, white, and blue,... and black. With that done, you know what's next right?
"Boom boom, Out go the Lights"
- Pat Travers
Grab the flashlight.
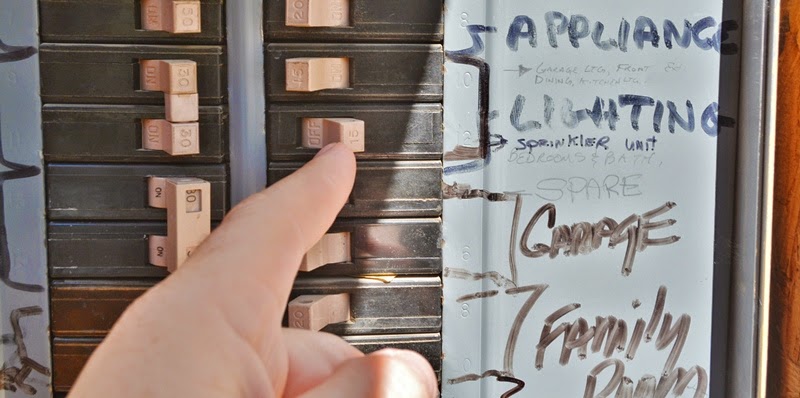
Power off at the breaker. Unlike a basic, toggle switch, the Humidity Sensor and Fan Control requires a neutral wire. There's a bundle of neutrals, tucked way in the back of the wall box. Normally this is white wire, but you can quickly verify it is indeed the neutral by the fact that it's landed on the silver screws of a receptacle, if there's one in the box. There are occasions where a white wire can be a hot. I fished it out with a pair of needle nose pliers.
Since the original switch didn't use a neutral, I removed the wire nut and added a piece, or a "pigtail" of white wire to the existing twisted joint.
After a fresh wire nut and making sure no bare copper was sticking out behind it, I gave each of the individual wires a good tug, to make sure everything was tight.

An AZ DIY Guy project just wouldn't be complete without at least one bone-headed mistake would it? The first sentence in The DIY Guy Code , Book One, Chapter 1, Paragraph 1, clearly states:
"When working with small parts over a sink,you will take one second to close the damn drain, or you are a pea-witted dumb-ass."
I'd skipped this excessively difficult step, so when I set a tool down on my pile of cover plate screws, I scattered them everywhere including launching one down the drain. Idiot.
Yeah. That really happened, knucklehead.
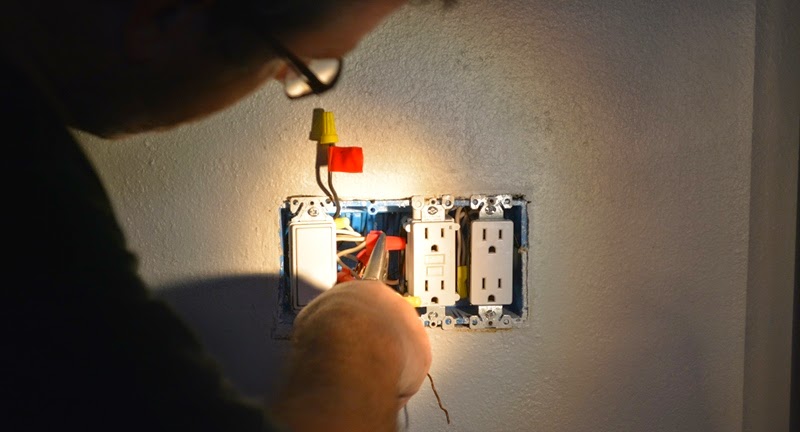
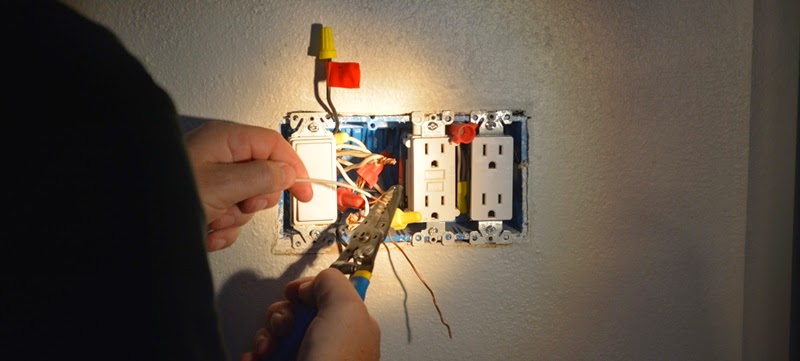
Finally, it was time for the guest of honor. Since I hadn't installed one of these rascals before and I know how miswiring can cause irreversible damage to electronics, I actually read the instructions.
I know, crazy-crazy stuff, right?

I guess I could have moved into another room, with actual light. Nah!
I started with the grounding wire (bare copper) on the green screw and wrapped clockwise so it tightened along with the screw.

The black screw got the hot wire, the (new) neutral landed on the silver, and the switch leg landed on the "red". It was actually more purple in color, but that was neat. I'd hadn't seen one that color before.

With all the wires landed and the screws tightened. I got a chance to try out a new roll of electrical tape, from the box of rolled goodies EchoTape had sent me a while back.

I like to put a couple wraps of electrical tape around a device, to insulate and protect the termination screws that carry current. It's not required, but I like to do it, as an added layer of protection. I really liked the tape, it has a real quality feel to it, compared to the cheap-o stuff I'm used to.

I always leave a folded over tape, "courtesy tab", for next time if it ever needs to be worked on. No sense trying to find the end and pick at tape in the dark.

With a nice "S" fold in the wires behind it, I gently slid the new control into the box, without kinking or pinching the wires. I screwed it in with the supplied, 6/32 screws.
I ventured back outside, blinking in the blinding afternoon sun to flip the breaker back on. With the power on, I hit the manual side of the switch. It worked! The manual button allows you to turn the fan on and off
for those delicate times when humidity isn't the reason to run an exhaust fan.

A nice thing about the new Leviton controller is that it fits in the common, rectangular "decorator" style wall plate.When I have a ganged group of devices like this, I like to leave them, ever so slightly, loose. It's easy to shift and slide them a bit to get the cover plate on. The plate keeps them pinned tight. To finish, I always put my Mini Bubble Level to it and align the screw slots vertically for a neater look.

The Humidity Sensor and Fan Control has a bunch of available dial settings (sensitivity, time, and humidistat) behind the front, pop-off face. It allows for all sorts of customization. Since we have super low humidity here, I dialed it down a bit to make it more sensitive. I'll see how that goes for a while and adjust to dial it in.
There's only one way to test this properly. I'll bet you've never read another DIY blogger's post where they were dedicated enough to take all their clothes off to test a newfangled device. No? Well then, here's a first.
Let's get to this.
I'm going in.
Shower time.
No clothes.
Last warning.
Here we go!

The things I'm willing to do for you, dear readers.
Steam simulated graphically due to lack of photographic evidence. Within a few moments, the fan kicked on. Perfect!
After a good long shower, with the bathroom door open and a rush of cool air conditioning, the fan kept running. It hummed along for a while before shutting off, when the air felt dry. Success.
There are several ways to configure the switch, depending on what application is desired. According to Leviton:
Features and Benefits:
- Built-in timer sets the “minimum ON time” for the ventilation fan.
- The sensor time settings can be custom set to 10, 20, 30 or 45 minute intervals.
- The sensor will continue to operate the fan for the minimum time set or until there is a reduction in room humidity level.
- A sensitivity level adjustment allows users to adjust the sensor’s sensitivity to ambient air to prevent false cycling.
- Features an Air Cycle mode which automatically turns ON the ventilation fan for a set period of time and repeats the cycle hourly (eg. 20 minutes ON/40 minutes OFF each hour)
- The device’s built-in humidistat control meets CALGREEN requirements for Indoor Air Quality and Exhaust.
I've seen the Leviton Humidity Sensor and Fan Control for sale on Amazon.com and Home Depot for abotu $35.
This neat smart-device joins a growing list of energy saving items we have installed in the house. Over the past few years, our bills have dropped measurably. I'm addicted to these gadgets.
Non-Sponsored Post - Device supplied by Manufacturer for review
Opinion and experience is 100% my own.