

Installing an automated Leviton Humidity Sensor / Fan Control in the bathroom to control the exhaust fan.
Read MoreAZ ADVENTURES: Live Post! All we are is dust in the wind (Dude)
A wild dust storm just slammed into Phoenix. It looks like we won't be headed out to the fireworks. You'll never believe what just landed in our pool.
Read MoreThe Claw vs. the Mountain
The claw chews it up and spits it out. Don't mess with the claw.
Read MoreMiter Saw Bench Revisited - Plus a Reader's Version
Dewalt 12" Double Bevel Sliding Compound Miter Saw work bench for wood working, economical but tough.
Read MoreThe Father's Day "About" Update
A six year old "helper's" view of her DIY Daddy.
Read MoreLeak No More - Replacing the Backyard Drip Irrigation System (Finally)
I'm replacing the patched up drip irrigation system. No more repairs!
Read MoreDIY Workbench Upgrade + A Tool Giveaway!
A DIY Work Bench project with the new BLACK+DECKER 20V MAX Lithium Cordless Drill/Driver with AutoSense Technology
Read MoreThe Water Heater Forensic Autopsy - Not for the Squeamish!
What killed the old water heater? More importantly, what do they look like inside? Could I have DIY fixed it?
Read MoreMurphy's Law: The Day of Days - An Adventure with DIY Irrigation Repair (again)
Day of Days. A very simple irrigation system repair project became a horror show.
Read MoreWhat the heck is going on around here? Are we haunted?
All of a sudden, everything is breaking at the house. Whaaaat?
Read More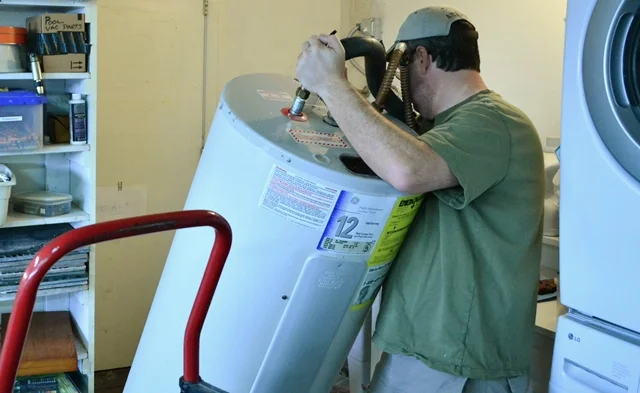
Replacing a Water Heater - New Energy Saving Features
The exciting tale of how I replaced a Water Heater and gained modern energy management features. Bonus - I replaced the supply valve too! Now with 100% more George Costanza.
Read MoreFix It: A "Quick" Repair with Heavy-Duty Double Sided Tape
I'm repairing a magnetic latch with heavy duty double sided tape by ECHOtape. It only took 7 years!
Read MoreFix-It: The Fantastical Powers of J-B Weld - Repairing the Vanity Mirror
I needed to repair a broken hinge on our bathroom vanity mirror. I unleashed the rack hard repair powers of J-B Weld epoxy.
Read MoreDisneyland with the DIY Guy's Eye

No, I didn't finish remodeling the house to look like a pink castle.
We took a long weekend and headed for Disneyland. As always, it was a great time. Nobody does it better when it comes to detail, service, and providing an enjoyable experience, for 10 bazillion people.
If you haven't been, I'm going to let you in on a little secret, to prepare you,... you are going to wait in line. Seriously. You are going to wait in some serious, godawful lines. Sure, it's worth it in the end; the attractions are pure joy for young and old. In fact, the lines are not so bad at first. They're generally theme decorated and everyone is anticipating a day of awesomeness. Early on, the lines are pretty fun...

Cars Land is like stepping into a cartoon! ...but later, as energy wanes and the heat of the day starts wearing you down, the lines are not quite as fun.

"Staaaaar Waaaarssss....better be worth it" (It is!)
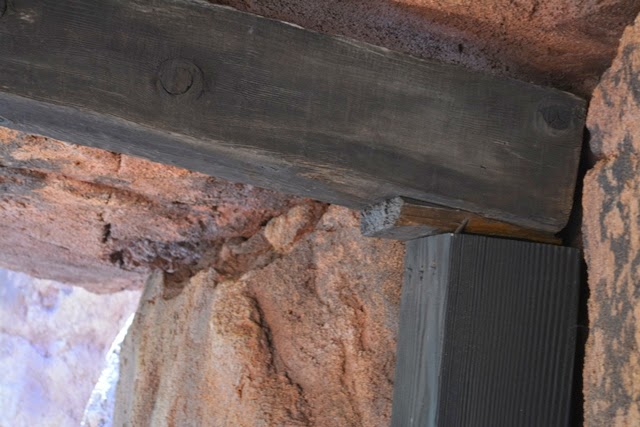
When your's truly wasn't in kid consoling mode or fetching drinks, I was peaking at the details, figuring out how stuff was put together. Check out at this bow-tie / dovetail joinery holding the timbers together at the
Peter Pan line. I imagine, it was probably built in the 1950's.

A " bow-tie / dovetail" (?) Over at the newly-renovated, Thunder Mountain Railroad, the fence was made from some sort of weird resin or acrylic, but it was nicely done.

Dino-mite!!!! There was some seriously rustic timber fit in place with meaty shims.
In the Toy Story - Midway Mania line I was mesmerized by their plank ceiling. I never even thought about setting ours at an angle. Look at all that molding!

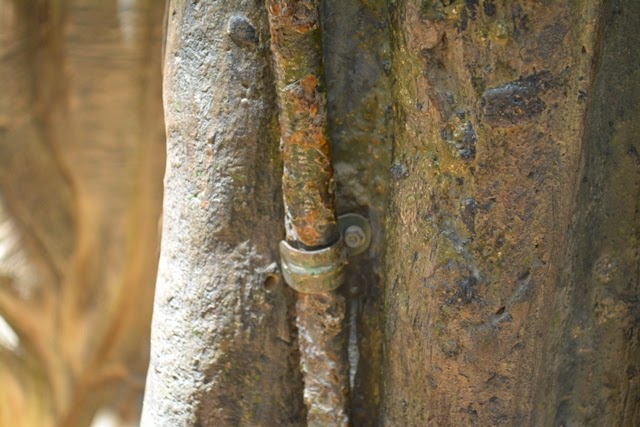
We clamored around in Tarzan's house for a while. It truly feels like a massive, vine filled tree...

... especially with this weather tight, flexible electrical conduit, growing from the jungle floor.
Finally, my keen eye spotted this incredibly realistic horse. I couldn't believe the attention to detail the designers had put into this fine piece of animatronic wizardry. I marveled at the heap of steaming Disney magic it deposited on the street, just like a real horse.

Obviously hand crafted realism!
"We noted a dead tree(s) on your property" - a PFIY project?
Do I buy a cheap chainsaw to take these trees down or do I hire someone? Do It Yourself or Pay For It Yourself?
Read MoreCleaning and drying out after a plumbing leak isn't as fun as it sounds
After an in-wall plumbing leak, I start the clean-up / dry-out. I have to cut an access hole and treat for mold and mildew. Fun fun fun!
Read MoreHow to repair a plumbing leak inside the wall, a tale of high adventure.
After finding a plumbing leak and tearing holes in the all, it's time to repair the pipes. Soldering and using handy push-fit connectors.
Read MoreSurprise! Finding a leak inside the wall.

I could hear something inside the wall. Note: This phenomenon, is generally what we like to call in the homeowner business, "bad news". Rarely, do noises in the walls turn out to be the shifting of gold doubloons sliding off a big bundle $20 bills onto a pile of 30 year old Apple Computer stock. No, it usually means you are going to spend money, lots of it. It is, however, a perfect opportunity to practice up on your curse words.
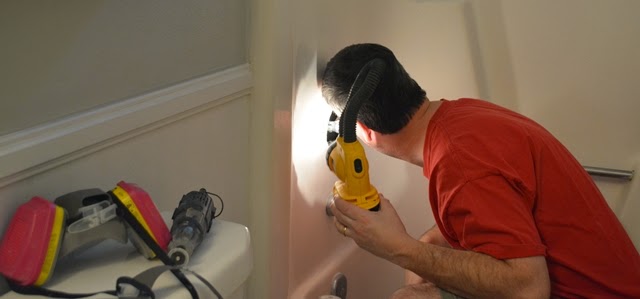
With the shower valve opening too small, I couldn't see into the wall, but I could hear water spraying. With the crud-circle buildup around the valve cover as a guide, I cut the hole larger with a rotary tool. The fumes and dust of cutting fiberglass were pretty strong, so I opened a window, turned on the exhaust fan, and slipped into the manly-pink 3M Professional Multi-Purpose Respirator
 |
| "No Luke, I am your Father" - D. Vader |
 |
| I don't see any hidden treasure either. |
Just like plumbers have done for hundreds of years, I stuck my smartphone up to the hole and took a flash photo for a better look.
 |
| Fact: This age-old smartphone trick is believed to first been used in Boston, circa 1771.
- The More You Know
|
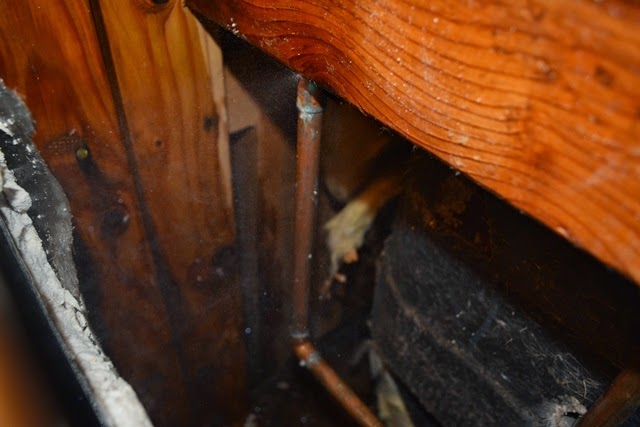
I could now see the leak. How the heck to fix this? There's a fine mist of water spraying, away from me, out the back of a 90 degree elbow, behind the wall of a one-piece shower / tub unit. Sure, this yellowing, beat-up old tub is on the eventual replace list, but there's no time or money for that now. I surely can't carve a hole through it and shut down one of our bathing locations.
 |
| The culprit. |
I checked the other side of the wall, our master bathroom. Now folks, correct me if I'm wrong, but when you press on a wall, it shouldn't bend right? Even if it's over an absolutely hideous 1970's gold marbled counter top?
 |
| Wasn't there a bending wall scene in Poltergeist? |
The side piece of the back splash (side splash (?)) is a separate piece. I figured I could cut the caulk, remove it, cut a hole in the drywall behind it, and if the DIY gods smiled upon me this day, quickly repair the issue.
Of course, that was before I simply plunged my knife through the caulk and spongy, wet drywall with ease. I slid the blade through the wall, like it was oatmeal.
 |
| This is not the work of a Sheetrock saw, just a simple pocketknife blade. |
Fan-freaking-tastic! My Facebook followers have already seen my happy face, bright-eyed with the magical wonder that is a handful of sopping insulation and the joy of beholding of drywall unable to hold its structural integrity. It's a face from the musty, recognizable smell, the smell of my weekend evaporating and my wallet flying open.
Great.
 |
| Can't you just see the joy on my face? |
With the wall open, and the insulation out of the way, I was greeted by a effervescent mist of water, steadily wetting the inside of our walls and soaking the floor of the cavity.
 |
| Cool mist. |
I could feel a J-nail holding the pipe, tight against the 2 x 4 cross-member that was there simply to secure the plumbing. The wood was blocking any hope of repair, so it got hacked out with a Reciprocating Saw .
.

Since we still had a load of laundry on rinse cycle, I didn't want to kill the water to the house quite yet. A gob of duct tape (the crowning achievement of modern civilization) and did a hasty wrap job, keeping the water from spraying in my face. A bucket placed below, began to collect the dripping water.

The bucket filled in 20 minutes. I figure there was at least 5 hours of leaking water so there is a minimum of 15 buckets of water loose in the cavity. Spec-freaking-tacular!
 |
| At least it was a small bucket. |
A few years ago, I'd bought a Bernzomatic Trigger Start Torch kit. I use the case to keep all manner of plumbing stuff in one place. I lugged it into the bathroom to see what I had to work with.
 |
| Sure it's a nice torch kit, but can you take your eyes off that delicious 1970's counter top? |
After shutting water off to the whole house, I used a Mini Tubing Cutter from my kit to slice the section out. These are handy little tools. They simply slide over the pipe and twist around it. You tighten the knob every few rotations, which drives the cutting wheel deeper into the pipe, until it finally snaps off, clean and straight.

It's a handy little gadget. This one really needs a replacement cutter wheel, but it made the two cuts.

Next up! Off to the friendly neighborhood hardware store to buy some copper.

This is running long, so I'll break it off here and tackle the repair next time. The bathroom window is open, there's a fan down in the wall and another one on the counter top. This mess needs to get dried out before the wall can be sealed up.
Any chaos in your weekend friends?
UPDATE: Here's the plumbing repair. At first, I make it look hard by failing miserably...
The Great Divide: Installing the Living Room Transition Molding
Episode 11: The space I left for a transition molding was too small. I had to cut it wider to install the transition between the new floor and the tile.
Read MoreThe Great Fix-It yourself Contest Winner!
A couple weeks ago I shared some of my DIY stories and asked about yours:
What have you done to save the family budget and keep stuff from the landfill? What's the one thing you're glad you fixed rather than throwing away? What fix it job are you most proud of?
Crucial Vacuum sponsored the contest for a $100 Amazon.com gift certificate.

Here are some of the great responses:
Jess:
"I'm not a mechanic or technician.....at all. And I'm uncomfortable with electricity so any fan or light fixture replacements are done by my dad or friends, so I can't take credit (except for skillfully selecting excellent amigos), but I have replaced my tub's faucet and I took off the drain to remove a hair-based clog in the tub. I figure I would have had a plumber come out for that, so probably saved me $100. And learning to do that was empowering enough that I put on some Spice Girls music to celebrate."
Eric:
"I bought my first Arizona tract home during the frenzy of 2005, so naturally I was broke the following year when the AC quit working. I spent some quality time in the attic replacing the fan motor and controller board and probably sweat off a few pounds in the process. The real feat in this whole experience was finding a place that would sell me the parts. Thankfully I found a small shop in Mesa that saved me from having to wait for parts to be shipped"
Margaret:
"I replaced the lid switch in the washer of our rental. It worked and the washer is still going strong several years later!"
John:
"I recently replaced the drain pump on our front loading washer. These things aren't really designed with ease of maintenance in mind. Got more scratches on my arms than if I got in a fight with a rabid bobcat." (Check out John's blog: Our Home from Scratch)
Brian:
"I am always trying to save a dime. One day my grinder stopped working and I thought it was the power switch. I never fix a grinder before, and I could have bought another for 10 bucks at Harbor Freight. However, I thought that I would open it up and see if I could fix it myself to save some money. Worse case scenario if it was thrashed I would at least know I tried before I junked it. I opened up the case and one of the brushes a brass plate was off one of the brushes.
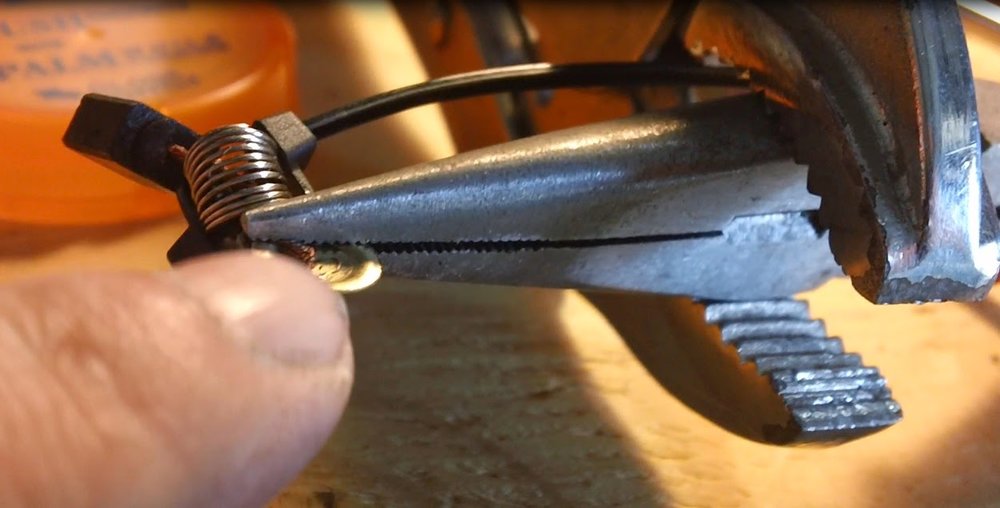
I could have stopped and bought a new set of brushes but these had a lot of life left in them so I figured I would find a way to fix it. All I had to do is solder the brass plate to the wire that is embedded in the brush head. Now in order to do this, I had to find a way to hold everything and compress the spring that goes over the wire, in between the brass plate and the brush head. Enclosed is some pictures of my solution."

Check out Brian on his site too! Summers Woodworking He has an infectious joy for woodworking and tools.
Ben:
"I fixed a broken soap holder in our tiled bathtub wall. We realized there was a problem when there was a leaking ceiling in the utility room that the tub sits over. The previous owners were the type that knew just enough about everything to screw it all up. Turns out there wasn't enough of a stud to screw the soap holder into, so they shoved a few pounds of drywall mud and shoved it in. Well, needless to say it started sagging from my two year old doing chin-ups on it (I exaggerate). I had to rig a 2x4 extension to the stud that was half visible and add a few tiny sheets of plywood to fill the gap of missing drywall, then I lathered it with liquid nails and taped it up for a few days and voila! No need for a plumber and saved countless dollars."
Thank you everyone for the stories. It is an impossible thing to pick the best. My friends a Crucial Vacuum picked the top two. I was frozen with indecision, so I had to flip a coin to make the final call.
Congratulations to John V who wins the $100 Amazon.com gift certificate!
Thank you to Crucial Vacuum for being the prize sponsor for this fun contest. Please check them out when you need some parts, supplies, and information for your DIY vacuum repairs.

www.criticalvaccum.com. Back to regularly scheduled programming soon friends!