The Great Fix-It Yourself Contest - $100 prize!

On this blog, I like share tales of "Fixing Stuff". Now, we want to hear yours.

One comment / story is going to earn a $100 bounty, a glorious Amazon.com gift card from our friends at Crucial Vacuum!  (update: Contest over)

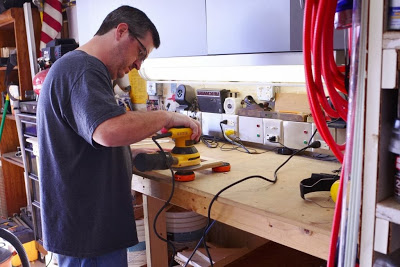
Over the years, I've taken advantage of the internet's easy accessibility to repair parts and educational resources to fix stuff that I would have either thrown away and replaced or paid someone the big bucks to repair for me. It's become my first reflex to tear stuff apart and fix it. I've saved tons of money in the process. 

Repairing a Shopsmith Dust Collector

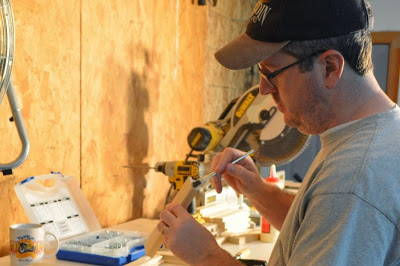
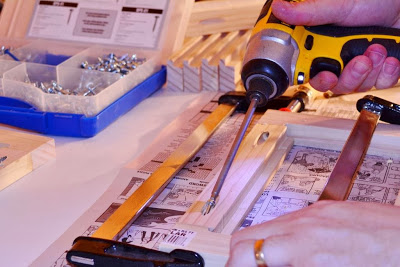
Replacing the cord on the dust collector.

Of course there's risk involved. I've attacked a repair, casually ignoring the "no user serviceable parts" label only to find that not only was I unable to fix the item, I couldn't even hope to put it back together. I am embarrassed to admit I did the walk of shame to the trash bin with an armful of plastic, electronics, tubes and dangling wires that had once been a beautiful Keurig Platinum coffee brewer. 

We lost a $130 coffee brewer in that debacle, but it was busted and out of warranty anyway. I'm not going to do a brake repair job on my wife's car in the driveway, because I don't know what I'm doing. I'm not going to risk my family to save any amount of money. I leave that one to the pros. 

I've had my successes as well. Here's a rundown of some of the highlights...

  • Remember the dealership challenge? It saved almost $100 and it took only a few minutes of my time to replace the auxiliary audio jack in my truck. No mechanic!

Plug and play!

DIY Repairing an LG Front Loading Washing Machine

This one took three hands

DIY Repairing a drip irrigation system
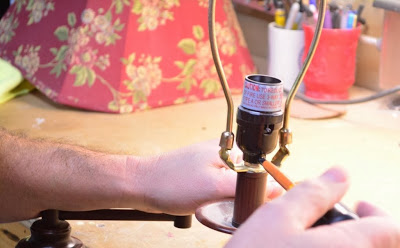
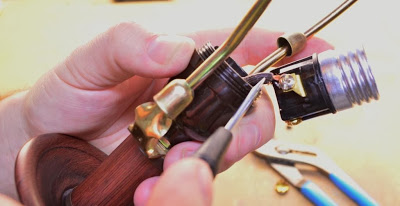
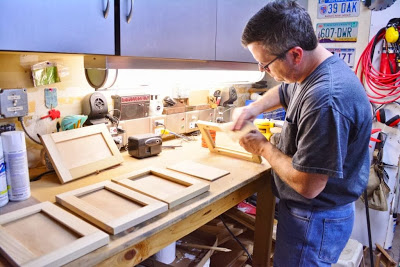
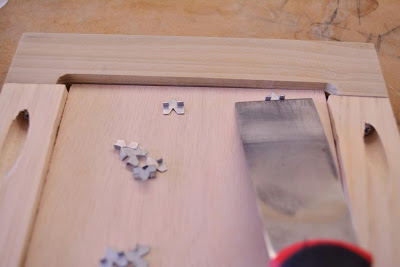
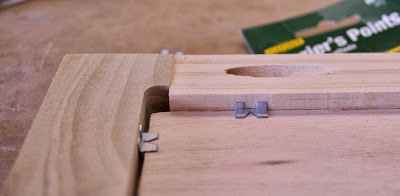
  • Recently, I rewired a lamp rather than chuck it. It's a cheap lamp, probably worth about $20 but we like it and didn't want to add it to a landfill. No landfill / No replacement!
DIY Rewiring a lamp
  • The pool vacuum spends it's life underwater in a chemically charged environment. Of course stuff breaks and wears out. I rebuilt this $300+ piece of plastic wizardry with parts and instructions from the internet. No repair shop!
DIY Repairing a pool vacuum
  • Speaking of the pool, I again reached out to the internet for parts and instructions to repair our aging DE filter in "You will go to the Dagobah System"No Service Technician!  I did later hire a company to replace and upgrade the whole system.
DIY Repairing a Hayward DE Pool Filter

I've had plenty of other fix-it successes like an XBox controller, a vacuum cleaner, a clock, countless toys, some light car repairs, and general household plumbing and electrical repairs. Other stuff, I've had to chuck in the trash when it's simply outside its useful life or just not worth the major surgery to attempt a repair, like televisions, a pool motor, a toaster, and etc. 

The Contest!

How about you?

What have you done to save the family budget and keep stuff from the landfill? What's the one thing you're most glad you fixed rather than throwing away? What fix-it job are you most proud of? What do you wish people would stop throwing out and start fixing?

Share your story in the comments below, email it to me ( john@azdiyguy.com), or even send it to me through a Facebook message. A few sentences is fine! Send photos if you like. I'll feature the winner in a future post.

The winner gets a $100 Amazon gift card from Crucial Vacuum I'd be honored if you'd follow me on Facebook ! I slip plenty more good DIY content and humor in over there. (Don't forget TwitterGoogle+Hometalk, and Pinterest too!) Have fun!

This contest is complete. We have a Winner

Thank you everyone!

From Crucial Vacuum:

"Crucial Vacuum supply vacuum cleaner parts and supplies, so we're always interested in ways we can encourage more people to fix appliances rather than throw them away. It's great to find bloggers like John, who get more people repairing, recycling, and taking care of things, so we thought it might be fun to see what his readers have been fixing!"

I've looked over their website and loved the how-to videos for installing replacement vacuum parts. I really like the fact that they plant a tree for every 1,000 filters they sell. I also like the price match guarantee, free shipping, and free returns. 

Crucial Vacuum is currently running a special coupon code for 20% off a $40 order though March 2014 (Coupon code: POLARVORTEX)

Read the ole' fine print below before entry:

  1. Relationship: AZ DIY Guy's Projects (Host) has no financial relationship with Crucial Vacuum (Sponsor) and has received no compensation for hosting. They originated the idea for this contest, thinking my readers would enjoy it and would appreciate their products and services. I'm hosting this contest as a way to engage and reward my awesome readers as well as meet new ones. Amazon, Facebook, and other third party social media outlets are not affiliated with the contest.
  2. Duration: The contest runs through March 26, 2014 at 11:59 pm, Phoenix, AZ time.
  3. Location: The contest is open to the US and Canada only. Participation is void if any a participant's local authority having jurisdiction deems this contest to be illegal in any way. Participants are responsible for verifying their legal eligibility.
  4. Eligibility:  Only individuals over 18 are eligible, no company or organization. Bloggers are welcome. Employees and family members of AZ DIY Guy's Projects and Crucial Vacuum are ineligible. Entries or comments that are deemed profane, hateful, discriminatory, or otherwise distasteful will be removed and are not eligible.
  5. Entry: Participants enter the contest via a written commentary / story. Entries are accepted via: 1.)  comments on this original blog post 2.) Facebook message to the AZ DIY Guy page  3.) Email to john@azdiyguy.com
  6. Winner: The winner will be chosen editorially and subjectively at the discretion of the host and sponsor. Following or subscribing to the host or sponsor of the contest on social media is not required for entry (although it is greatly appreciated!). Photographs are not required, but would be great to post on the winning announcement.
  7. Notification: A good-faith attempt to contact the winner will be made via the contact information provided at time of entry. The winner has 48 hours to respond, before forfeiting and an alternate winner is chosen.
  8. Prize: The sponsor is responsible for providing the prize, a $100 Amazon.com gift certificate to the winner. This certificate may be digital or physical at the discretion of Crucial Vacuum.
  9. Release: Participants allow their story, comments, and identity (as supplied) to be shared.
  10. Errors: The host and sponsor are not responsible for any potential, technical errors into the contest. An best effort will be made to resolve any errors fairly. If a legal error is discovered, adjustment to the contest will me made to ensure compliance or the contest can be cancelled. 
  11. Acceptance:  By entering the contest, participants accept the terms and agrees to hold the the host, sponsor and any social media used harmless in the event of an error or omission.
  12. Spam: Spam will be deleted. Seriously. Shame on you.

Want to win that $100 certificate?!! Let's hear your story!

 This contest is complete. We have a Winner

Thank you everyone!

Actually reading instructions and other nonsense.

Men. We don't ask for directions and we don't read instructions. It's testosterone-fueled knowledge, ladies, we're born with it.

Although I leap unhesitatingly into all things DIY, and am generally fearless to tear stuff apart and (try to) fix it, I've never claimed to be an auto mechanic. It's just not my expertise. I think it comes from growing up in Michigan where everyone else's dad but mine worked in some way for the auto companies. I had so many car-handy friends that they'd just help me with it, no problem. I never really learned much about it.


However, I have changed headlamps before, and I am a handy guy. After all, I kicked butt fixing the auxiliary audio jack in my truck, didn't I? When I popped outside to fix Sweetie's car, I took a cursory glance at the owner's manual to see how to remove a plastic air duct that was in the way, without breaking the plastic clips, before swaggering to the front of the car to fix the hell out of it, 'cause I'm a handy, handy man.

Yep! Shorts in February!!!
It took an obvious, quick squeeze of wiring harness to slide it off the back of the lamp. The lamp took an easy twist to pull it out of the socket. Piece-o-cake! I removed both of the front lamps so the beams would match.

2007 Honda Accord Headlight
The 2007 Honda Accord Ladies and Gentlemen.
I grabbed a new bulb and,....uhmmmmm.....CRAP!  It didn't fit. Tried it again,... Dang it! Just to be sure I wasn't just feebly struggling to get it in, I actually measured the base with a micro caliper. Yep. The new lamp base was too big. Those idiot, grease monkeys at the auto-parts store had sold me the wrong freaking part. I had even bought a two pack of them.

Precisely different sized lamp bases, exactly and positively wrong.
I slammed the hood, drug my tools back into the garage, and grunted to Sweetie I had to go back to the @#$%! store because that idiot had sold me the wrong part. I don't get mad often, but this guy was going to hear about this for sure. After all, it's his job to know this stuff. He's the "expert."  I think he is even the manager, more like the head moron.

I took the car, so I could show that  mental giant personally. I don't know why I glanced  at the open owner's manual still laying in the passenger seat, as I backed furiously out of the driveway...  

My eye caught the bold heading, "High Beams Headlight". Whaaaat?!!!. After looking over my shoulder to see if anyone was watching, I casually flipped the page to see the next bold  heading, "Low Beam Headlight

Oh.

There's two sets of lamps. Ohhhhhhh.... heh heh... silly me.

"I'm with stupid à"
I couldn't see them from the outside, but after actually reading the manual, I found the "Low Beam Headlight" was behind the fender liner, accessed by popping some plastic screw things out with a screwdriver. They were behind a reflective cover in the headlight area.

Of course my first attempt to snag it blind resulted in a turn signal. Nope, back in he went.


The second excursion resulted in success. The lamp was exactly the same as the ones I had purchased, including the yellow gasket ( = Exactly the same as the ones the friendly, very knowledgeable counter guy had recommended.) It was a quick and easy swap.

2007 Honda Accord Headlight

I opened the hood again and put the high beams back where I got them. At least they were a little easier to get to, and in a less filthy location than the brake-dust coated fender wells. 


The wiring clipped back in place. 

2007 Honda Accord Headlight

Since I was already filthy, I replaced the other lamp on the passenger side too.

2007 Honda Accord Headlight

All the little plastic clippy-things had shattered when I pulled the fender liners so I did actually have to go back to the auto parts store for new clippy-things. I couldn't look the guy in the eye. I felt horrible for doubting him. He even gave me advice on choosing the right clips. Thank goodness I looked at those instructions before truly making an absolute ass of myself at the parts counter. Like I always say, those guys at O' Riley Auto Parts are just awesome (Non-sponsored, just an apology for those awful words I was thinking in my driveway).

I got back home and got to play with my sweet new DeWalt Right Angle Adapter Attachment to drive the new fasteners in. I'd been waiting to play with this beauty since I won it in DeWalt's Fan of the Week Photo Contest


No, I didn't read the instructions.


Financial Impact

Renovation is expensive and difficult to keep on budget.

Around here, the short term budget is a little tight as we move into the final stages of the living room remodel. We can handle it, partially because we planned well and used a 0% financing deal for the costly flooring investment. We're disciplined and use these finance deals fairly regularly, paying them off well before the big interest hit comes into play at the end. Sweetie handles the books perfectly, every time. Why would we pull from interest-earning savings when we can use the merchant's money for free? As all projects do, we got hit with a few construction overruns. We managed to absorb them as we went.

But sometimes unplanned things, outside the current project, give a swift, precision kick to the wallet and drop your plan gasping to its knees. For instance, who could have foreseen the colossal financial impact our family budget would suffer due to an utter and complete unpreparedness for the season where legions of uniformed Girl Scouts besiege the entrances to every shopping center in the county, with their diabolical cookies? I simply lack the fortitude to walk past a smiling little commando, as she dual wields Samoas and Thin Mints, without reaching for my wallet. (Note to self: double-check the ladder's maximum weight capacity rating against my new-found pounds.)

The diabolical lure of Thin Mints, for second breakfast
Breakfast of Champions

Then, another hit. Literally. On my way to work this week, some mental-giant in a Honda Odyssey decided to cross three lanes of traffic and stop across the fast moving left lane lane blocking a pack of speeding morning commuters in the darkness. It caused a chain reaction of ricocheting vehicular pinball madness that resulted in a fast moving Mustang skimming across my front bumper and running me off the road. Luckily, the stability assist feature in my truck helped me maintain control and avoid a streetlight when my tire blew out on the curb. Even more lucky was the that bus stop I found myself parked in was vacant and a couple inches higher than my roof rack.

Hanging out at the bus stop.
I know there were several vehicles that hit each other in the pandemonium. I heard the impacts. I saw the skid marks and bits of plastic in the road. Of course, every single one of those turkeys boogied-out, at great haste. I was only able to catch a partial plate number on the Mustang before the throaty roar of its big V-8 disappeared into the darkness.

One of the special treats about living in Arizona is a cornucopia of possible reasons why people may abandon an accident scene. There are undocumented immigrants afraid of deportation. There are people with minor criminal warrants, terrified of being sentenced to the humiliation of pink underwear, green bologna, and freezing nights of Sheriff Joe's "Tent City." There are uninsured drivers. There are common people afraid there is a loaded firearm in every other car, ready to settle traffic altercations like it's the O.K, Corral.

Regardless of reason, I was alone on the roadside with a busted wheel, flat tire, and a pounding heart.

Busted Ridgeline Wheel
$480 worth of aluminum and rubber.
Surprisingly my truck body was only a little scratched up. Nothing serious. I have to contend with a $300 wheel, $180 for a tire, and an alignment to be roadworthy again. I can't DIY this particular project; regrettably it's not in my wheelhouse. Hopefully, the suspension is OK. I won't know until I get the wheel back on, but  if major repair is needed, we'll have to make an insurance claim.


This is definitely not in the budget. We could have done a lot of DIY renovation work for this kind of money.

Crap.
P.S. - No, before you ask, the new "spare tire" in my mid-section from ingesting 2 metric -tons of Girl Scout cookies will not fit a Honda Ridgeline. 

This is AZ DIY Guy's 100th Post! Thanks for reading.

Follow my blog with Bloglovin

DIY Lamp Repair - A Fixing Stuff Adventure

The switch on our living room lamp broke, leaving my favorite quiet spot too dark. Being the handy guy about town that I am, I thought I'd take a stab at repairing it rather than search for a new lamp. How hard could it be? As it turns out, it was technically very easy, but physically, this particular lamp was a bit tricky.

Lamps are simple creatures. Generally, they're a series of raceways that the electrical cord goes through to reach the socket for the light bulb. There's hollow tubes, threaded nipples, nuts, washers, lock washers, and screws, but that socket is where all the real action is. The rest is just decoration and structure.


To start, it's an easy operation to unscrew the finial that holds the shade in place. 

This floral shade is way to pretty for my workshop.
With the shade removed, guest of honor was immediately revealed, the socket. This is where the light bulb threads in and receives its life-giving electro-juice. Speaking of light bulb juice, it goes without saying, I hope, that this project should be done, with the lamp unplugged.  


Our switch knob was mysteriously broken off. Those of you with children have undoubtedly heard many times before, "I don't know..." (what happened to it). 


The next series of events was simply a dis-assembly process. First, I took out the little set screw that keeps the socket from unscrewing from the nipple. I use an insulated screwdriver, which not necessary here, but it's my favorite one, a nice comfortable Klein. Unlike the beautiful new one Jeff at Home Repair Tutor used on his florescent light repair last week, mine looks like it's served in front-line combat. I'm jealous.

Removing the set screw.
This socket unscrewed in the middle. Some versions simply need to be popped open to expose the electrical connections.


There was no slack in the wire. I couldn't pull the socket from its housing to get at the screws, so I chucked the whole lamp up on the workbench and fed the cord up from the base, into the vertical, hollow pole. 


Many floor lamps are simple, stick-straight units, but this one has an articulated arm. The power cord is fed through very narrow tubes with tight bends. I had to unscrew each section to get as close to the joint as possible, to feed the cord. Channel Lock pliers did the trick nicely.


Once the retaining nut is off, whole sections come apart easily. Little caps pop off to allow access to the joints. I took the liberty of promptly dropping this one and crushing it under my boot, like an oaf.


Once the joints were open, it was a "simple" matter of man-handling the cord up towards the socket, feeding it and pulling slowly, taking care not to damage the cord. Damaging the insulation is referred to, in technical, electrical terms as, "BAD".  A bare copper conductor, without the protection of the rubbery cord coating, touching the metal parts of the lamp would cause a direct short, hopefully tripping a breaker, instead of much worse. 

A little of the old push 'n pull technique
With enough slack to pull the socket itself out, you can see there is a silver screw and a brass one, just like a a wall outlet. The important thing to watch here is identifying which wire goes where. You can't tell what color the they are. You can mark one with tape as you pull it off or, even better, look very closely at the two wires that make up the cable. In this case, the neutral (grounded conductor - normally a white wire) has ridges on the outer jacket, while the hot (ungrounded conductor - normally a black wire) is smooth. Remember this for later.


Like Ruffles, it  has ridges.
I still needed more slack to install a new socket. It wasn't easy at all. There was no space in those transitions and I had trouble getting the cord to budge. So, I used a trick a salty old electrician shared with me years ago. Normally, electricians use a special lubricant when pulling wire through conduit. In a pinch, he showed me they can use dish soap. I was in a pinch, so...

Yes, it's "green apple" scent.
I fought the cord, bit by bit through the fixture, leaving slack at each elbow. The slippery soap helped, and kept me from damaging the wire.  


With enough slack pulled and more than enough parts strewn haphazardly across my workbench, it was time to quest out into the open world for the replacement parts. I headed out to my friendly neighborhood hardware store with the old socket in my pocket and dreams that their popcorn machine would be in action. Surely they'd have something in stock I could use (besides a bag of free popcorn).

I faced the electrical lighting section at the hardware store. They had EVERYTHING! There's parts for all kinds of stuff that I never paid attention to. Heck, you can build your own lamp with the stuff they have here. 
Note to self: future project - find a shapely, plastic woman's leg and make my own, fragile Christmas Story lamp to display in our front window. The wife will love it!


Of the various sockets, I chose a replacement 3-way rather than a standard on/off only switch. This allows the use of a bulb with three filaments for different lighting levels. This works nicely with a  30/70/100 watt light bulb. It's something you can retrofit onto an existing on/off fixture for a nice upgrade. They were actually the same price.


Returning home, sadly without any popcorn, I cracked the new socket open like an egg. It was a snap-together unit, rather than threaded like the old one.


The base then screws onto the nipple from the lamp and gets held in place again by the set screw. Its easy to peel the two wires apart by hand, since I finally had plenty of slack to work with. 


 Here's a close up of those ridges on the neutral wire. Take a look at a lamp cords in your house. They'll probably have these and you've never noticed it. I think it's a secret communication method left to us by Ben Franklin. The string hanging down from his kite with a key probably had ridges just like this. That dude was smart.

Believe it or not, I've never had a manicure my whole life. Honest!
Remember to use the correct wire on the its corresponding termination screw - with the neutral landing on the silver screw. This is important. If you reverse the wires, the lamp will work just fine, but there's a safety hazard. The threaded shell for the lamp becomes the hot, electrified portion and the contact tab deep in the socket becomes the grounded neutral. This places the dangerous, "hot" way too close to accidental contact should anyone ever change a lamp with the switch on (and who hasn't done that?). Considering the lamp itself is metal, that's a recipe for pain, or worse.


I stripped the insulation back a half inch using wire strippers, twisted the strands together, and wrapped it around the screw clockwise. As the screw is tightened, it pulls the strands tighter rather than pushing back a rat's nest of frizzy copper. I wanted a good connection with no loose copper strands to sticking their electrified noses where they didn't belong.


After that, it was just a matter of reassembling everything I had taken apart, in reverse order. It's probably best to lay the pieces in order on your workbench rather than fling them randomly about like I did, resulting in a pissed-off Easter egg hunt. I fed the cable backwards through all the elbows until there was just enough to fit into the socket enclosure. All the various nipples threaded back in with their retaining nuts tightened.


I gently threaded the lamp in. Finally, the moment of truth, my friends.. (click) ...

Blinded by the light, revved up like a deuce, another runner in the night!!
                                                                             - Manfred Mann's Earth Band
Now comes the victory parade. An adoring family gets to see witness this monumental feat of home repair triumph as it is transported, first to downtown New York for a ticker-tape parade, then to its home, by a comfy chair. Full disclosure: It's cold in New York and surprisingly inconvenient from Phoenix. I skipped that step.

There's nothing better than a nice book under the warm glow of a reading lamp...


zzzz....

Quick and Easy Shaker Drawer Fronts (Dodos vs Rabbits)

I've been working on a hallway organizer furniture project for over two years now. Other, more pressing,  projects keep pulling me away, but this is the one I fall back to putter on, when I have time.

As part of my challenge to clean up all the loose ends around here, I'm attacking the project with renewed effort. To get back in action, I need to make four drawer  fronts.

Initially, I was going with flat, recessed fronts. I even have them cut to size and sanded. The problem is, they simply look too plain. I wanted something a little more interesting.


Plain, like Saltines without the salt. Boring.
Eventually, we hope to redo the kitchen with shaker style doors. I decided to take a crack at them for this project. 


Now, if you actually want to do it properly, check out John's video from Our Home From Scratch. He has a great video on making Shaker doors properly, with tongue and groove assembly. Unfortunately, I don't have a dado (wide cut) blade for the table saw and my test attempts with my narrow kerf blade were tedious and gave less than great results. The normal router route won't work either; I don't have a router table or the proper bits. So, I'm not going to do it properly.

I've come up with my own quick and easy method. I think it's going to work. 

I'm using poplar, since it's affordable, durable and easy to work with. To save time ("quick"), I purchased 1 ½ " x ¾" stock to make the stiles (vertical) and rails (horizontal) rather than ripping boards on the table saw. I used my big, Sliding Compound Miter Saw which made it an operation of absolute sawdust-spewing joy, but it could be easily done with a miter box and saw or whatever other precision cutting methods your evil brain can devise. I mass-produced the cuts, using a stop block clamped to the fence for repetitive precision in my pieces. I was done in minutes.

An operation of absolute sawdust-spewing joy. 
Quick tip:  When I have the tool set up and am making precise, repetitive cuts, I often make several extra pieces, if I have enough wood. It saves heartache later when, I inevitably pull some lame-brained move and screw up a piece (...which I did do).
Here's where I take a weird turn, away from conventional construction methods. I routed a "rabbet" in the back side of each piece. A rabbet is a like a dado but is missing one of the shoulders. Its just a recessed notch. However, a rabbit is nothing like a dodo.

On woodworking joinery, extinct terrestrial avians, and common Lepus currpaeums:


I made a makeshift router table, probably not my finest safety moment,... definitely not my finest safety moment. 
Don't try this at home,... or at work,... or in a restaurant,... or in the shower.
I made the cuts with a straight cutting bit, assembly line style, in several passes. One deep pass would be too deep and would get unwieldy (especially with my makeshift router table setup). There was no need to risk my fingers, trying rushing it through to quickly. The rails (horizontal) got a rabbet their whole length. The stiles got a rabbet that didn't show through on their ends. 

A freshly prepared rabbet.
A glued butt joint might hold, but it wouldn't be exceptionally strong. Since our home is infested with rough-and-tumble children, I beefed it up with pocket holes and screws. I assembly lined all the pieces through the small, but mighty, Kreg Jr. Pocket Hole Jig .
.


All the parts of the frame are complete. Time for assembly.


It was a standard glue-up. I use those cheap little welding flux brushes to spread it evenly.  


I clamped it together temporarily and drove fine-thread, square drive screws from my Kreg Pocket-Hole Screw assortment. This step was done on my miter saw bench, because it's really flat. My MDF workbench top is a gouged, bumpy surface from years of spills and abuse.

I was pleased to have spare pieces; exuberance with the impact driver split the hell out of one.


Of course, speaking of spills,... flopping clamps, hammer taps, and an impact driver didn't agree with my fresh cup of coffee. Another reason to use the miter bench, the melamine coating is good for cleanups.

I'm just glad I didn't knock my beloved Bad Ass coffee mug off the bench.
Sweet success! The clamps came off as soon as the screws were in. 


When they dried, I took them over to the disc sander to even out a little of the imperfections at the joints,...

I only took a little meat off my pinkie knuckle. 
...to the random orbital sander to smooth out the face,...


...and finally to hand sanding, for final finish and to ease the sharp edges. 


Once again, continuing my veering off the beaten track of proven assembly methods, I'm using a technique I found to install glass panels in frames. Instead of glass panels, I'm using 3/16  inch thick plywood panels. 


Using a stiff putty knife, I drove glazing points into the frames, pinning the panels in place. The gap allows for expansion and contraction of the wood. 


With all the glazing points in place, the panels are super tight. 


They don't even move when I pry with the putty knife. I think (hope) it's going to hold. When it's attached to the drawer, there will be even more pressure pinning it in place.


Since it was a lovely December day, I took them out to the driveway to spray them with primer. I keep a couple big, leftover Styrofoam blocks around for this sort of thing. Propping the pieces up on toothpicks lets me get the edges.


It was at this point I realized three things:
  1. That is some seriously dark primer. Painting these things white will mean more coats.
  2. In my zeal to get the panels in, and concentrating on setting my camera, I had lost focus and installed a couple of the panels backwards, rough, un-sanded side out.
  3. Idiot.
With the backwards panels it's going to take some more filler and sanding to to get these rascals smoothed out for final coat. But I think I have a decent solution for Quick and Easy Shaker drawers. We'll see how they last in the long run. If I have to re-do them later, it's a simple swap out.


Followup notes.
  1. On quick and easy: It was both, quick and easy but the many outfit changes (I'm a Grand Master of wearing solid color T-shirts) and the changes in lighting in these photos betray me. I picked away at this over several days, stepping out in the garage for a few minutes here and there between doing other stuff.
  2. Before mass producing the four fronts, I used the old Norm Abram's New Yankee Workshop trick of building a first pre-production copy. I worked out the problems and played with the technique before committing to building all of them. You'll see this mystery prototype in the background. It's assembled without glue, just the screws, but it's holding tight.
Eyeballing the prototype piece on the actual project.

Simple, easy, and inexpensive. What do you think?