


We're re-installing the base molding in the living room of the AZ DIY house, now that the room is painted and the new floor is in. If the floor is the new shoes of the room, base molding is the pants. Rather than having the low, saggy pants-around-the-ankles look, by replacing the 3" builder-grade stuff, we're pulling up those drawers with a mighty, 5 ½" tall molding.
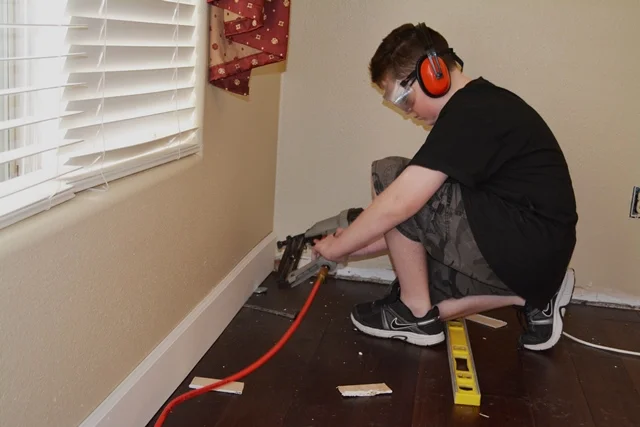
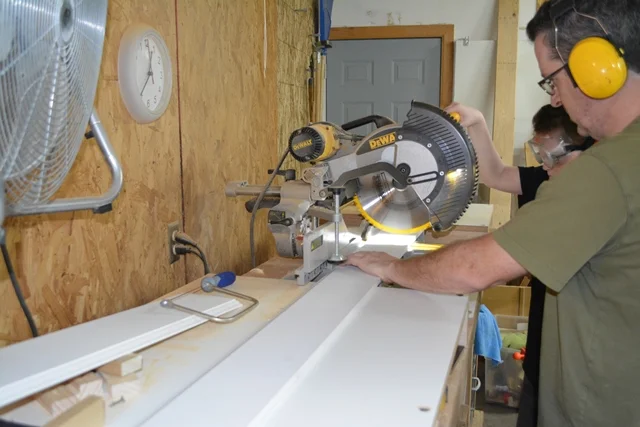
Jack (13) joined me for this part of the project, intrigued by the notion of using power tools and a nail gun.
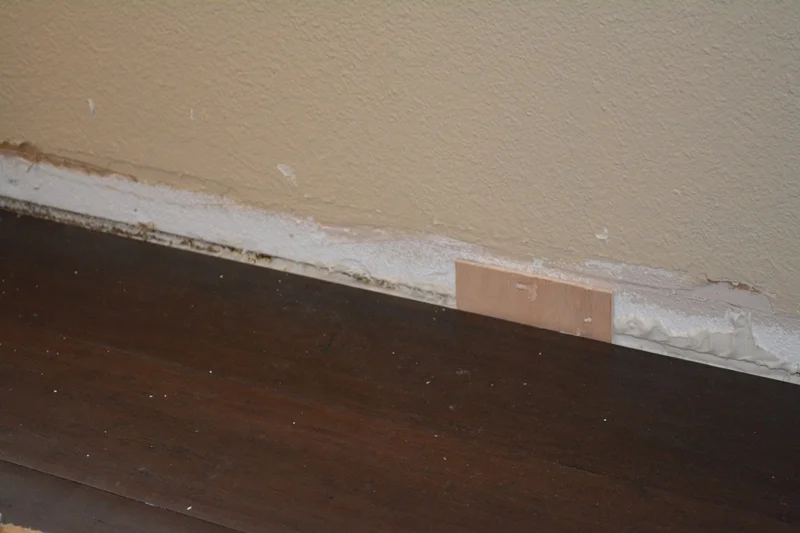
We started the day attempting to install the front, outside-wall molding. This is significant, because it also happens to be the exact same wall where I started installing the bamboo floor planks. I'd used wooden spacers (to allow for expansion of the floor) when I'd glued it down, with super strong urethane adhesive. I'd pulled them out when the floor was in place, before the glue dried,...probably. I now think a sneaky and mischievous night-time gremlin had crept in and cruelly stuck the spacers back into the globs of wet adhesive. It's the only explanation, because I couldn't have possibly left them in there for a week, while the adhesive hardened and encased them in a death grip,...right?
Damn gremlins.
When I find the idiot that glued this in...
Naturally, we started the day hammering on wooden spacers, prying on wooden spacers, chipping at wooden spacers, and ripping wooden spacers from the clutches of well-cured urethane adhesive,... all according to plan.
We laid the base molding on a couple washers, spacing it for vertical floor expansion and started shooting 2" finish nails through the drywall, into the base plate. Since it's a tall profile molding we shot higher altitude nails in at angles, like a "V" or "X" to allow them to grip into drywall where there was no in-wall framing to hit.
Kill shot!
Jack's shooting skills were on the mark, obviously well-honed by his many hours of Halo and other X-Box first person shooters. He did not have to put any grenade lobbing skills into practice on this project, but he was ready.
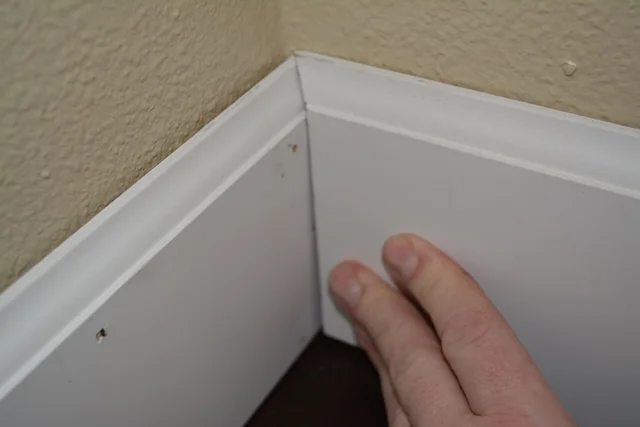
We butted the first run tight into the corner. A 45 degree miter joint just wouldn't cut it (no pun intended). That approach would have suggested a nice 90 degree corner in this house,...riiiiiiiiiiiiiiiiiiiight. I can't even blame this beauty on my half-blind, drunk DIY Predicessors. This feat of modern architectural precision is pure tract-home framing genius, from the original builders. I think they were still trying to figure out degrees of angles using the metric system in 1979 when this place was built. (Milli-degrees?)
A precise, nearly 90 degree-ish corner.
I used the "coping method" to back cut the joining corner piece into place. It's the more professional approach and can adapt easier to weird angles in old homes, without opening up as noticeably when the house moves. I can almost pull it off well. Rather than explain it, I'd rather send you over to the Grand Master of Molding, Tom Silva of This Old House.
He patiently explains the method (on crown molding) and makes it look like child's play. But then, Tom can whittle a perfect, tight-fitting joint out of solid oak with a bent butter knife, one arm in a sling, and an eye patch over both eyes, in 44 seconds.
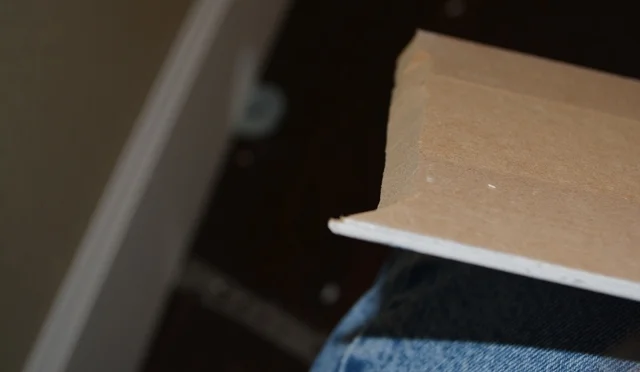
A fresh coped joint, dude.
It fit absolutely perfectly, ... for some caulk to fill later.
I still need some practice, but it is good enough for paint grade,... behind furniture,... when viewed from the street. Nahh,...It actually looks great, but I would be hesitant to try it if I was going for a stained wood finish. I'm not quite that skilled yet.
"Nurse, hand me the caulking gun"
Of course, the walls are about as straight as Liberace, so it's going to take some caulking to get a good finished edge with this tall profile base. Jack and I moved around the room at a pretty good pace. He really enjoyed taking the miter saw for a spin (no pun intended). I let him do all the straight cuts, but I wasn't ready to release him to bevel cuts yet. There's just too much of that spinning 12" blade exposed for Dad to feel comfortable. I think it's a parent's duty to let a kid make it to at least 15 years old before they lose their first finger.
That's a damn fine looking clock installation up there isn't it?
I bevel cut 45 degree "scarf joints" when joining two lengths. Compared to the coping joints, I did really good on these. Of course, it's probably due to the fact that I cut it with a good, power miter saw, instead of a hand-held coping saw with a tiny blade.

Scarf it up!
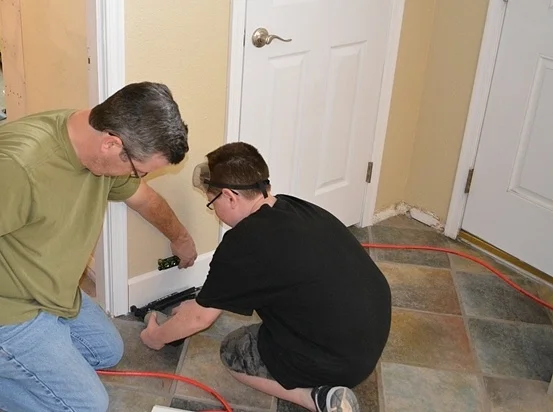
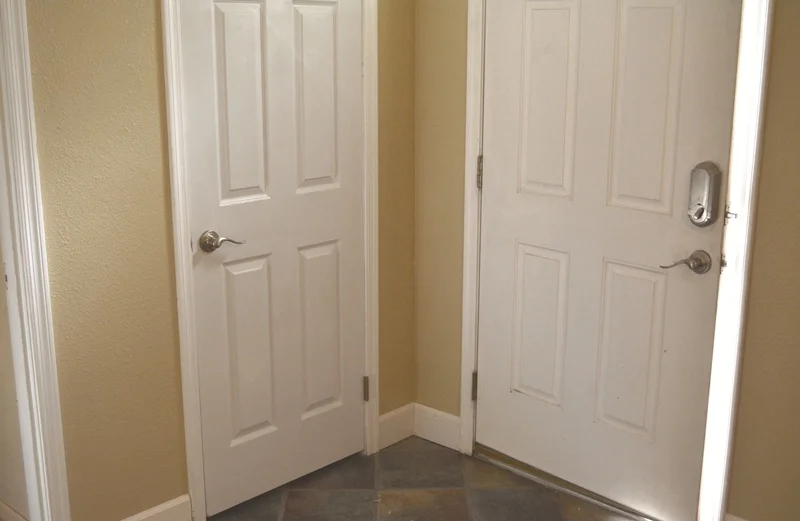
We cruised around the room, finishing up the last little bits around the doors.
To clear up any possible confusion, I'm the one with the dusting of gray hair (like George Clooney).
This was a fun project. Working with my son was a good time. We joked, laughed, and shot plenty of nails. I was about his age when I started helping my dad on home projects (but we didn't have a nail gun). I hope he's starting to pick up the confidence that he can to do stuff himself, like I did at his age.
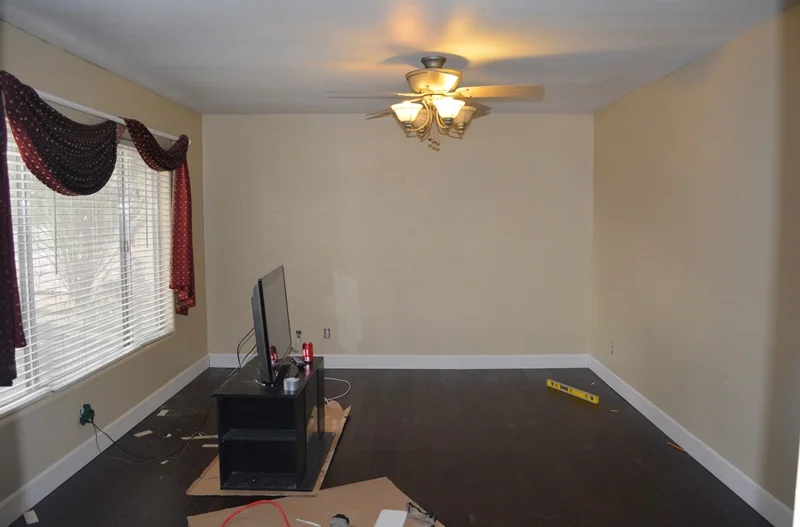
The molding is still wearing its factory primer and is full of nail holes, but you can already see how its going to look. It's starting to come together! In the front corner. the neater, lighter paint job, the fresh new closet door, and the base molding really brighten the place up.
Next time, Crown molding! Bam!