

Patio Remodel: Episode 11
The original patio cover is demolished, the roofing is a hanging flap, and the giant 31” concrete footer cubes are deep in the earth. The original, dilapidated wood and corrugated fiberglass structure was held up by six, big 6x6 posts, a 20 foot 6x6 beam in the middle, and lots of framing. One of the supports was smack-dab in the middle of the patio.
No more. The new patio cover will share the same footprint, roughly 20 feet by 20 feet, but it will be held up by only two, steel support posts and beam at the far end. There is no snow-load to worry about here, so it can work.
Although I still had plenty of work to do on the roof edge, I couldn’t stand it any more. I just had to start actually building something.

No shade whatsoever
I’d ordered the whole Alumawood system from Patio Kits Direct (non-sponsored). Along with all the material (now stacked in the backyard), they’d designed and engineered it for me as part of the deal. Each installation might go a little different based on individual design, but the basics are pretty similar.
The first bit of a new, above-ground structure would be a support post. Our design had the post inset in two directions from the edges about a foot and a half. I measured in from my string line and from the house, snapping a chalk line on the spot.

Getting snappy
My X-mark’s-the-spot, was where I needed to attach the post. The instructions would have allowed me to sink the post into the concrete, back when I poured the footer, but I just didn’t want to deal with all that at the time. It had been the first time I was doing such a big concrete project. Mixing, pouring, and leveling the concrete while worrying about returning the rental mixer on time was more than enough.

X-mark’s-the-spot
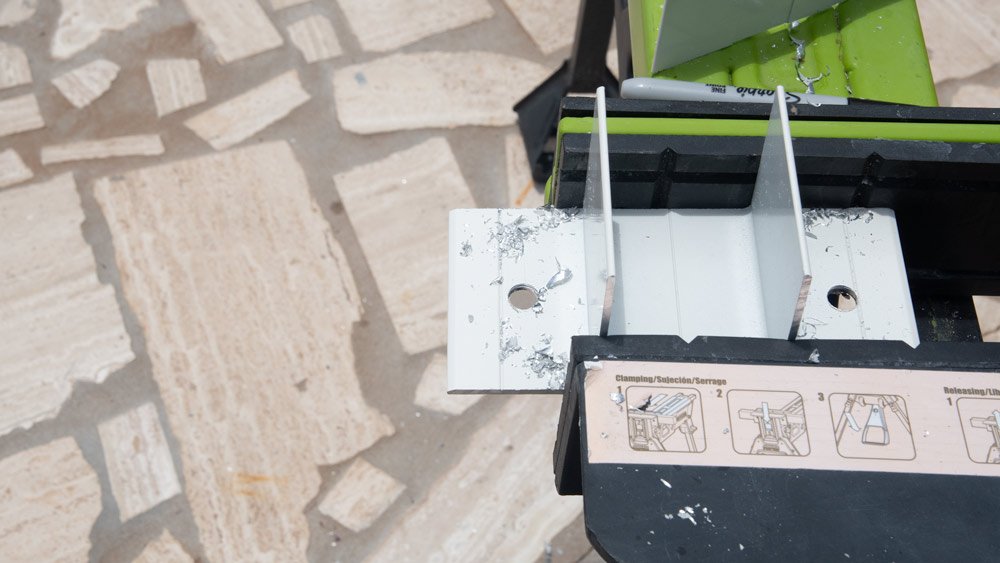
To attach the post, I’d use a bracket provided with the kit. It was an aluminum piece that had a couple of vertical wings to slip up inside a hollow, steel post.

The first piece
To prepare it, I just had to pop a couple of holes through the outer edges for fasteners. I clamped it in the Jaw Horse and drilled it through with a 3/8” bit.
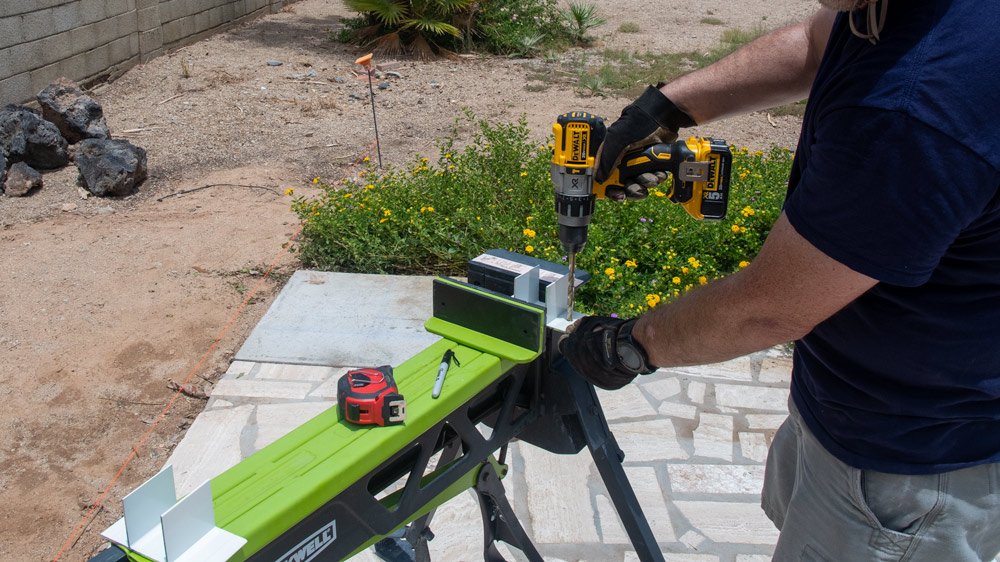
Since the holes were rather large, I passed over my cordless hammer-drill and brought out the big SDS, corded beast you last saw with a chisel bit, when I’d dug the footers. I drilled the holes slightly deeper than the anchors I’d be using.

Using the old shoe clamp trick
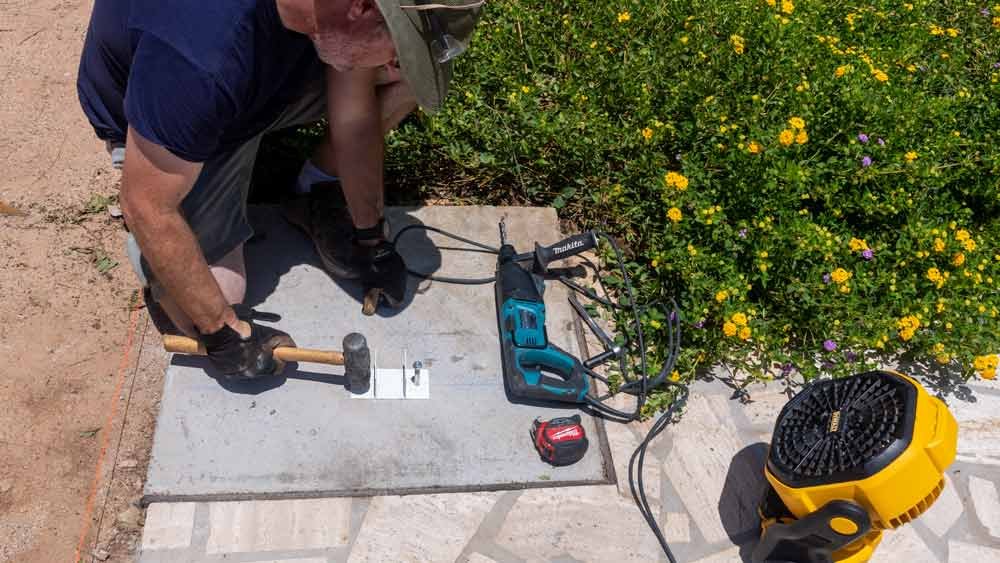
For the fastener, I used a drop-in wedge anchor, with a threaded bolt top. By tightening the nut against the washer, it would pull the flared bottom of the bolt up through an outer jacket, against the sides of the hole. It would not be going anywhere; these things are stout.

The mighty anchor
I dropped the anchor through the bracket and into the holes, gently tapping them in place with a hammer. In one of my rare feats of not using power tools, I tightened up the nuts with a ratchet.

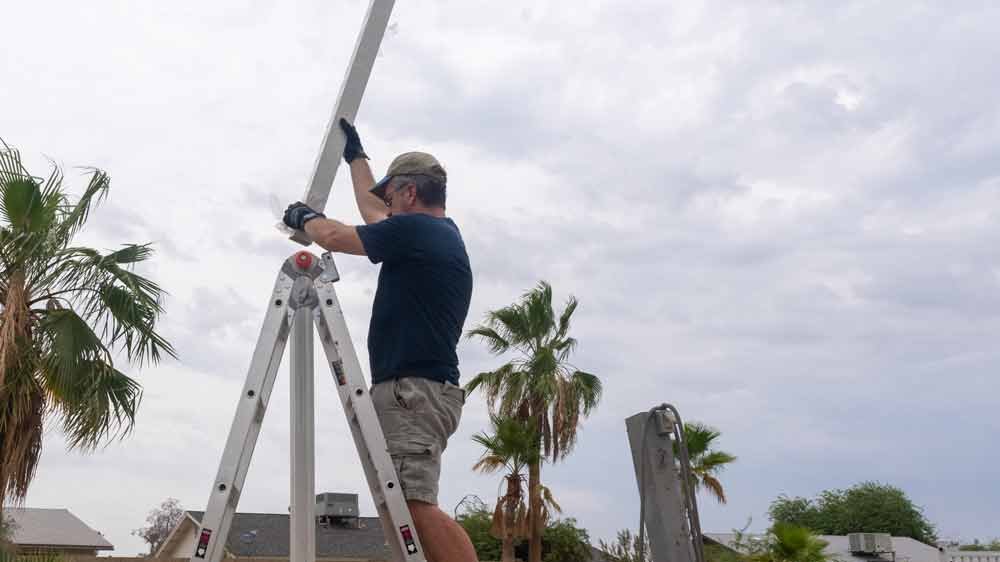
The steel post was much taller than needed. To begin to figure out where to cut it, I slipped it onto the bracket and put the level to it. It fit snuggly and stayed vertically in place on its own.

Things are looking up around here.
I used my laser level to shoot a line level with the hanger I’d attached to the house. At least it was cloudy enough to barely see the indoor laser. With that, I could measure down to the point I’d calculated to obtain the proper slope for water runoff.
Since my installation would be using a double beam, sandwiching the post instead of a single beam sitting on top of it, I marked it at the final height the cover would be sitting.

Squinting with a Sharpie
The Alumawood kit is, of course, aluminum. But the weight of such a large span needed to be born by twin, clover-shaped, 3 x 3 steel posts. Again, I decided to forgo power tools, my reciprocating saw has a tendency to wander through a cut undesirably sometimes. I chose the hand-held precision offered by a friendly hacksaw.

Merry sawing
The textured, aluminum cover that would slip over the steel, however, got a taste of the circular saw. Aluminum is soft enough to use my carbide-tipped, wood-cutting blade.

A quick cut.
I sheathed the post in the aluminum cover, and climbed down to fasten it in place.
Comfortably back to stone-cold power tool mode, I drove #14 x 3/4” tek screws through the cover, the pole, and the bracket inside. It was stoutly attached and would later brave some most beastly summer monsoon storms without the slightest waver.

You gotta love an impact driver.
The white column rose majestically towards the increasingly cloudy skies, keeping a watchful eye over the piles of material that would make up the rest of the patio cover.

Glorious. I still have so much work to do on the house to make the roof shipshape, but a first step of actual construction really makes me feel like the project is becoming reality.
