


I'd been struggling to know what time it was in my workshop. I'd grown tired of fighting my cell phone from my pocket, just to glance at its brilliant, illuminated screen and shove it back, after seeing it's not quite lunchtime yet. That's not an easy undertaking, with dirty, often paint spattered hands. It's time, my friends; I've made the decision to invest in a permanent, wall-mounted clock.
Since this is my workshop, my man cave, where I spend countless hours slaving over projects for the family, I decided it fitting that this be a high-end time piece. Obviously, everyone knows the finest timekeeping on the planet is meticulously crafted by the Swedes. So, naturally, I returned from an excursion to our local importer of quality, Swedish goods with a gorgeous example of their renowned work. It was a brilliant piece, with a white face, a crimson second hand, and crisp, black hands and numbering. It was a glorious product of Sweden, crafted in China.
Good God. It's Beautiful.
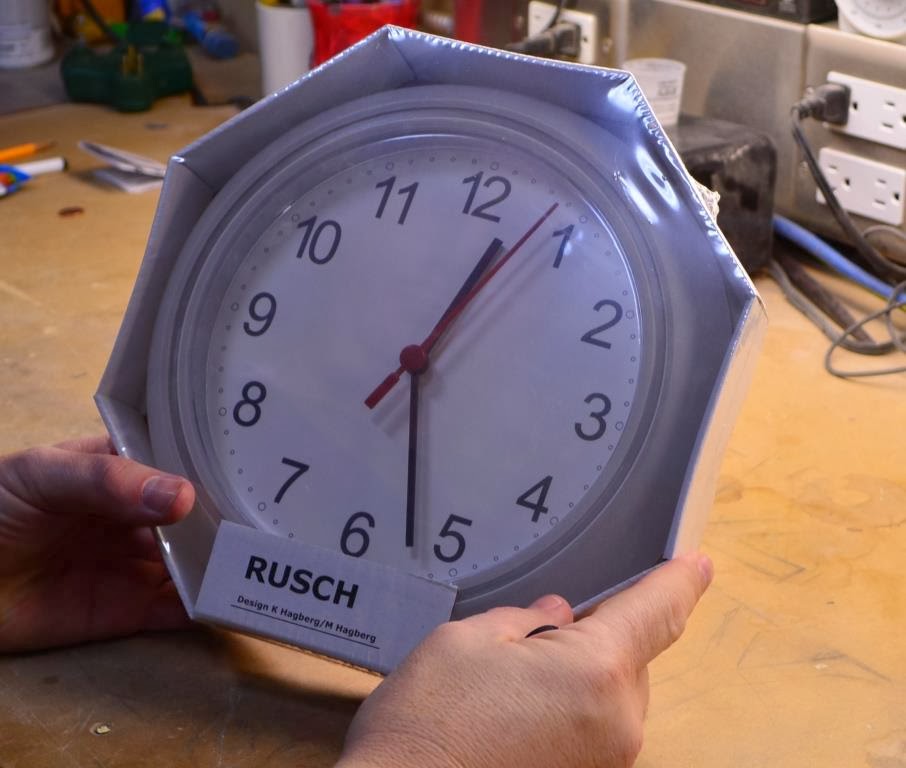
"Rusch" translated into Swedish, means "Premium Clock, by IKEA"
A clock is not something that should be installed as a Neanderthal would adorn the wall of a cave. You can't just slap it up on a nail*. Clock installing is a serious business, for serious people. Placement is an exact science. It must be readily visible from all working locations in the room. I chose the back wall, after thoughtful deliberation and faithful application of the scientific method. Rough location was determined by carefully pulling a horizontal measurement...

Amateurs should not try this one-handed. I'm a pro.
...and a vertical one, from the ceiling.
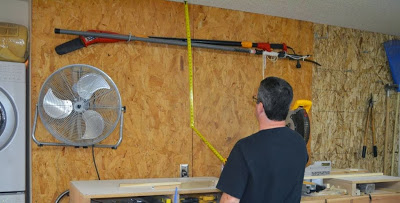
Remember to account for the deflection caused by your pole saw collection.
I knew only had one shot at this. Precision was paramount. Installing the mounting hardware in the wrong location would be catastrophic, since the resulting removal of an incorrectly installed screw would mar my pristine Oriented Strand Board (OSB) wall covering. Lord knows this material isn't free (full disclosure- two of the three sheets were actually found free, in the shed). Since I needed to lock in the exact location with laser accuracy, I used a laser,...for accuracy.
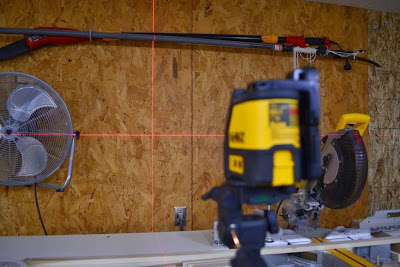
"Luke, you've turned off your targeting computer"
With the center located, I carefully marked the location with a pencil. This was important since pencil could be erased if I missed. I didn't want to mark the OSB unnecessarily with a failed attempt.

If this was the Death Star, it would be where you shoot your proton torpedo.
Then came the exciting part. I got to extract the fine timepiece from the safety of its protective cocoon. Without the slightest hesitation, I slipped a fresh, sharp blade in my utility knife. The expense of a blade is inconsequential compared to the risk of a dull blade catching and tragically slipping into the clock face, ruining it forever.
Steady my friends,...steady.
With the packaging laid open, I paused and inhaled the deep aroma of fresh plastic polymer that had last been sensed by humankind on the other side of the planet, in a high-tech Chinese factory. Who knows how long it had been secreted away, in ocean containers, trucks, and back stockrooms before I laid my hands on it. I knew how other brave pioneers like Neil Armstrong must have felt when they first smelled the fresh air of their discoveries.
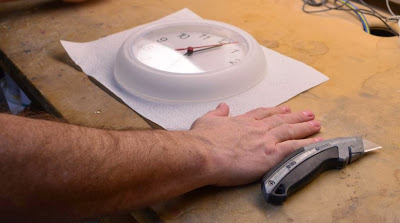
Beautiful, flexible, translucent plastic.
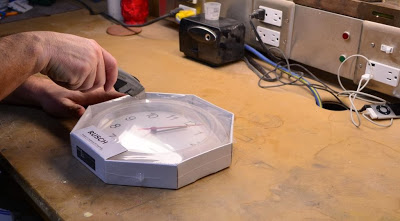
I gently, gently laid the clock on its face, protecting it with a soft, disposable towel. Here's where it got complicated. Complex math was involved. Try to keep up, but feel free to refer back to this article or contact me directly if you need help when you attempt your own install. First, I determine the total diameter of the clock, 9 1/2 inches (24.13 cm).

Then, I carefully measured to the center of the mounting hole, from the top of the clock. It was an even 2 ½ inches (6.35 cm) below the lip. I carefully recorded the measurements on a Wear-N-Write, wrist mounted white board, for easy reference and hands free calculating.

I completed the complex calculations on a project calculator. (9.5" / 2) - 2.5" = 1.75" (1 3/4" (4.445 cm))
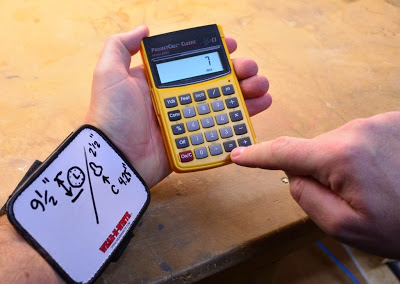
I had mathematically determined that needed to install my mounting hardware precisely 1 ¾ inches above the mark I had made earlier. I transferred the measurement, scribing a second pencil mark only a mere quarter of an inch below a full two inches above my initial mark.
This was precision tool work, requiring micro calipers, not the sloppy approximation offered by a common tape measure.
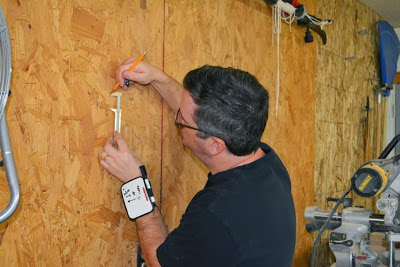
I'm embarrassed to confess that I don't own a quality, precision protractor to set the angle. I had to line up my 15 degree approach with a plebeian rafter square, like a barbarian. Forgive me for my sloppy technique, but DIY is a craft of creative problem solving.

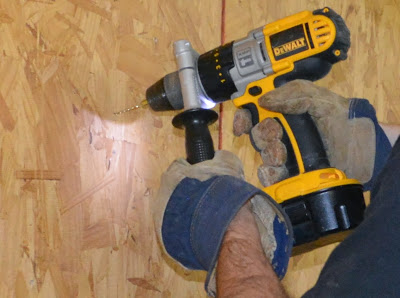
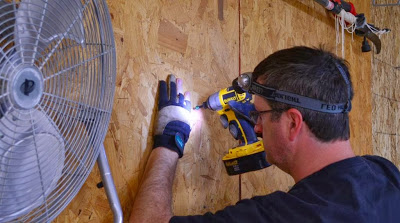
Enough prancing around like a dandy prince with diminutive hand tools, it was time for some heavy lifting. Power tools must be unleashed! Since penetrating OSB is not for the weak of heart, I recommend a heavy-duty cordless drill with an added fore grip for stability. A hammer drill option is preferential; be prepared. Don't skimp on the Personal Protective Equipment (PPE); heavy, cuffed work gloves, hearing protection, safety glasses, steel-toe boots, shin guards and a cup (gentlemen only) are the de rigueur of the moment. I made sure Sweetie and the kids were well out of range and let the 1/8" razor sharp bit tear hungerly into the wall sheathing like a rabid dog. It was over in moments. If there had been smoke, it would have slowly cleared. The pilot hole laid the wall open, revealing the darkness within.
At this point, it was time to take a break and recharge. Shaky hands, wet with nervous perspiration were not good for the challenges ahead. I recommend a completely natural, yet processed source of nourishment and rejuvenation, preferably molded into real, miniature food shapes.
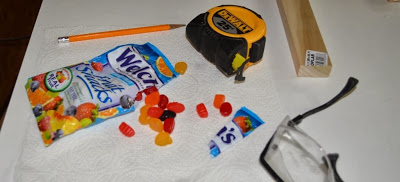
Don't forget the paper towel, lest they get "icky"
Not resting too long, because there was a lot more to accomplish, I shift into kit more suited for the installation of the hardware, just light work gloves and a LED head lamp. Holding to the 15 degree angle, I ran a 1 ½ " drywall screw carefully into the pilot hole. The heavy hammer drill would be out of class here; the rapid beat of an impact driver took the screw gently home, stopping just a ¼</center>" proud of flush.
Steady,... steady....

This must be exactly how it looks, or the project will fail.
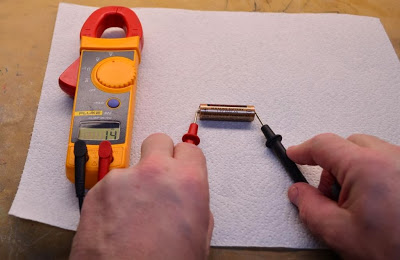
Moving back to the workbench, it's was finally time to prep the guest of honor. It called for a 1.5 volt DC power source, size AA. My initial selection tested to be a total failure, only 1.4 measly volts. Discouraged and feeling useless, I considered scrapping the whole project and taking a nap.
I thought of the great minds ahead of me, who didn't just didn't quit: "Would Jimmy Carter have invented the peanut if he quit?" "Would George Washington discovered Delaware if he had quit?" Would The Ayatollah have invented Rock 'N Rolla if he had quit?" The answer to all, of course, "no".
With renewed purpose and determination, I returned to the task. I carefully selected the next specimen, a real beauty. GOOD GOD! They had harnessed a mighty 1.6 volts of direct current! It exceeded the manufacturer's expectations by an incredible 6.25%. I WOULD BE TELLING TIME THIS DAY!!!

Oh yeah, refer to AZ DIY Guy's Scary Warning - Electrical Edition before attempting any electrical work on your own.
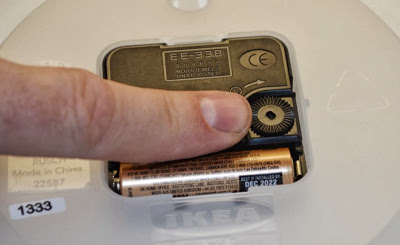
I flexed my dexterity muscles and installed the battery with steely-eyed, steady-handed precision. There were no mishaps, no injuries.

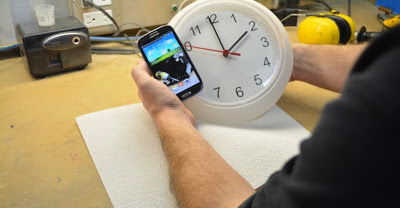
The Swedish / Chinese beast roared to life with a mighty "tick",...closely followed by another,... and another. It lives! I'm not one to celebrate too quickly. A quick visit to the atomic clock (www.time.gov) verified my mobile device accurate. Then it got tricky; this tiny, little, miniature, diminutive wheel must be rotated, very carefully to set the time.
To make it extra tricky, you have to turn the wheel, while its completely out of sight!
Somehow I managed to make the adjustment while simultaneously watching my cell phone display AND the hands of the clock. I stopped the adjustment when the hands depicted the actual time of day, in my timezone.
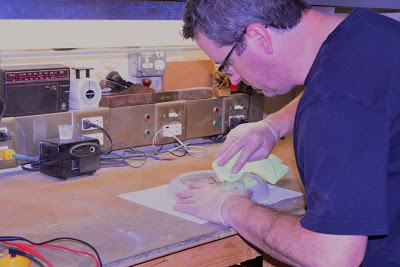
I wonder how our Grandparents did this step. I'm man enough to admit I had to sit down on the couch for a moment and drink a Gatorade to steady my nerves. Solely in the interest of full disclosure, it was Tropical Fruit flavor, with no artificial flavor or color (Gatorade is not a sponsor of this post, I chose it without any outside influence). Returning to the battlefield, my steady hands and focused gaze were once again called upon as I cleaned the unit with a microfiber cloth, careful to keep fingerprints from marring the gorgeous, clear face.
Again with the steadiness. Finally, it was time. Time to dock the clock with the preparations that had been made for its new, eternal resting place. It required one last maneuver of steady-handed workmanship to mate the fine timepiece's integral hanging bracket with the perfectly round screw head waiting anxiously for its mate.
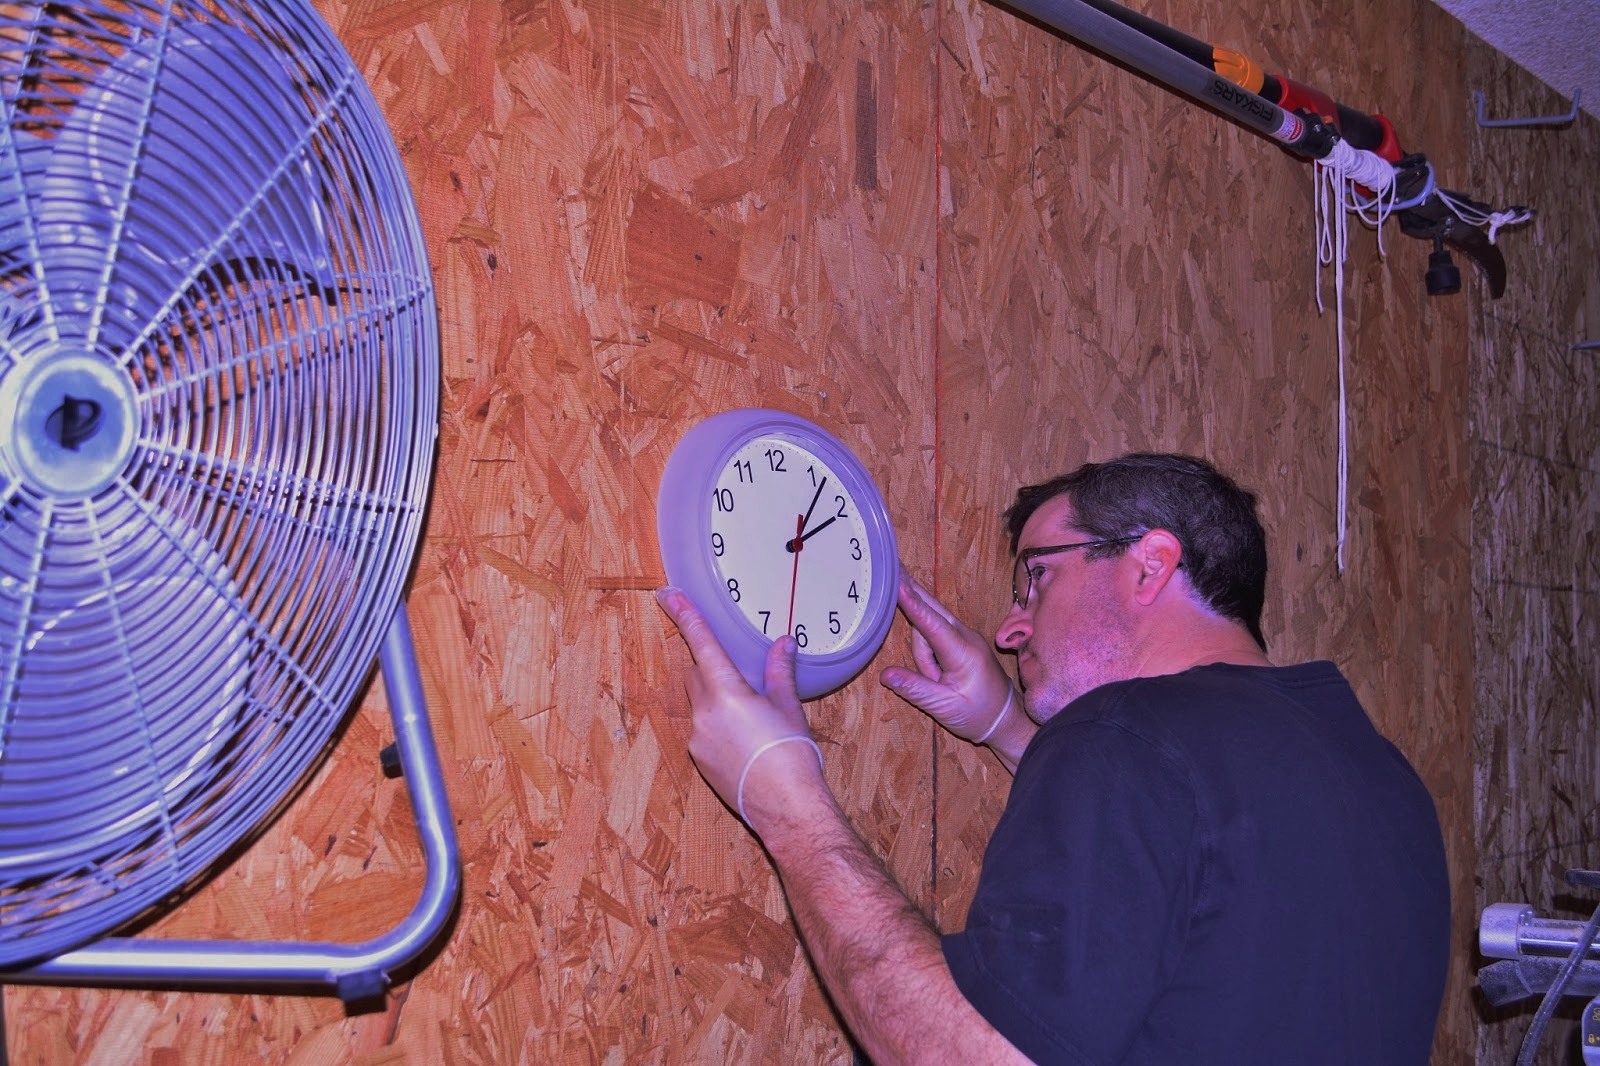
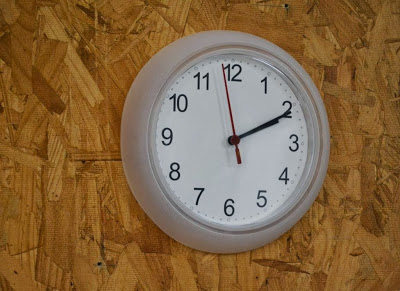
Complete. REVEAL TIME!!! The breathtaking beauty of the fine, almost perfectly circular marvel of modern time keep-ery as it rests on the shop wall, framed by a pole saw, a floor fan, and a compound miter saw on its bench cannot be fully conveyed by modern photography. But I'll try:
It's ok to cry.
I apologize for skipping past some of the more elementary steps in my brief description. Let me know if I can answer any questions, should you contemplate an advanced timekeeping project such as this one.
I was lucky to have a few of the tools and materials I used, but I've worked up a list in case you need to pick them up for your project.
- Heavy Duty Cordless Hammer Drill
- Cordless Impact Driver
- Battery & Charger for cordless tools
- 1/4" hex shank Magnetic Impact Driver bit (#2 Phillips)
- 1/8" hex shank drill bit
- Utility knife with speed change option
- Razor blade
- 25' professional grade tape measure
- mini precision calipers
- construction calculator
- disposable paper towel (2)
- Fruit Snacks
- pencil
- Pencil sharpener
- Horizontal and Vertical line laser
- Tripod
- 1.5 volt battery, type AA
- Digital Multi-Meter
- Wear N Write
- Rafter Square
- Needle Nose Pliers
- 1.5" drywall screw (coarse thread)
- Safety Glasses
- Hearing Protection
- Gloves (Heavy, Medium, and rubber)
- Work Boots
- Misc. PPE
This list should only run you about $ 750.00, chump change, considering the results you'll get. Imagine the thrill of bringing the neighbors over and showing them your fine new...wait...
...add $1.98 to cover the cost of the clock.

"Time is on my side, yes it is".
- Mick Jagger.

*UPDATE - I need to correct a statement from above. I've learned that clock installation CAN actually be accomplished by just slapping it up on a nail. My apologies for the error.
If you made it this far, thanks for reading. I wanted to celebrate my one year Blogiversary with the same style of hard-hitting exposé that launched it a year ago with Stubble: The Ultimate Power Tool. I appreciate all of you for your support of azdiyguy.com