


The Rusty Old Valve
Remember this ugly sucker from the last demolition post? This valve was hidden in the back of a corner cabinet I'd pulled out. It had been seeping water, probably for decades.
This little gem is what's technically known in elite DIY circles as a "Corroded Horror".
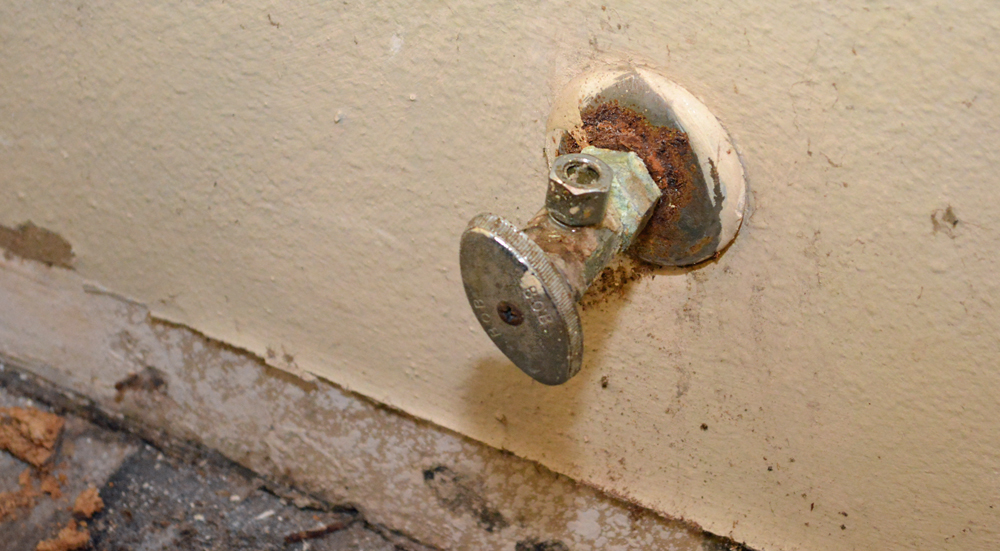
An unspeakable monstrosity
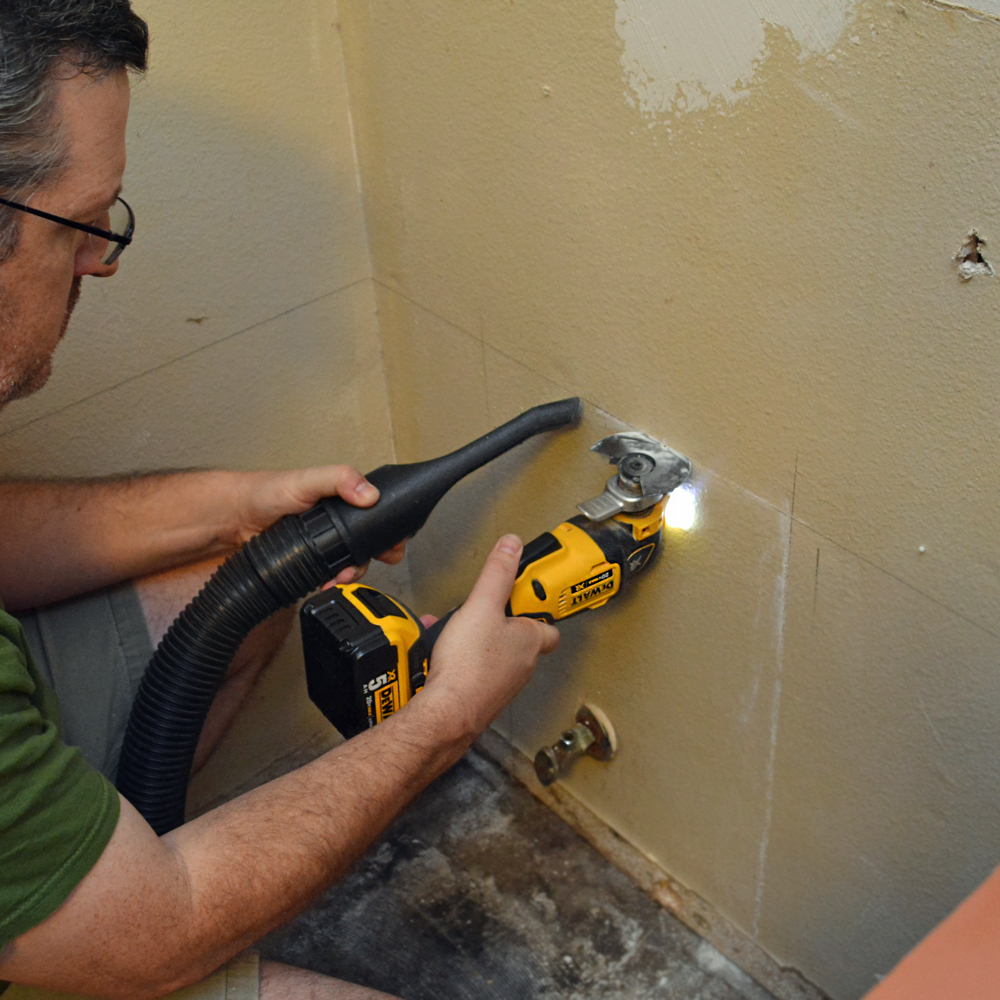
Rather than run a water line up though the hot attic or around the room to feed the water dispenser and icemaker, I'm hoping I can take advantage of this close source. It's currently positioned to stick into the side of a new pantry unit and would interfere with the slide out drawers, so I figured I could cut into the wall and run a new copper line to the new fridge location.
I did some exploratory surgery with my random oscillating tool, and popped a piece drywall off.
Since we're trying to do the project in small bites and keep a working kitchen throughout, I chased the oscillating multi tool with the shop vacuum to for suck up all the drywall dust as I made it. A tidy workspace is a happy workspace.

The existing valve and waterline looked even worse than I imagined. I can't believe it's wasn't leaking through a pinhole yet, like the mess I found in the bathroom wall a while back. At least the valve still turned. I was able to spin it a full turn, stopping the slow, seeping water dripping from the open connector.
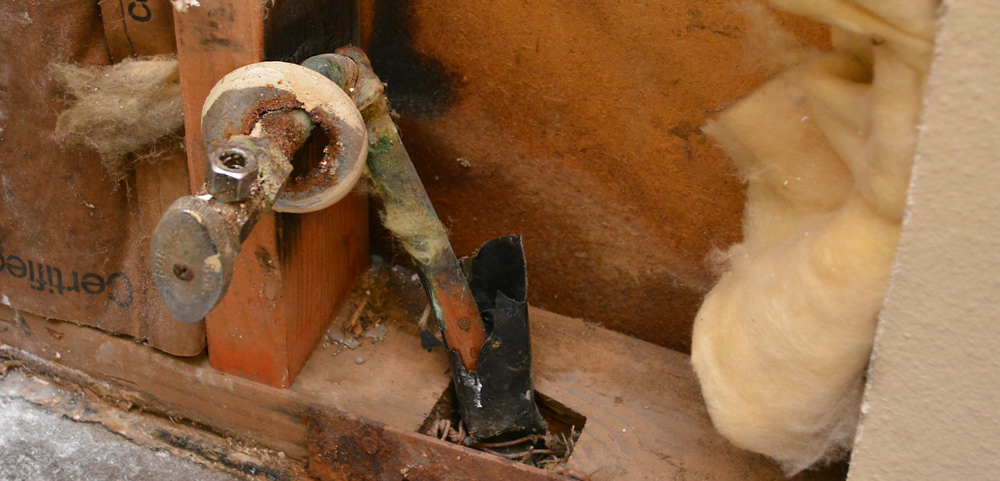
It doesn't get any prettier does it?
Prepping the Wall
I removed more drywall to clear a path to the new location and marked the studs, with a line at the same height along the base of the open wall cavity.
A spade bit with a threaded auger tip made short work of the studs. I plowed a series of holes in the straight path, horizontal to the floor.

Splinters, Sawdust, and Wood Chips, OH MY!
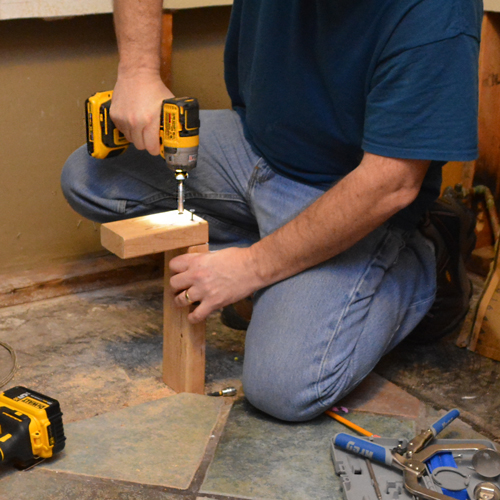
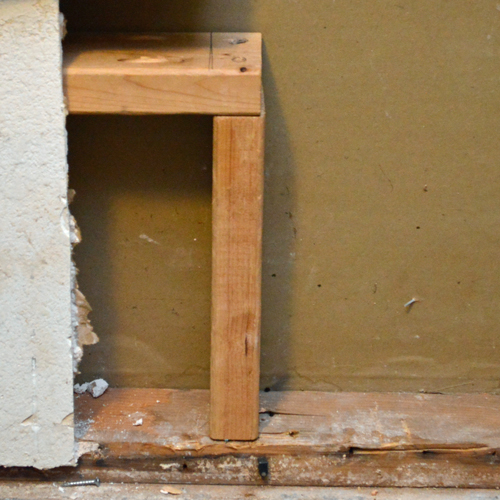
Next, I screwed together a couple scrap pieces of 2x4 together to make a simple frame to mount the new valve later. Pocket holes in the ends would let me screw it to the wall studs when I would slide it into place, but I left it loose to give me room to work on the plumbing.

Copper Tubing Time
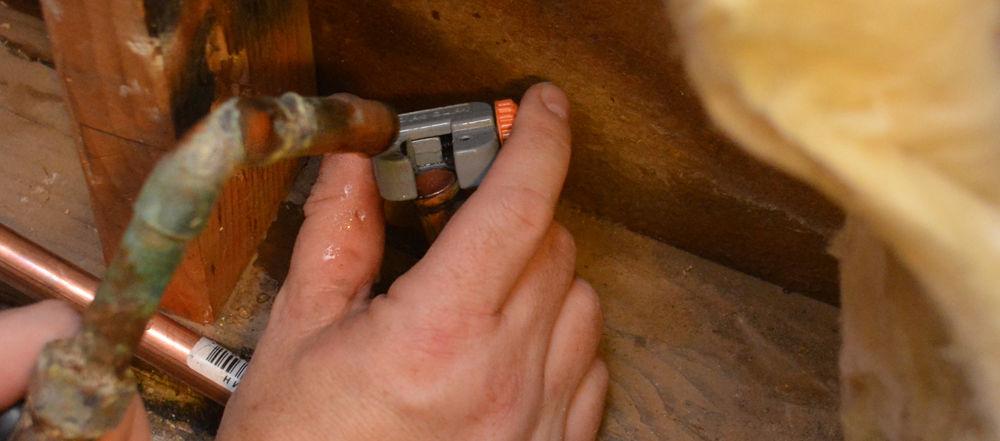
Prepping copper tubing is a piece of cake. I use a simple, rotary pipe-cutting tool to slice the pieces to length. alternating between spinning the thing around the pipe and twisting the cutting wheel deeper and deeper.. After that, this handy wire brush cleans the mating surfaces of the copper to a bright shine, inside and out.


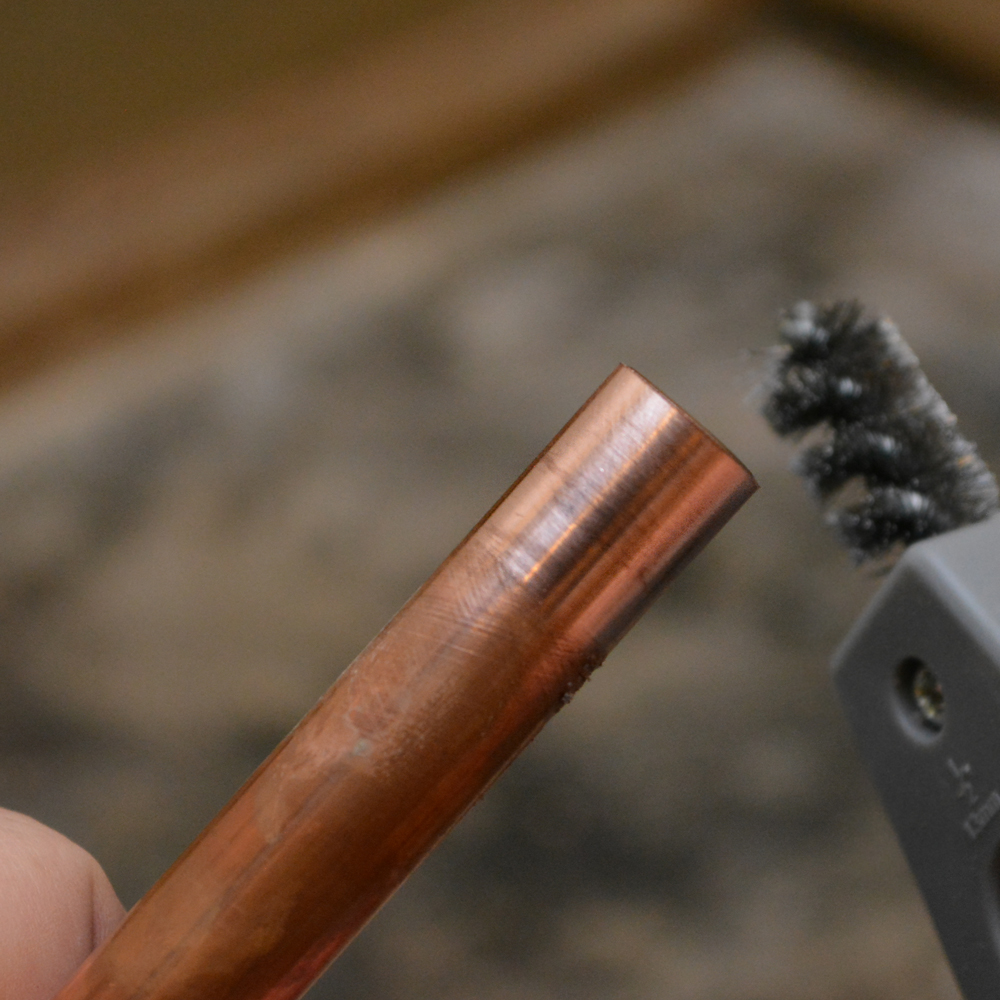

Each time a piece is connected, it's a potential for problems, I like to use as many complete pieces as I can. Copper tubing has a little bit of flex to it. It can be threaded through all the studs in one one piece, saving multiple soldering sessions, coupling smaller pieces together.

Notice how our 1979 home has studs spaced 24 inches apart, rather than more common 16 inch spans.
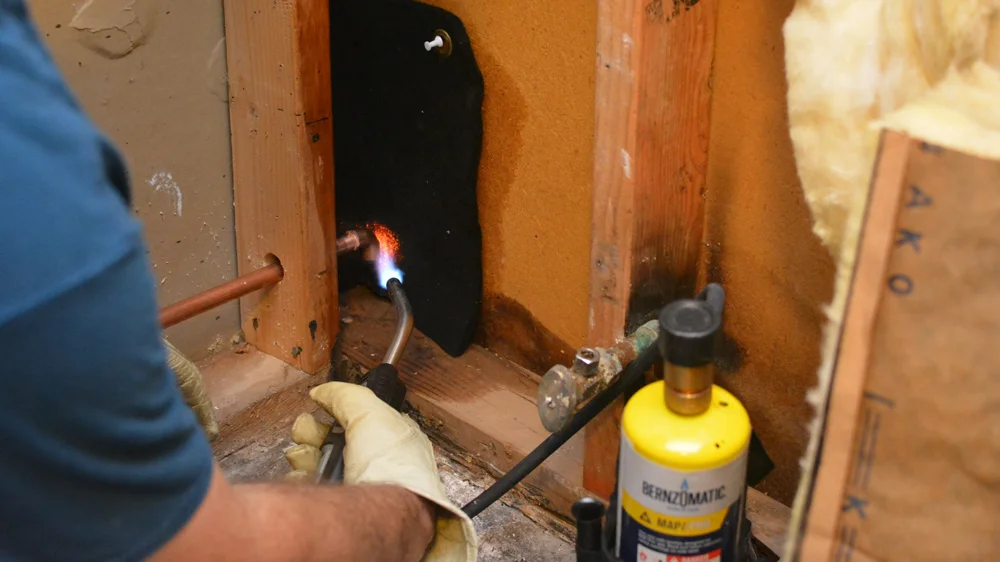
Don't burn the place down
In this case, my first fitting needed to get installed in a tight little alcove of flammability. It's a cozy pocket of well-dried framing, surrounded by the dusty backside of exterior siding and paper-backed drywall.
Not only is it flammable, but it's a tight spot too. Maneuvering one of my blowtorches in that tight space between the studs would be difficult.

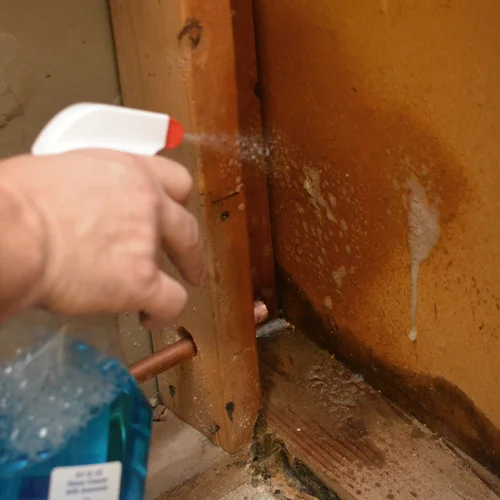
One of my favorite fire safety tricks to is to hose the area down with some cheap window cleaner. It's not flammable, it dries quickly enough and...it's cheap. A flame proof pad and having a fire extinguisher complete my triumvirate of protection.
I gave a light coat of Bernzomatic Plumbing Flux to the end of the conduit and inside the 90 degree elbow before popping the pieces together.

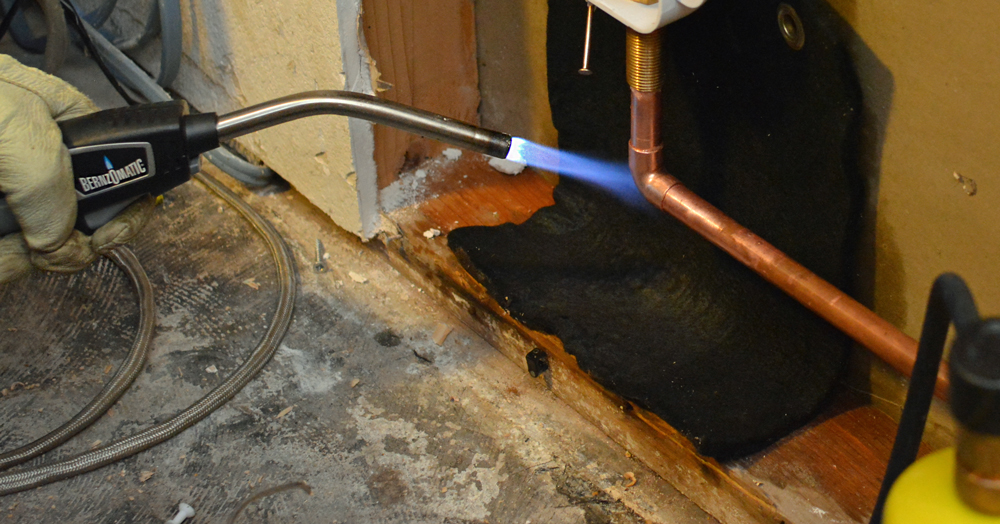
Bring on the Fire!
This tight little spot would be easy to access without the fuel directly attached to the torch head.
Using Fire to get Ice & Water
This post is sponsored by Bernzomatic. All experiences and opinions are 100% my own.
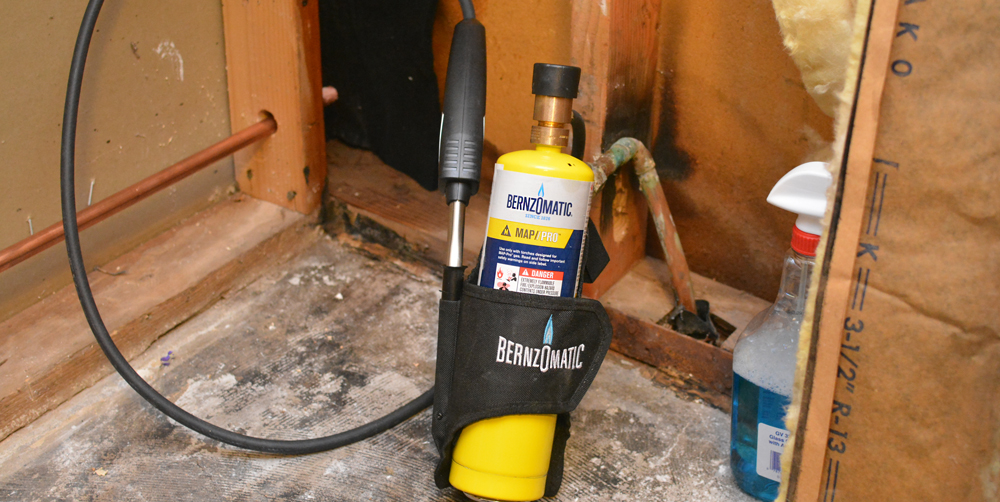
The Bernzomatic BZ8250HT Hose Torch for Accessibility and Mobility
I sparked the auto-start trigger and laid some heat on the elbow. I really like using hotter burning MAP-Pro fuel (in the yellow bottle) to Propane (in the blue bottle) for these projects. It gets the parts heated and the flux bubbling quicker. Once the flux starts to sizzle, I tap plumbing solder on the seam and watch it melt, geting slipped quickly inside and around the seam. The two pieces are fused together.

The rest pieces were ready and I had a fresh tank of fuel. Once I cut into a live water line, I couldn't stop until the run was 100% sealed up again. This was easily the most nerve-wracking part of the project. If one thing was to go wrong, the whole house would be without water until I got it all figured out and fixed. This is not something you want to chance on laundry day; I learned that the hard way.
I shut off the water valve to the house and cut the line. Go time!
The point of no return. We're fully committed now.
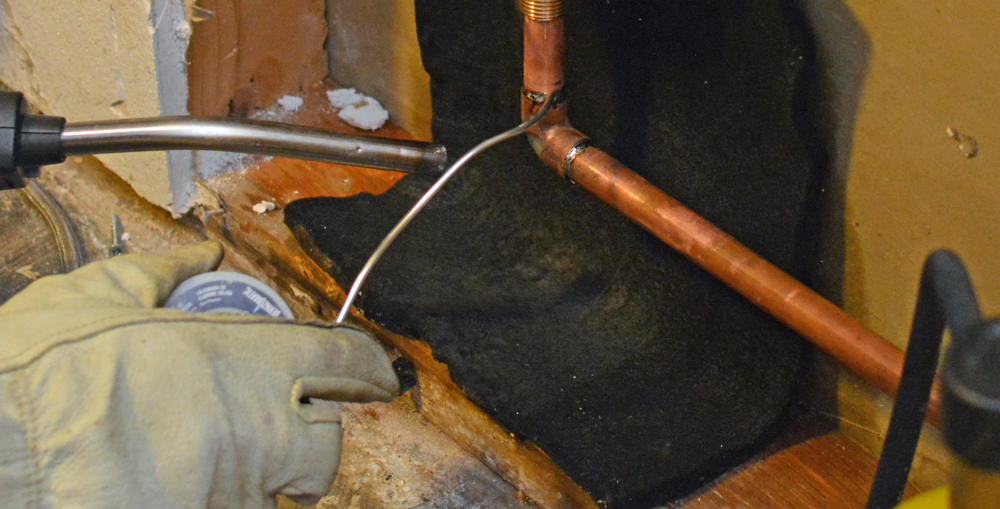
The pipe coming up through the slab was bent and at an odd angle somewhere between 45 degrees and 90. Although it had some flex to it, I was afraid of putting too much pressure on it and kinking it in a bad spot. If I screwed up bad enough, I'd be chipping down into the slab, or calling a plumber, at emergency weekend rates. No thanks. I needed to put a slight bend on my new run of straight tubing to make the whole assembly all fit together.
I don't have any kind of pipe bending stuff for plumbing around the house, but I do have a 1/2 electrical conduit bender from my relatively short career as a commercial electrician. That puppy did the trick. I slid the tubing in and gave it a a little pull. It was a kink-free success.

Mixing electricity and water?!!
With my custom crafted pipe in place, I sparked the flame on the Bernzomatic Hose Torch again and soldered the whole run together, piece after piece.

It's important to heat the fitting, not the straight piece. The heat and flux draw the molten solder into the joint (more on my soldering method here).
Cooking in the Kitchen
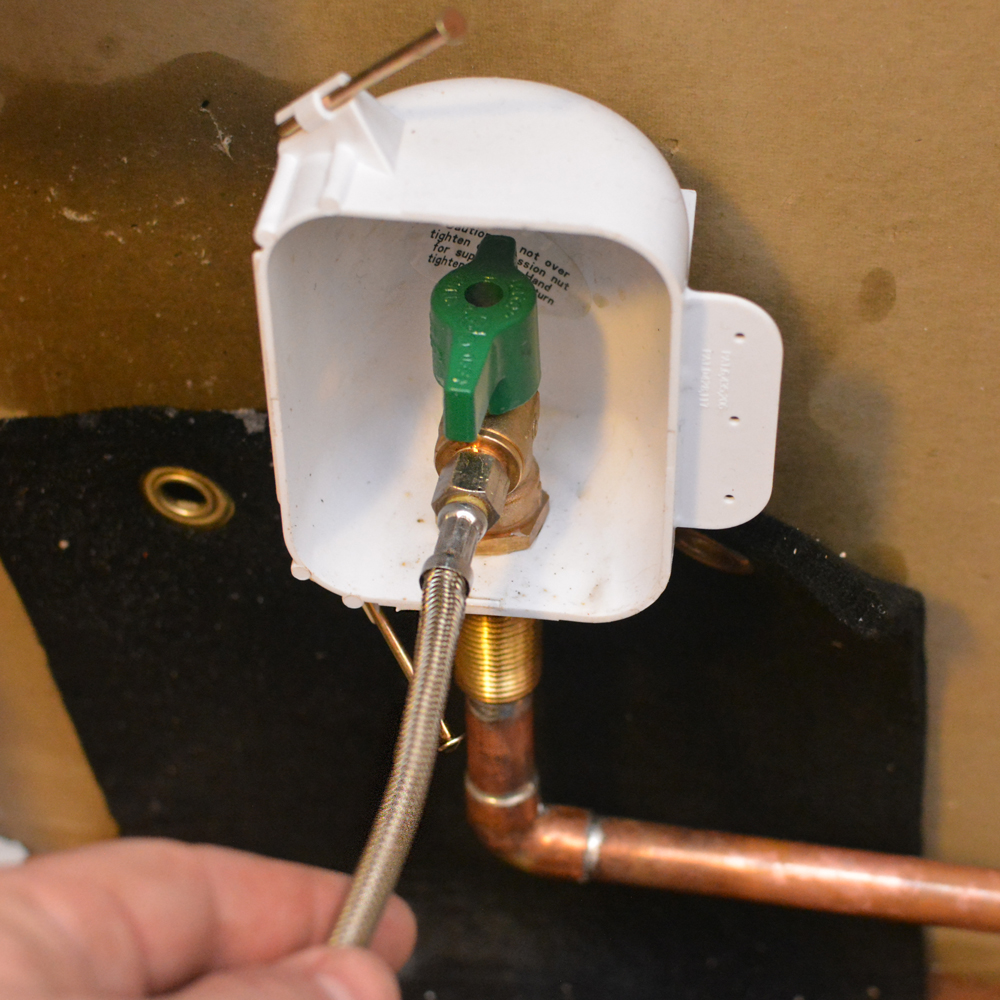
To cap the run off, I installed an ice maker outlet box. It was set up to attach to the pipe either by using a threaded connector, or by my choice, a copper sweat connection. The 1/2 inch line slipped perfectly into the fitting and got itself soldered on permanently.
You have to be careful with this box and do the install quick; the plastic softens when it gets hot and starts to sag a little. I think if I was to really lay the heat on for a long time, it would have screwed up the box. In my case, the MAP-Pro flame from the Hose Torch got it up to heat super-quickly for soldering and a damp rag got it cooled down rapidly as I held it in place with a gloved hand.

THE Moment of Truth
Even thought I've done a good amount of successful soldering in the last few years, it's always a heart-pounding moment when I open the valves and return city water-pressure to the house. I always run back inside, half expecting to hear the horrifying sound of water geysering across the room.
This time, my the DIY gods were with me and there were no leaks. Because I had tapped into an abandoned line, I wasn't 100% sure it was an active one. I threaded a piece of the old braided line onto the new valve, ran it across the room to the kitchen sink, and turned the new valve.


Successful plumbing behind me, I re-set my artistic framing piece and screwed it into the studs.
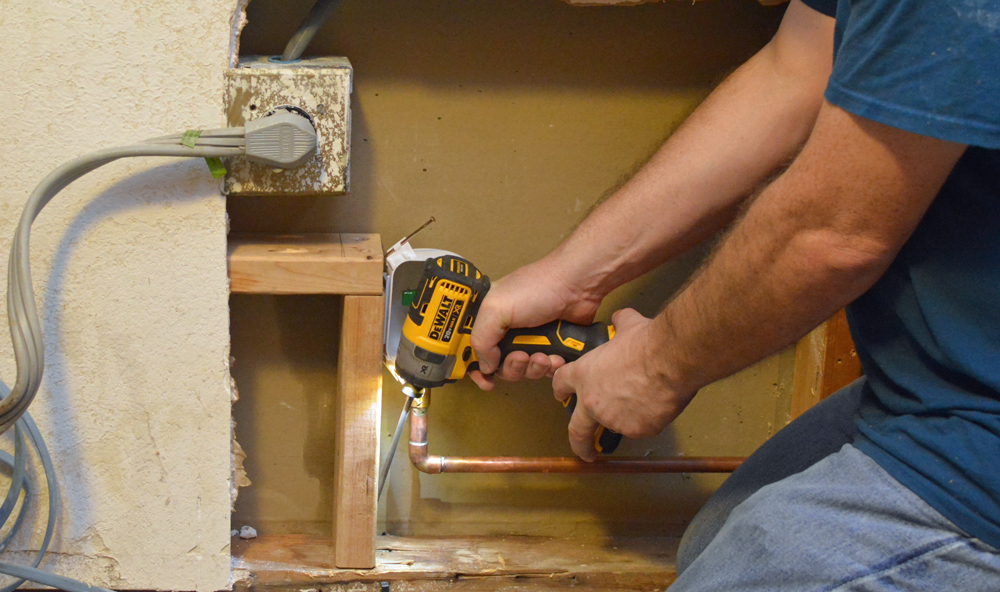
The outlet box included some nails to attach it in place. I also screwed a scrap spacing block onto the other side to keep it from twisting inside the wall cavity.
Protection
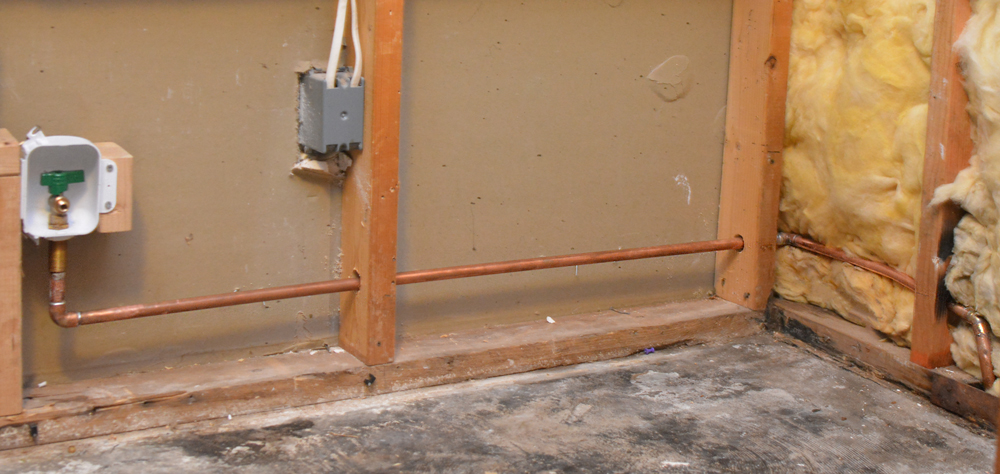
The last step to wrap the project up was to install some safety plates. These hammer-on steel shields will stop me from running a drywall or cabinet mounting screw through a waterline and flooding the new kitchen. It's worth a few pennies to be safe.


I was super lucky to find this abandoned water source so close to the new location. If it was a bust, I would have cut a "T" fitting into the cold water line for the sink and installed a longer run, probably up through the attic.
Thanks to Bernzomatic for helping complete this phase of the project!

The Bernzomatic Torch Bearers are a group of tradespeople, DIY'ers, culinarians, adventurers and artists brought together to create projects using Bernzomatic torches and share their knowledge and ideas with you. Check them out and get inspired to create with fire. Thank you for supporting my sponsors!