

Lessons learned, cool shortcuts, and how to avoid disaster with IKEA cabinets
We chose IKEA cabinets for our kitchen remodel because they are super cost effective, ingeniously designed, and good looking. The obvious concern about the IKEA system is that everything comes unassembled, packed flat in boxes. The amount of assembly before installation can begin can be downright intimidating. Don't despair, just crank up some music and jump in; it's actually fun!
Now that I've wrapped up 50% of a new kitchen, I've come up with an in-depth list of tips and tricks to make IKEA cabinet assembly and installation super easy. Settle in for a monster length post.
TIP #12: The PLAN, The PLAN!
I spent a bunch of time simply thinking about this renovation since it's the most complex and expensive DIY I've tried so far.
We screwed around with the IKEA design software, researched kitchens online, and walked stores until we were sick of cabinets. In the end, I had a professional designer, take our vague design idea and lock it down to reality, down to the finest piece-by-piece detail. It's money well spent.

The South wall design - Phase 1 of the remodel, by Inspired Kitchen Design
Working with a 3rd party designer was one of the best decisions we could have made. Even as I continue the build, I keep finding little details in the design that I never would have thought to include.
If you missed it, check out the story of how I worked with a Pro Designer of IKEA kitchens.
I pinned the design and parts list to the wall and worked it piece by piece. I even used the dimensions to transfer measurements to the wall and lay out the basic shapes with masking tape so we could get an early sense of the space and lay out some of the adjustments to electrical locations.

The stove location was moving 5 feet to the left. The stove itself was moving to the trash.
Tip #11: Verify Measurements and Dimensions
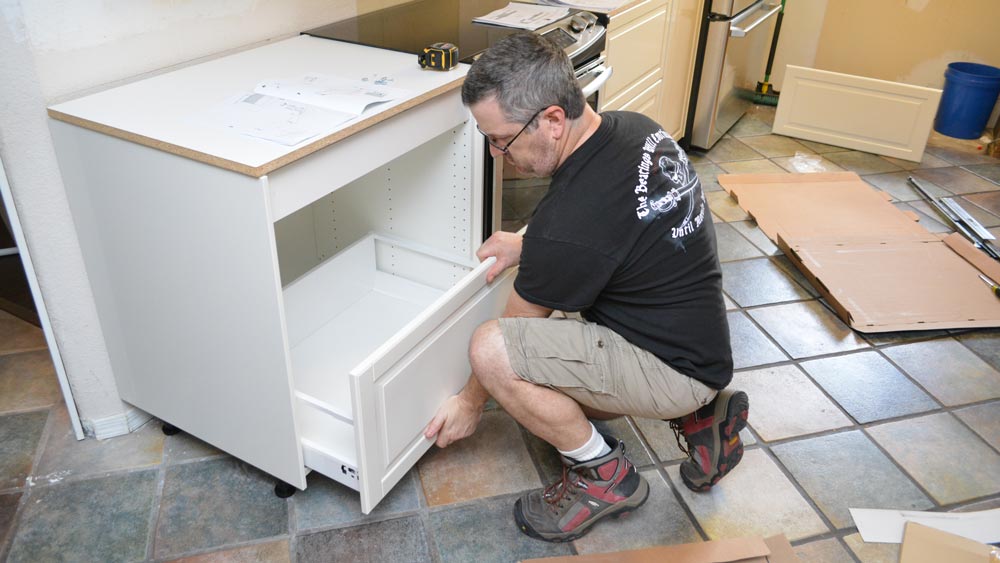
Double-check the plan before you go into the store to pick up the order. Like a damn chump, I somehow goofed the refrigerator width, by a long shot. I even built the narrow cabinet box and installed it.
It wasn't until I stood on the floor and looked up at it, that I engaged the slightest bit of spacial awareness in my brain. Try as I might, I couldn't comprehend a solution that would allow me to squeeze a 36" fridge into a 30" wide space. Idiot.

Wait for it... Idiot.
At least I could return the doors. I'm still using the little cabinet box for a home away from home for some of my tools as the remodel continues. Jeeze.

Double Decker Tool Dump
TIP #10: Check it in!
I purchased our kitchen cabinets in two big batches, 111 pieces, for the south wall then, months later, 71 pieces for the north wall. A "piece" in this case was a big cabinet box, a flat door, a long strip of floor kick, a little bag with 2 hinges, or an appliance. Both times, I counted the total pieces as I loaded at the store.
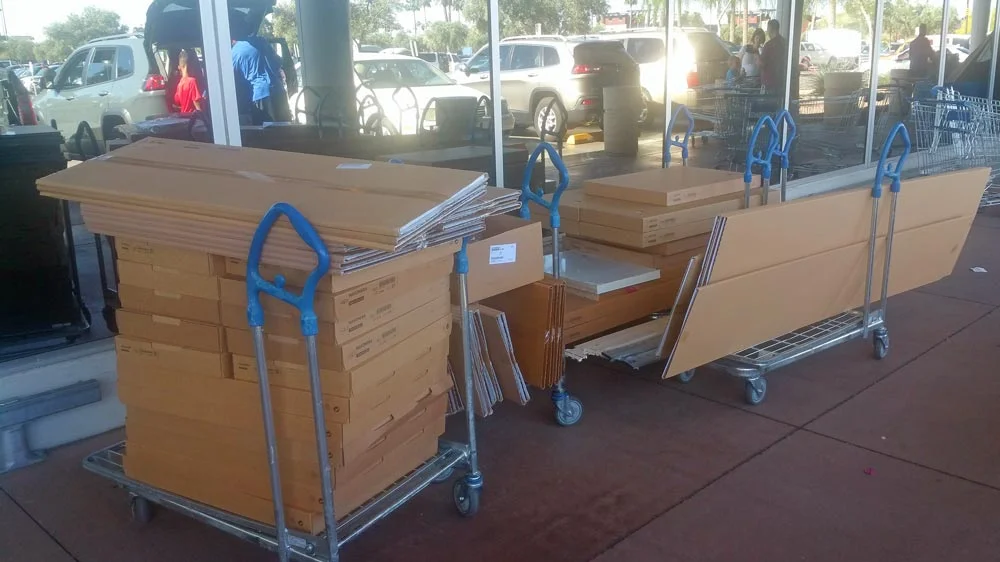
111 pices on 4 carts, with wheels that go in every directon
We also checked it in, piece-by-piece, using the box code numbers as we unloaded it at home. I called out the part numbers and my wife ticked them off the parts list. It's tedious, but well worth it, since you only have 48 hours to report an error. If we lived further away from our local IKEA (only an excruciating, 8 minute excursion), I'd probably do a check-in at while I was still in the loading zone at the store.
It's incredible how much can be loaded, Tetris style into a short-bed pickup.

Don't step out of the passenger side too quicky.
Tip #9: Parts bin
Amongst the contents of flat-packed boxes of IKEA cabinets are hardware baggies full of screws, twigs, acorns, and mysterious doodads. It does not take much prognostication to predict that you will loose some of it while shuffling cardboard, parts, and pieces.
I sure did,... at first.

Heap-o-hardware
It's also a great opportunity to kneel or drag a piece of cabinet on a screw. Both missteps will leave a painful gouge, one bleeds blood, the other bleeds money.
I started using a shallow tray to dump the bags into the moment I pull them out of the box. I ended up using a magnetic tray, like this one. It keeps metal parts from flying out if I knock it over and it has rubber coated magnets on the base that don't scratch up the finishes of my workpieces.

Want a little snack?
Tip #8: Use the free protection
IKEA cabinetry is tough stuff, but it's not bulletproof. Most of it is coated MDF (particle board). Scooting it around during assembly puts it at risk of scratches and gouges (especially if you don't follow tip #7!). As I pull all the flat pieces out of a box, I lean them against walls or set them on other boxes. Then I pop the tape and open the shipping box up completely to use it as an assembly surface. For once, something free!

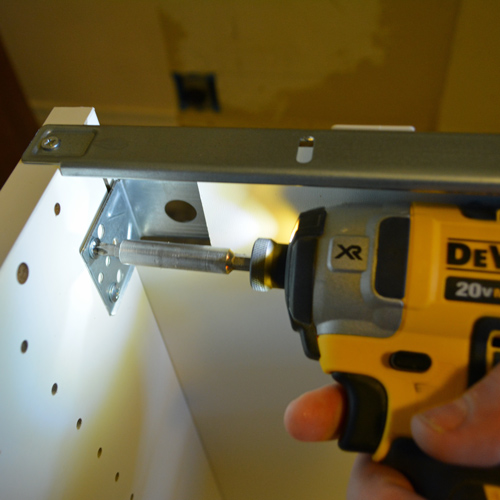
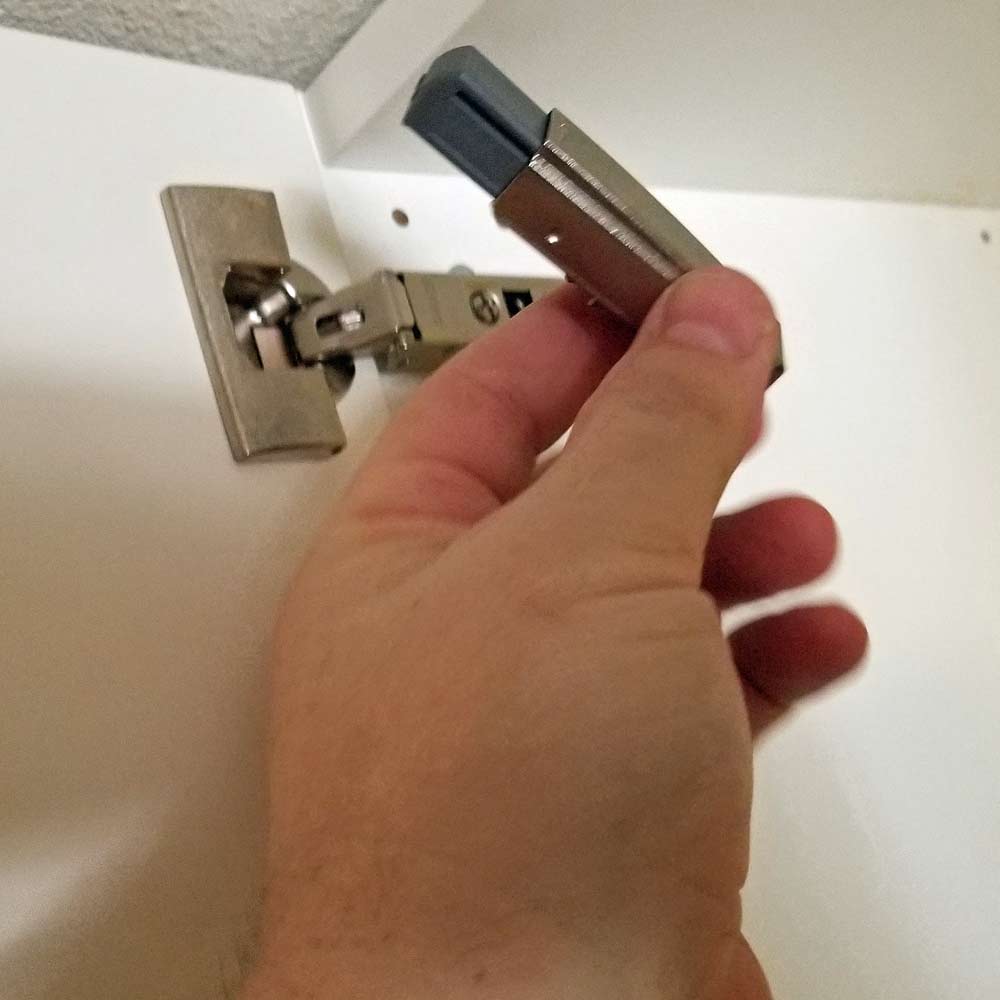
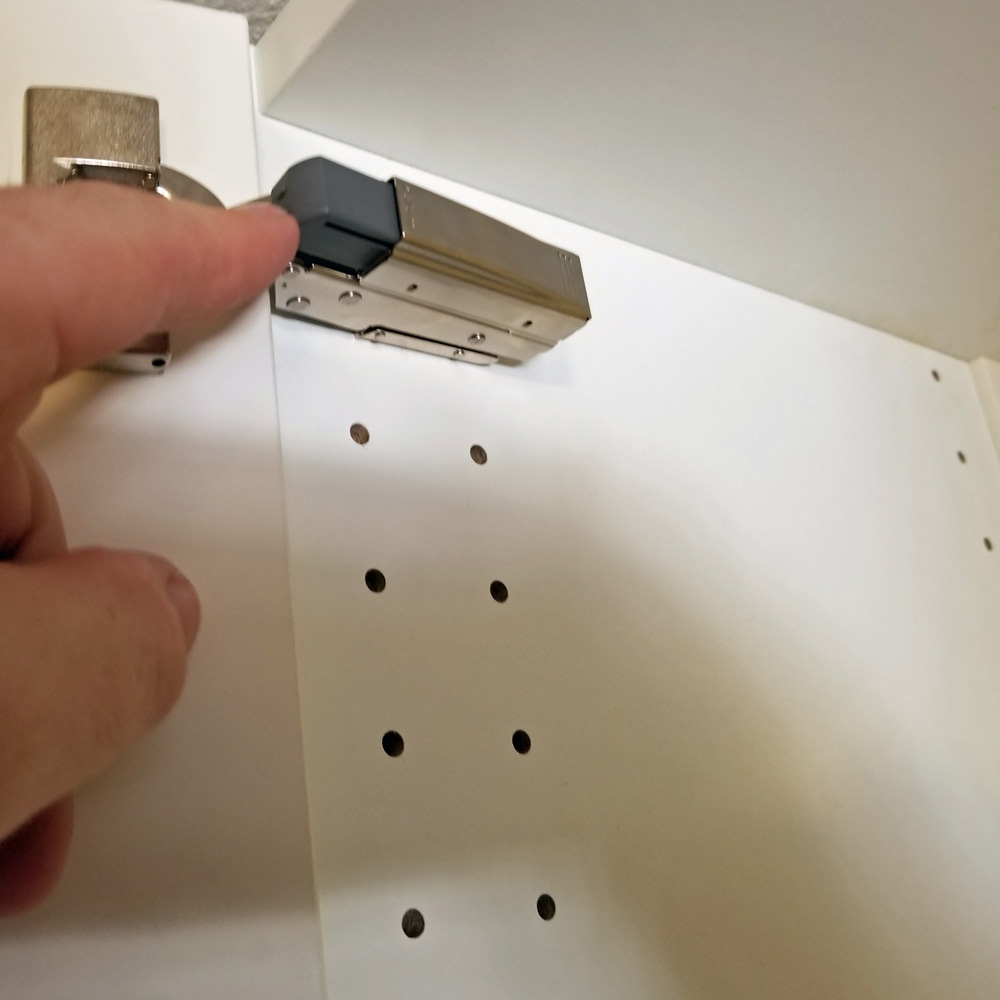
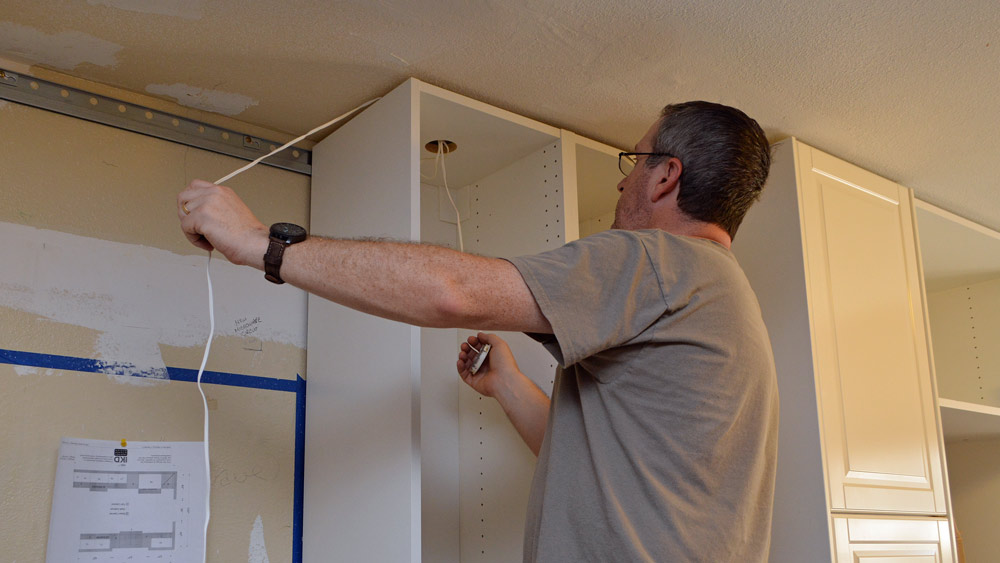
TIP #7: Ride the Rails
Ohmygosh! Using the optional mounting rail system is absolutely awesome. Once they are in place and level, the cabinets hang in place in a second. They can slide along the rail before they get locked in place. It's the easiest, precision way to install.
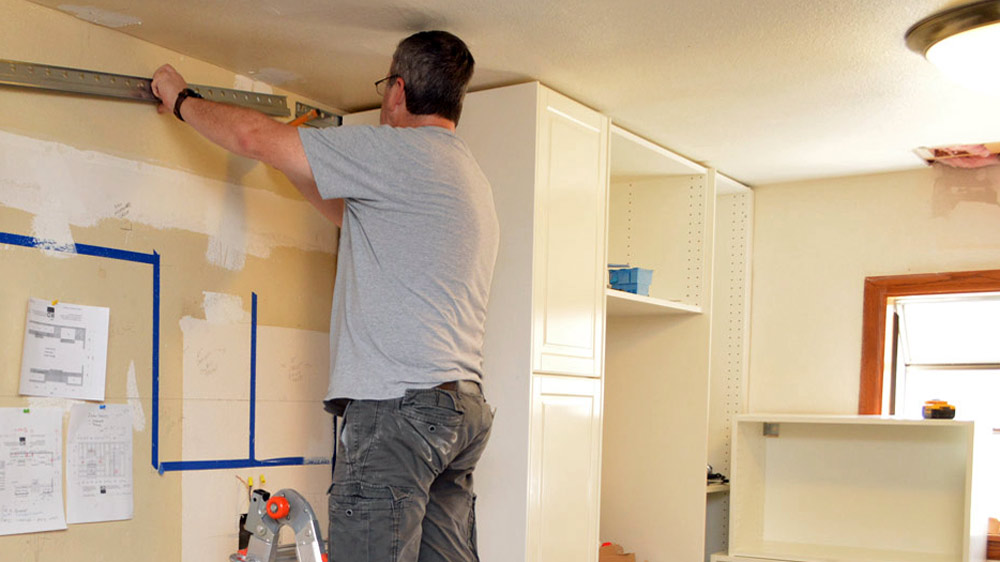
Installing IKEA SEKTION Suspension rail, galvanized
I was even able to grunt a large pantry section into place on my own because it was a quick lift onto the rail. I don't recommend it, but it's possible. I had my son help with the next one.

"grunt"
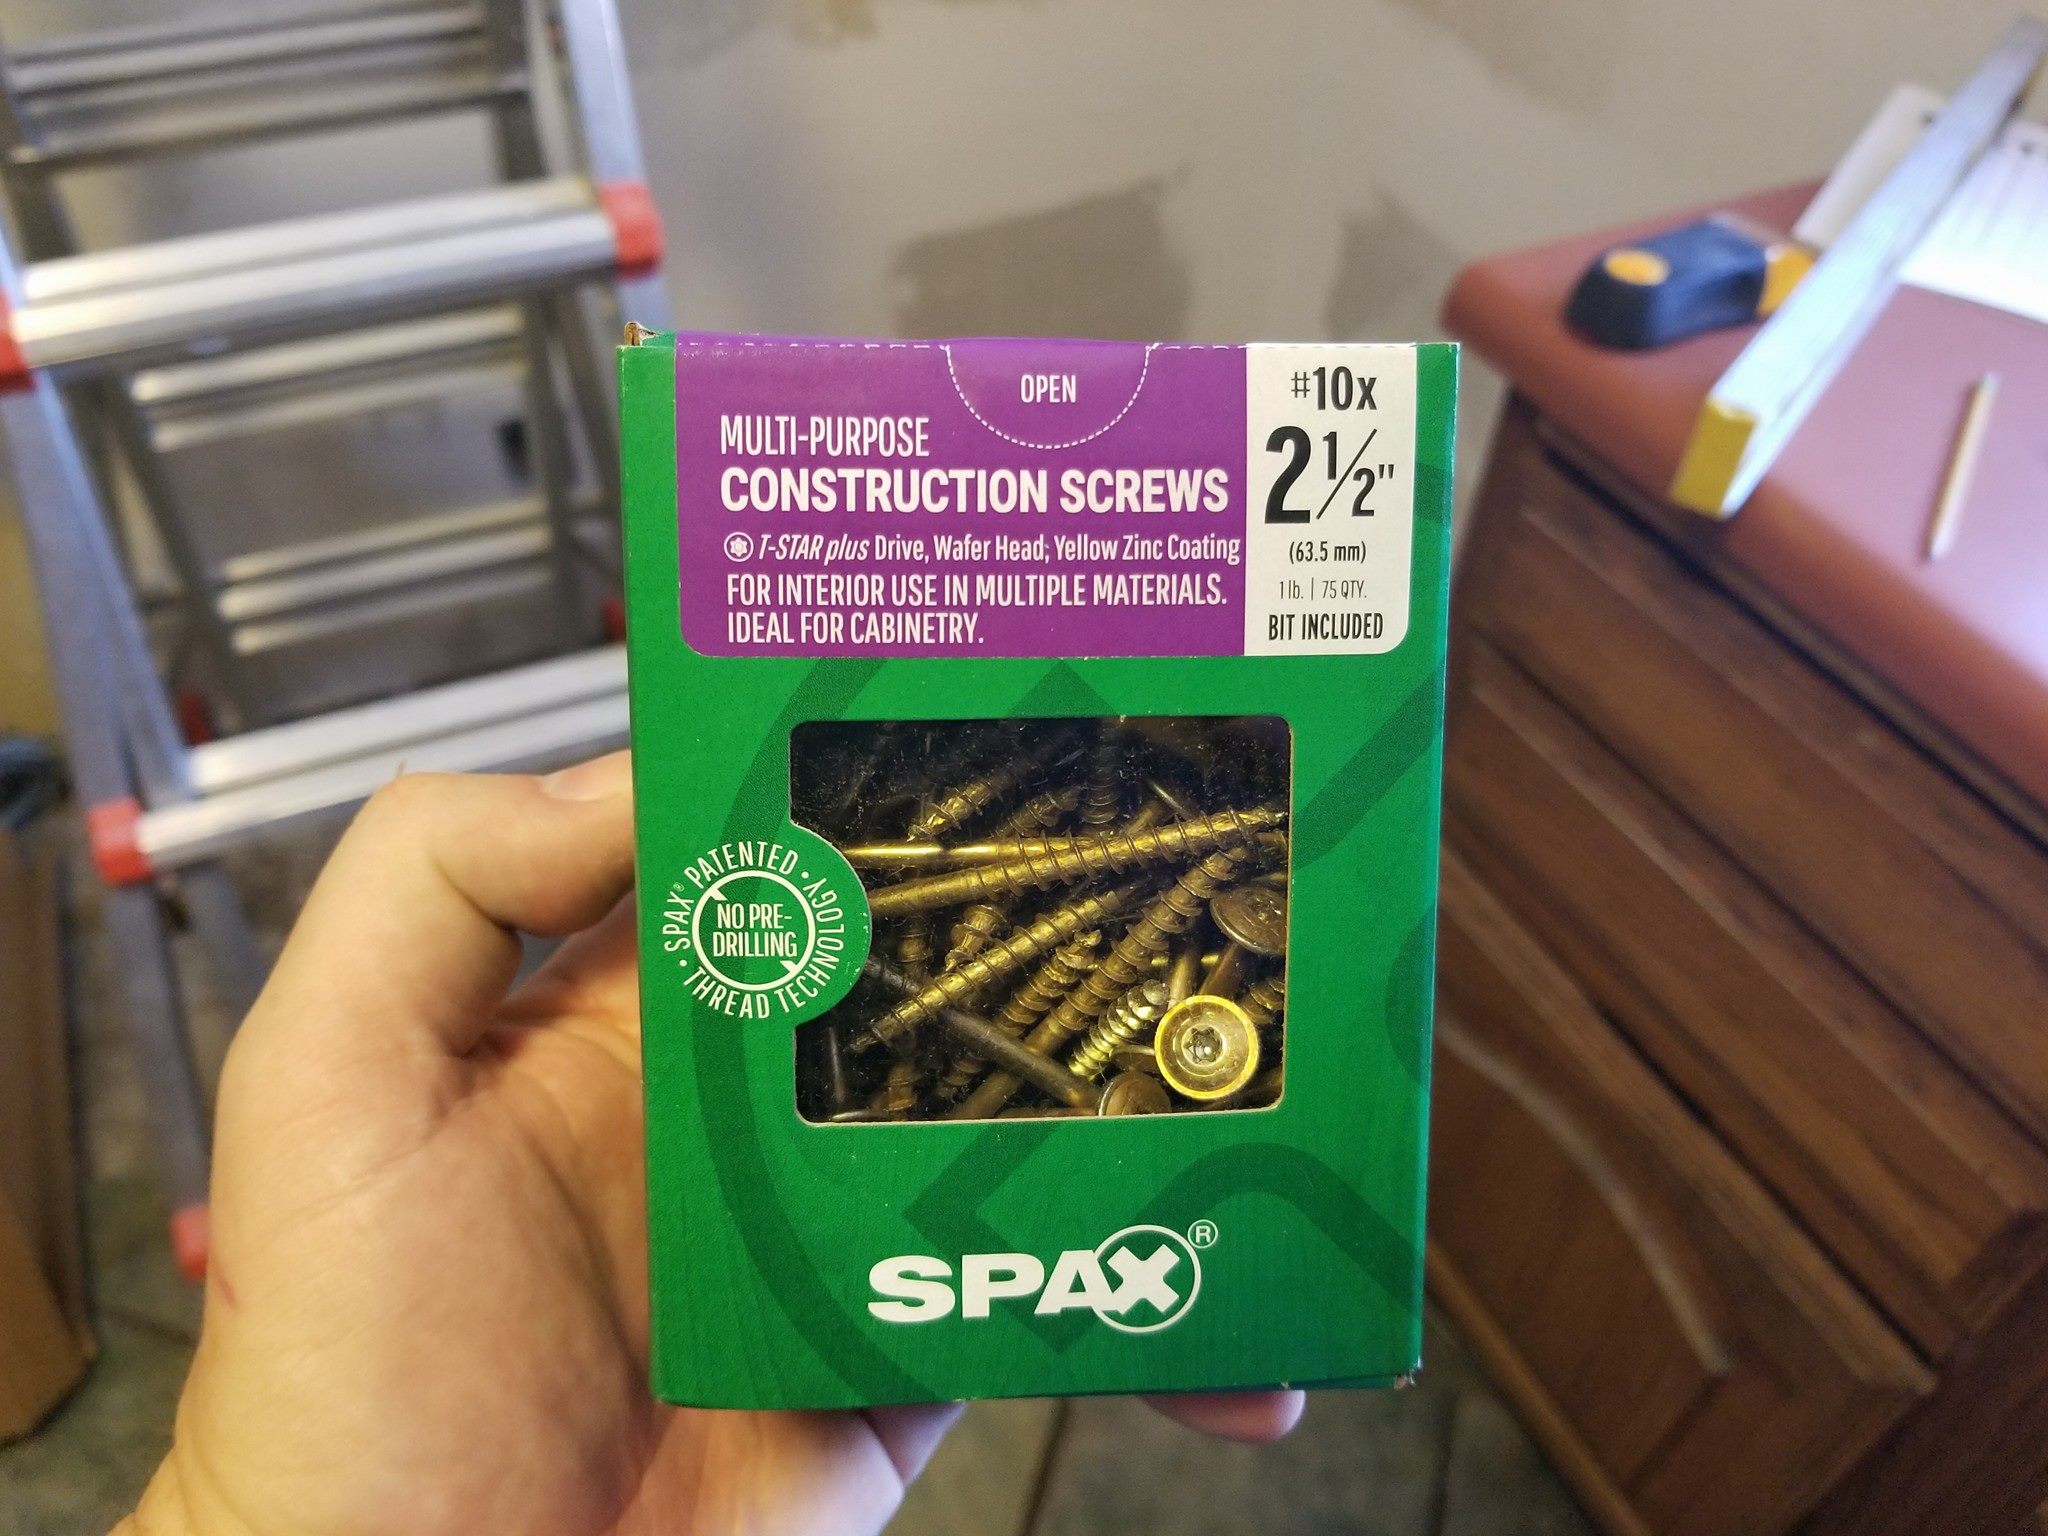
You have to supply your own fasteners to attach the rail to the wall. I used Spax construction screws to attach the rail into the wall framing and EZ Ancor - Drywall Toggle Anchors for drywall. Both are beasts with serious holding power.


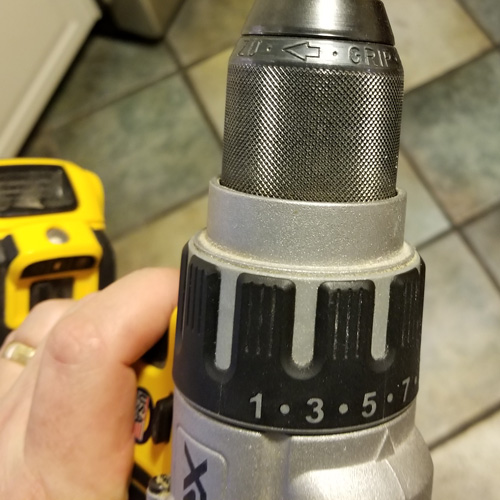
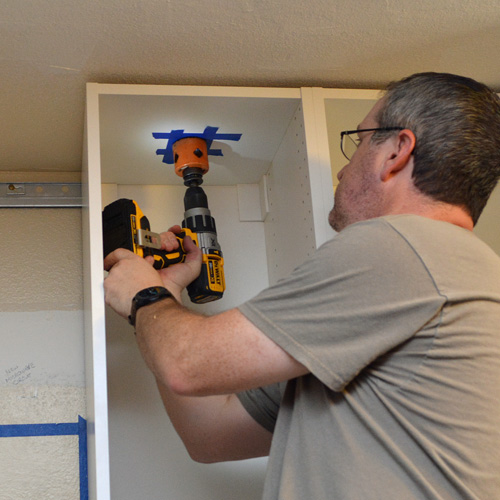
Tip #6: More Power
Some online advise not to use power tools to drive the assembly hardware to avoid damage. I hear it and I say horsefeathers.
Unless you want carpal tunnel syndrome from hand screwing 10 thousand fasteners, power tools are the way to go. Plus, they are way quicker. Just don't over do it. Too much power will strip the pre-drilled holes and fracture the crisp candy shell of the cabinet.

The trick is to throttle it down a bit. You can try to do it with a steely-eye and a steady trigger finger, of course. Possible, but risky. What would be the chance that at least one of the kajillion fasteners an IKEA kitchen needs gets overdriven? Pretty high, I think.
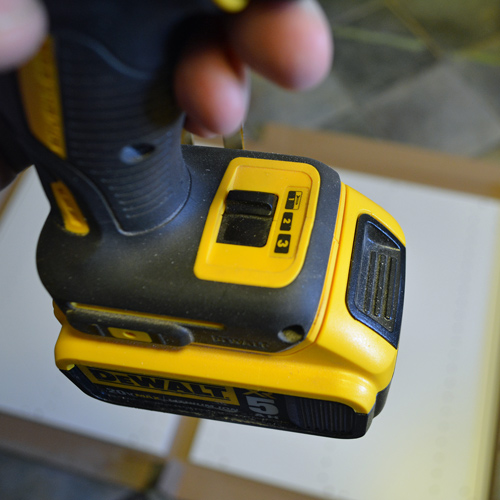
The solution is to adjust the clutch found on most cordless drills. My favorite drill, a 20V DeWalt Hammerdrill, has a spin the selector to choose a perfect amount of force (torque) to apply before the drill disengages from driving the fastener. I have another drill that has a push button selector to automatically senses when the fastener is fully seated. There multiple variations of similar clutch functions out there.
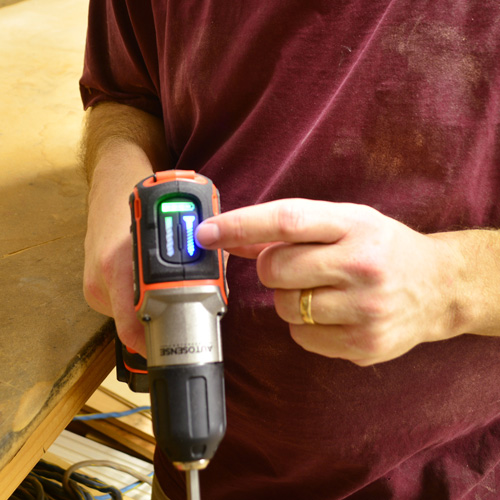
After half a kitchen, my favorite tool for driving the fasteners is a 20 volt, 3 Speed Impact Driver. It's small and light with plenty of power. The cool part is the speed selector. I ran all my fasteners in on the low speed setting without damaging a single cabinet part. Occasionally, I'd make a little snug-up with a screwdriver.
I actually purchased both the hammerdrill and the impact driver in a kit, not too long before I started this kitchen project. (Amazon link).
Tip #5: PRevent ChiP Out
Again, this is a coated MDF product, which means it's strong and stable, but the outer surface can be easily chipped when using power tool bits and blades. The issue is easy to avoid with some quick preventative steps.
Pre-Drill
Cabinet boxes need to be screwed together once they are in place on the wall. While screws can easily be powered through without it, pre-drilling will prevent the surface edge from chipping out. I mark the depth on the drill bit with a piece of painter's tape or permanent marker, so I can stop drilling before the bit shoots out the other side.

Pre-drill baby, pre-drill.
Tape The Cut-Lines
When using a hole saw (for cabinet lighting) or ripping a filler piece with the table or circular saw, it makes a difference to install a piece of painter's tape along the cut line.

Use A Backing Block
When drilling completely through these cabinets, or any wood really, it's good to clamp a sacrificial piece of scrap wood to the back side. It will prevent backside blow-out when the bit blasts though.
I used the backing block approach when drilling holes for the knobs and pulls.

BONUS TIP: If you missed my earlier post on it, I recommend reading Installing Knobs and Pulls with the Kreg Hardware Jig to see how I used this cool widget. You've got one shot with this step, go for accuracy or you may be buying new drawer fronts.
I held both the jig and the sacrificial scrap wood with one clamp.

Tip #4: Manage Trash
Installing a flat-packed IKEA kitchen is going to net a metric-ton of packaging. Managing it as you go makes a huge difference in keeping your work area from devolving into an apocalyptic wasteland with heaps of cardboard, plastic baggies, and burning car wrecks. Get that stuff out of there right away. Trust me, you don't want to spend your time hunting for tools you've buried.
I used my collection of 5 gallon buckets to collect the little bit of actual trash. The little bits of foam dividers, plastic bags, and tape don't really add up to much, but it's clutter.
Cardboard is another story. There's a bunch of it. I started breaking it down`with a utility knife and shipping it out in the recycling bin. It quickly became a pile in my garage, outpacing my capacity to slip it out weekly. Luckily, here in Phoenix, they really encourage recycling, with free "Eco Stations" located around the city. I folded, crammed, and stomped a massive pile of cardboard into the shortbed of my pickup and ran it down there with my son.


TIP #3: Don't Forget the Little Things
Silence!!!
Buy the door dampeners. Just do it. They're about $7.00 for a pack of two; you only need one per door. They snap on to the hinges in a second with no tools. A slammed cabinet door will never wake you up again. Get them when you order your cabinets and you won't have to go back through that hike through the maze, up to the IKEA kitchen design center to go through the order / pickup process again.
If you live alone, I guess you can skip them. Slam away.
plug The Holes
The design software doesn't seem to mention it, but I noticed the kitchen displays with glass front doors have some kind of little plug filling the pre-drilled shelf pin holes. How cool is that? They don't totally hide the holes, but they do a great job of camouflaging them. A slight white bump is better than a string of gaping black holes.


Each bag has 100 plugs and only costs a couple bucks. You just peel them off the strip and mush them in with your thumb. They're easy to pop out later. Save a trip and grab a few bags.
TIP #2: Do It Light Now!
Originally, I'd planned on adding glass door and undercabinet lighting later in an effort to save money at first. Once I started screwing cabinets together, I realized just how much easier it would be to do it during the initial install.
I actually hooked up the whole lighting system, loose on a counter, just to make sure it all worked before permanently installing each component. It was super easy thread the wires behind the cabinets when I could still slide the boxes along the mounting rails.

Much easier without the lower cabinets
I plan write a tutorial on how how to on install the IKEA OMLOPP lighting in the near future.
Tip #1: Just the Tip
Seriously, if you do nothing else on this list, do this one! Get the right screwdriver / bit. Although all the screw-in hardware looks, smells, and tastes like your everyday #2 Phillips screwdriver bit, it is not. While a Philips screwdriver will sorta work, but I assure you, it will piss you off in the long run. It will be a fumbling, slipping episode in frustration and creative swearing technique.

The Knuckle Buster
IKEA hardware uses the Pozidrive pattern. It's nearly indistinguishable from Phillips at a casual glance, but it's got some extra, odd little angles and facets to lock into the screw heads and simply do not slip out with the correct tip.


I challenge you to find this little tidbit in the IKEA pictographic instructions. Trust me, if you start with a Phillips driver and switch to a Poszidrive, you will want to drive to Phoenix and give me a hug.
I bought a ten pack.


Well, what do you think? Did I miss anything?
If you are new to AZ DIY Guy, this remodel is way more than just IKEA cabinets. I'm inviting you to jump aboard and read all about it from the beginning on my Kitchen Remodel Page.
I'd be honored if you'd follow my social channels as well. If I’ve helped you out or you like what you read, you can buy me a coffee!
Thanks for reading!
- John