Considering a counter depth refrigerator

Refrigeration Madness
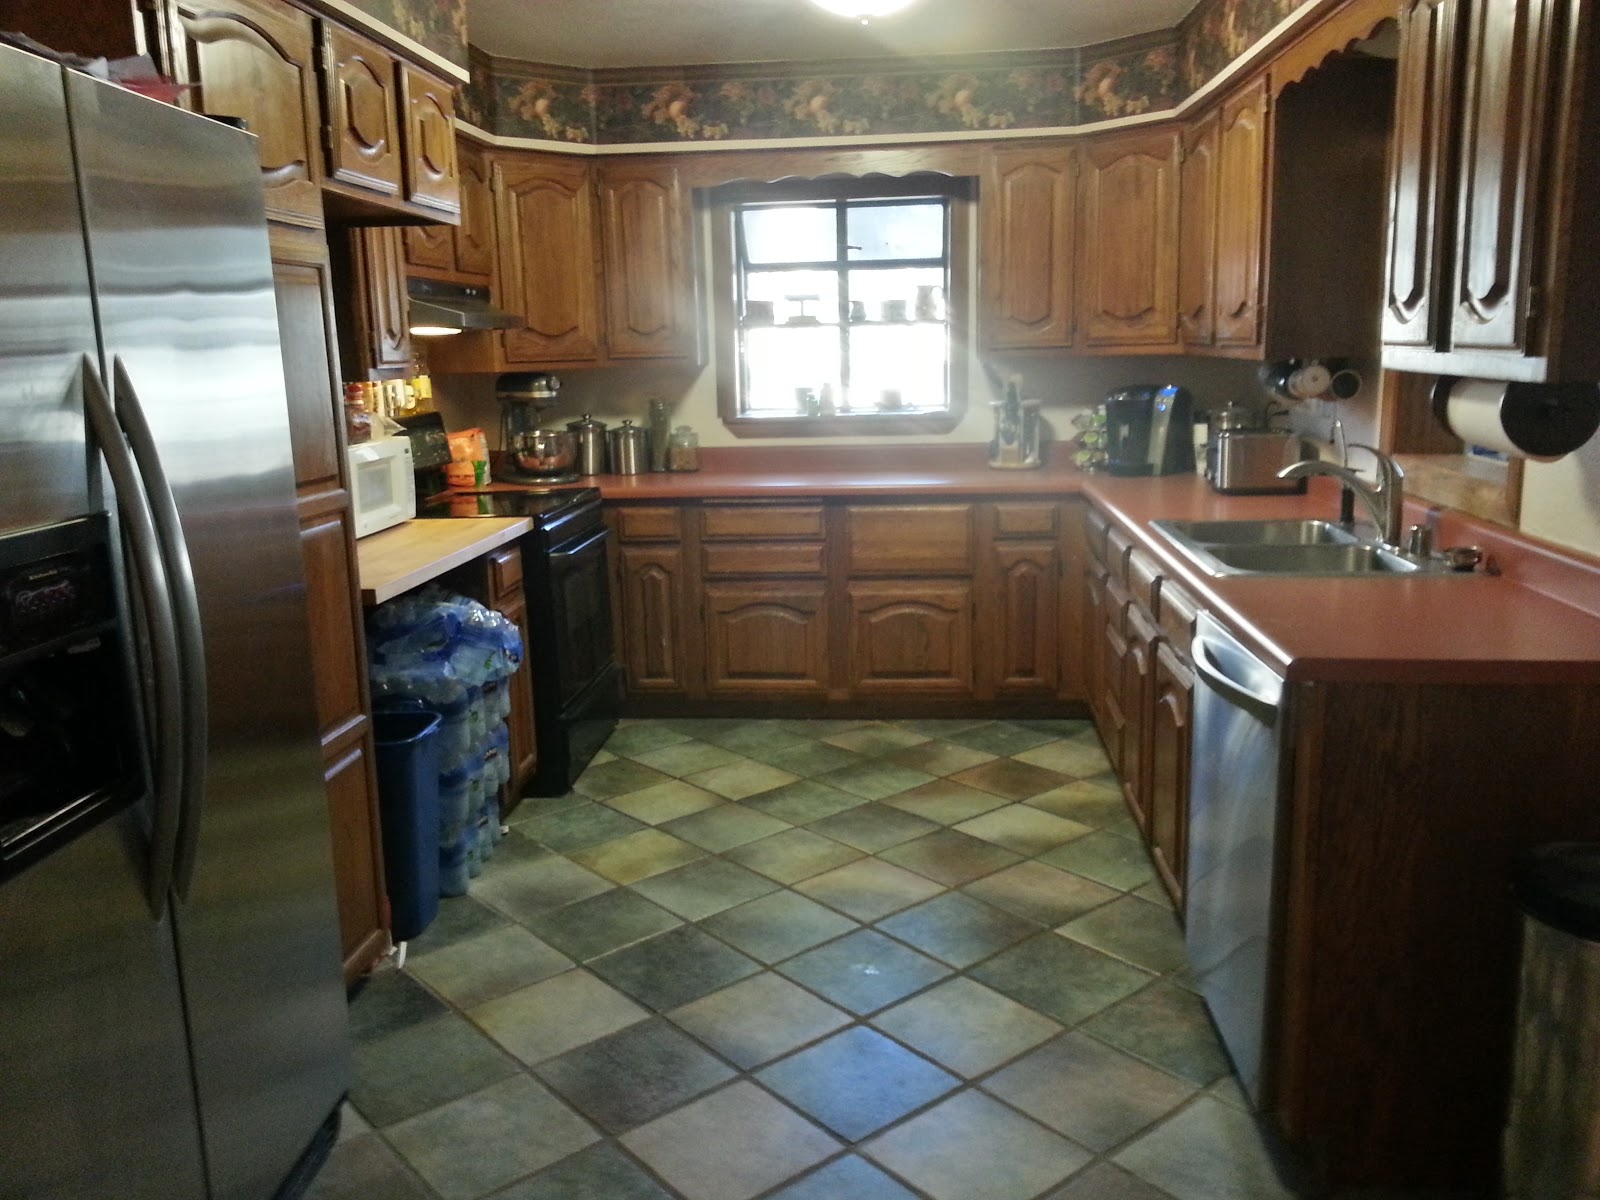
I've just become aware of counter depth refrigerators.  This just might be an excellent design solution for our cave-like, U-shaped kitchen. We've been considering recessing the 'fridge through the wall, to set it flush with the cabinet faces, but that is one big invasive, load-bearing wall mess I'd prefer to stay well clear of if I can help it.

I understand those massive Sub-Zero beasts with cabinet panels are counter depth, but much wider than normal. They're also scientifically classified as "spendy" and thus beyond our humble means.

A casual visit to Lowes turned up four models, a couple side-by-sides and a couple of the awesome French door style, with the freezer drawer below. It seems that they all are about a 23.5-ish sq. ft. size, smaller than our current side-by side. The French door style seems to make more efficient use of space, so maybe it would be a good trade off. Samsung's current line looks pretty good. We'd probably try to buy all the appliances at once, to ensure a matched style, and hopefully get a volume discount.

We're going to flip the 'fridge location to the other side of the room. Either way, a full depth fridge cuts into the entry of the kitchen, physically and visually. It's even worse when I have the door open and am staring slack-jawed into the treasure trove of temptations.


The Cavern of Doom
Anyone have any thoughts or experiences with this class of refrigerator?


Review: ProjectCalc Calculator

In my Support Tools post, I mentioned I am enamored with my ProjectCalc. It does a bunch of stuff beyond a normal calculator, but for me, the winning feature boils down to one key ability, quickly doing calculations with fractions.

Sure, I took basic 5th grade math (a million years ago), and still remember some that cross-multiply and divide crap, but why do it when I can rely on economical technology to do it for me?


I like to save time, instead of scribbling my error filled, unintelligible calculations on scrap cardboard or 2x4s. Plus, it's more accurate than taking off my shoes to count past ten.

"Math is haaard".
-Kevin Malone, Accountant
Dunder Mifflen Paper Company

I keep it stowed in a drawer of measuring, layout, and marking implements, but like to tuck it in my Nail Apron when I'm suiting up for project combat operations. Its hinged cover protects it in a pocket, tool bag, or drawer full of tools. Maybe there are some smartphone apps that can do this stuff, but do you want yours to slip out of your hand from atop a ladder? I have a version older (#8515) than the one they are currently selling; it's probably about 3 years old and going strong on it's original batteries. The rugged construction of this little bulldog has allowed it to survive many projects.

The fraction feature is easy to learn, but takes a few extra keystrokes to accomplish. For example, to divide 7 feet, 3 and 3/8 inches into three equal parts, you tap a few unique buttons (shown here as <BUTTON>):

7 <FEET> 3 <INCH> 3 < / > 8 < ÷ > 3 < = >

Therefore: 7ft.  3 3/8 in. ÷ 3 = 2ft. 5 1/8 in. Wham Bam! Done!


Just don't forget to add the width of your saw blade, like yours truly did.

In addition  to standard calculator functions, it easily converts between decimal and fractional numbers in standard or metric measurements (linear, square, or cubic).   It also calculates for paint, concrete, tile, wallpaper and carpet.
 
The new version takes advantage of a quantum leap forward in project mathematical calculating technologies. Calculated Industries has finally able to harness the power of White and Blue. Gone is the ancient, yellow styling of yesteryear.  Of course this upgraded modern technical marvel has been renamed as the Home ProjectCalc Do It Yourself Calculator  (#8510). I didn't see any other differences other than additional buttons replacing the dual button function I have to use in order to figure materials.
 
Calculated Industries has a full line of project / construction calculators with even more features, (like memory storage) but for what I normally do, I'm really happy with the DIY / Homeowner grade calculator. At some point, maybe I'll try out one of the more advanced models, but for about $20 - $30, you can't go wrong with this one.
 
I've personally used mine for renovation projects, woodworking, and electrical conduit bending calculations. I'm happy to recommend it. It's a tool worth having in your collection.

10,000 Visit Milestone - One small step for AZ DIY Guy...


Following an initial launch on Facebook, in August 2012, I launched this blog in December 2012. I've just passed 10,000 views. For my little corner of the interwebs*, it's a milestone. For other elite members of the blogosphere*, it's a good week's worth of visits and in some cases, maybe just an average Tuesday.

I'm just starting to get comfortably broken-in feeling.

Ready for 10,000 more!
I enjoy prattling on about the stuff I enjoy. I'm pleased to have heard from those that enjoy my projects and tolerate my particular brand of humor. The comments and connections made have been great.

It's funny, I can never tell what post may take off in popularity. Review: Kreg Jig Jr. was lightning in a bottle, it's still almost always my daily top visited page, almost half my total visits. I really enjoyed writing the Stubble: The Ultimate Power Tool post; it's popular too. Other top posts are: The "Ted's Woodworking" Scam, Building a Miter Saw Bench - Economical but Beefy! and even the negative Review: General Tools EZ Pocket Hole Jig. I can never figure what's folks will like.

The goofy  How gun control will affect remodeling post? Not as much. The The DIY Guy vs. Dealership Challenge 2013! was one of the most fun ever, to do and to write,... not a lick of interest. Undesired Inheritance from our DIY Predecessors , ehhhhh.....

So early in my "career", I'm humbled to be noticed. One of our projects was the subject of an interview and article on Bankrate.com (and picked up by Yahoo and Fox Business). One of my reviews was featured in a Kreg newsletter. Parts source, Repair Clinic liked a post and wanted to put affiliate ads on the site. I'm even affected by scrapers stealing my articles and posting them on their sites as their own. What's next?

I'm looking forward to the one year mark. I wonder,... in December 2013...
  • Will I still be here, beating the massive 1st year blog failure rate?
  • Will I still be posting fuzzy, one-handed photos taken with a Samsung Galaxy S III Smartphone?
  • What will my shop look like? An added Shopsmith band saw perhaps?
  • Will the kitchen remodel actually be underway?
  • Will I still have all my fingers? (please?)
  • Forget completion, will I get any further on the hallway organizer project?
  • Will there be a second season of Elementary? (PLEASE!)
  • Will I bump into another amateur  DIY / Renovation blogger out there, who's a dude?
  • Will I ever get to 100 Facebook fans before their greed policy pushes us all to Google + or whatever copycat social network a new Apple/Microsoft/NBC/ABC/CBS conglomerate comes up with? Allow me to be the first: Please "approve" me on Yeeeesh!
Come on back, I'll keep the light on for you!
Thank you for visiting my friends!

- John
 
* Achievement complete: Use the words: Interwebs and Blogosphere in a post. Consider me a pro.**
**Achievement complete: Commenting on the fact that I used the terms Interebs and Blogosphere in a post. Rockstar!

Review: JELD WEN Interior Doors (hollow core)

I'm well underway with replacing all the interior doors in our home. We started with flat slab, hollow-core doors that were probably original to the 1979 home. These originals are very plain, beat up, and so thickly coated with poor paintsmanship that there's no saving them. We've started replacing them one-by-one.

Some before and after action!

Some before and after action!

I've been picking up a hollow core, six panel doors from Home Depot by Jeld Wen. I believe Lowes sells the same brand, but I have my reasons to go to HD.

Jeld Wen - hollow core interior doors

Concern?:

This sticker did not slow down the planer at all! It got chewed to bits.

I'm using the hollow core doors, because:

  1. The originals were just fine, still structurally stable after 30+ years. It's a family home, not a great wall, fortified to withstand an onslaught of marauding Mongol hordes.

  2. They cost $30.00 each. This is a serious improvement for a great price. I'm spending more on hardware than on the door.

  3. Seriously, they're $30! (Compare to this investment, for more than $30)

  4. I can man-handle these myself. They're light enough to prepare and hang solo, without having to lure a neighbor over with a craft-brew to get help wrestling a solid-oak, back-breaking beast onto the hinges.

They come off-white primed on six sides and have an embossed wood grain pattern. Painted a nice glossy white, even by hand, (...even with a 5 year olds assistance) they really finish up nice.

Of course, I had to plane mine down to size. I got a look at the construction, beneath the primer. The sides are a finger jointed, natural wood. It looks like pine. It's clean and free of knots and imperfections. The top and bottom are particle board. I'd prefer better, but it seems to work. Our old doors were the same. I just make sure I seal them up with primer and a couple coats of paint.

Jeld Wen - hollow core interior doors

Clamping a sacrificial edge to prevent snipe and blow-out with the planer.

Because the standard sizes were too big for my framing, I bought them as slabs, no hinge mortises or holes for latches and knobs. They did have pre-bored in stock for a few bucks more, for those with houses not built by guys with short tape measures. I cut into mine for two different latch applications, there was plenty of meat left.

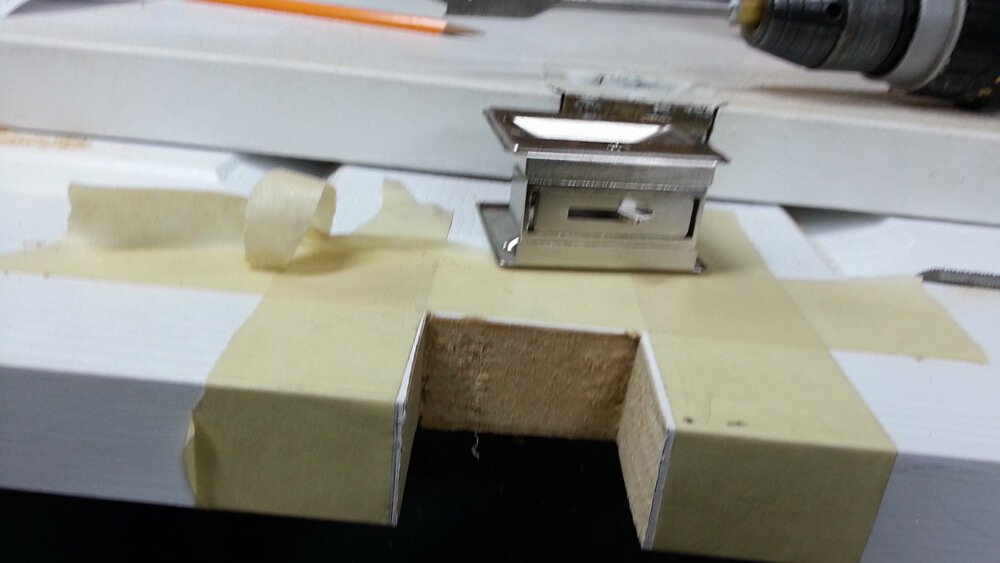
Surgery, to&nbsp;install a pocket door latch

Surgery, to install a pocket door latch

The instructions limit how much you can plane down, 1/8" max per side. That was just fine for my application. I did it with a handheld power planer (Bosch).

Overall the quality was really good (see #'s 2&3 above!!!). So far, I only had one with a front that was coming off. It may have caught and popped up when they loaded it onto the shelf at the store. I glued and clamped it overnight before planing it down to size. Fixed!

Jeld Wen - hollow core interior doors

I'm happy with this good-looking, easy-to-install Jeld Wen product. I have no problem recommending it to mid-skilled DIY'ers, with the proper tools, providing they don't require interior doors capable of stopping bullets.

If you'd like to follow my bumbling, door replacement adventures from the start:

  1. Planning and decisions - Looking at doors, tools, and hardware (while sick as a dog)

  2. Prepping a replacement pocket door - The inaugural first door

  3. Installing a replacement pocket door - Saved the hardest for first

  4. Prepping a replacement hinged door - Improving prep and shopping for hardware.

  5. Installing a replacement hinged door - Here's my first hinged door install, including the first attempt at hinge mortising.

  6. Review: Ryobi Door Hinge Template - Now I have it figured out!

  7. Father & son DIY skills training - including the pitfalls of door shopping with your guard down.


I’m keeping this old, small version of the top pic on my site for a while. There is a carpentry business that stole my image and is passing it off as their own on their corporate website. Weird, right? - John

Considering Home Depot vs. Lowes

Since I mentioned it in my disclaimer for the Ryobi Door Hinge Template review, I need to address a serious subject related to the Home Depot vs. Lowes debate. I pretty much bounce between the two home centers when I'm getting project material and have dropped a significant amount of coin at the both of them over the years. My local stores are almost across the street from each other, so it's not entirely inconvenient. Plus, they both have some exclusive product lines. Some trips simply require a stop at both.

For some reason, especially when I'm shopping alone, I find myself at Home Depot more often. I guess it's because I'm particularly interested in some of the fine material being sold out front, that can't be found at my local Lowes...

Bad Dogs, Bad Dogs, what 'cha gonna do?
I don't know if this is a nationwide phenomenon that or if it's just my local stores. Personally, I hit Bad Dogs nearly every time and grab me a tube-steak. From hot dogs, to jumbo hot dogs, Italian sausages, Polish sausages, chips, and sodas, they have a wide selection of quality DIY / renovation project fuel. (Don't forget the fixin's.)

Lowes: May I recommend a Philly Cheesesteak vendor perhaps? Nachos maybe? Get in the game!

The kids are still sleeping this morning. Maybe I should head over for some "supplies". Certainly it's too early for Ace Hardware to have the popcorn wagon going.  


DISCLAIMER: Lowes Home Improvement Warehouse could not be reached to comment on this post. I can only suspect it was because I did not even attempt contact them to discuss the subject of hot dog vendors.


Father to Son DIY skills training

Since Jack's rapidly approaching teenagerdom, it's time the lad starts picking up some mad handyman skills. My dad started letting me help with projects when I was about his age and I still remember those times fondly.

The two of us left the ladies behind and took a Friday night, before-bed trip down to grab door #4 for our interior door replacement project, this one for Jack's own room. He examined a couple from the top of the stack for dents and scratches before choosing a nice specimen from the middle of the stack.

Get those doggies rollin'
Get that doggie rollin'
He took charge of the six-wheeled beast-cart and headed out with the unmistakable din of rattling sheet metal and chattering caster wheels. He paused to treat me to some humor about what great stuff, Great Stuff is when we passed the display. Where does he get his goofball sense of humor anyway? We were having fun. Too much fun...

Folks, I'm just going to admit it; I let my guard down and paused like a slack-jawed yokel at the clearance rack. I should have known better to stop in such dangerous proximity to the kitchen section. Of course, I was immediately waylaid, out-of-the-blue by Mr.Smiling Clipboard Dude,
 
     "Has anyone told you about what we're doing for customers tonight?"
 
CRAP! Amateur move, Mr. Smarty Pants DIY Guy. NO! No one had told me what they were doing for us customers tonight. I was snared like a gazelle drinking from the crocodile pond. Somehow, he sensed I'm a nice guy (chump) and I'd pleasantly engage in his conversation. I dutifully answered the questions about our kitchen and, ever so nicely, gave point-by-point details on our state of unhappiness with our cabinets and layout. I shared the plan for a total kitchen gut and re-model next year,... yes, including plumbing,... and electrical, ... aaaand new cabinets with taller uppers,...

You're going to have to sit this one out boy. Watch the master at work.
We all know where this leads don't we? The pitch. It doesn't matter that I clearly, obviously have no reason to entertain his product; I just have to let him toss it out. But I know can still kick away from the crocodile. He's worked so hard, and I can't be rude in front of my son (or all those shiny new tools) can I? A slight pause, a friendly smile, and he lobs it:
 
"... consider cabinet re-facing"  Yaaaaaaaay! We're almost done...
 
"Free in home estimate" Woooo-hooo! Now there's only my initial polite decline <kick> and his second, face-saving counter attack ...
 
"...just in case you want to consider it, as an option, anyway", offered with a kindly smile and an attempt to immediately schedule the estimator. I give my trusty standby, a pleasant second decline <kick> followed without pause by a quick, simultaneous thank-you / smile /cart acceleration, and finally the inevitable third decline mumbled over my shoulder as I depart <kick-kick-kick>. Checkmate. We're gone <run>. That's how it's done folks, it's a skill acquired by years of home center visits. I'm just glad my son was there to see it. (You may want to start easy, like a quick run of the dueling Cable TV vs. Satellite TV polo-shirted gauntlet in the back of Wal-Mart. This will sharpen your skills for the pro leagues)
 
We did a quick checkout, strapped down...

 
..and slipped away, like ninjas into the night.
 
 
Sure, I could have hired a pro to extricate me from the salesman, but I did it myself and saved. You can do it too! Teach your children well.

Review: Ryobi Door Hinge Template

Following a slightly less than awesome experience freehand routing mortises for door hinges, I looked for some kind of template / jig that would make the job easier, with better result.

To those who haven't heard the term, a mortise is a recessed area on a door where the thickness of a hinge leaf is set, in order to lie flush with the surface of the door.

We've been slowly replacing all our ugly interior slab doors  with nice looking six-panel beauties. After the initial pocket door experience and the guest bath door install, I'm getting the hang of it.

Without prior research, (very, very unlike me) I picked up the Ryobi Door Hinge Template at The Home Depot for about $26 bucks last weekend. I don't have much experience with Ryobi products other than to understand that they are regarded as an mid-level, consumer-grade line offered exclusively at Home Depot. Plus, I'm pretty sure Ryobi was a character on some giant-robot Japanese animated series when I was a kid. I thought I'd give it a shot

The Ryobi Door Hinge Template - contents

First off it's plastic. But it's that pretty tough stuff, not brittle. I also liked that all the parts (except drill bit and double end driver bit) fit neatly for on board storage. The kit includes instructions, corner inserts (reversible for 5/8" or 1/4" radius hinges), a guide rail for smaller / laminate routers, a router bit with top pilot-bearing, a 1/8" drill bit, a double-ended driver bit and the hinge mortiser unit itself.


Ryobi Door Hinge Template - mounted on the door
Yep, I'm wearing shorts and sandals. It's 85º today! (Sorry Detroit @ 27º)
It was simple to slip the mortise on the door edge and close the clamp. It's clearly marked to adjust for hinge size. I could see it was right on target because I had already transferred the outline, tracing the hinge itself.

Ryobi Door Hinge Template - depth of cut setting
Depth Charge!
I loaded the bit into the old Craftsman router. Depth adjustment is easy. There are marked depth stops for thick or thin hinge plates. You just set the router base on top and crank the bit down until it hits bottom. I had to reset my bit the first time because the collet hit the guide before I had it at full depth. I like this feature, it's the same concept my Porter Cable Dovetail Jig uses to set proper depth.

The instructions are pretty no-nonsense, bullet points. After setting the depth, they simply state:
  • Turn on power tool and remove wood from template area 
Well, I guess that about tells the story doesn't it? As Goose would say to Maverick, "Kick the tires and light the fires!"
Cutting with the Ryobi Hinge Mortising Kit


I took the router for a leisurely drive around the back side of the jig. The bearing rolled along nicely. The bit did it's bit-ing. Looks good. I nearly cut into the front of the jig lifting the router, something to watch in the future. Future Note II - When watching the operation closely, don't forget your dust mask, or at least don't smile too much. The shape of the jig will pretty much wind-tunnel a nice blast of wholesome fiber right at your mouth. <spit>


A fresh, flat bottomed hing mortise
Flat bottomed: It makes the rockin' world go 'round.
I'm left with a smooth, flat-bottomed mortise. It's lovely. Even with the whole setup, I did it faster than my first free hand cut a couple weeks ago. Feeling that bearing roll along gave me confidence.

A perfect Hinge Mortise


A perfect, neat fit. Just a matter of rubbing a bit of gummed up paint off and erasing some pencil marks. I moved the rig over to the next spot and zapped it out in a matter of seconds. Perfect.

The verdict I - For a DIY / Remodeler this thing is a definite win. To adapt easily to different door sizes and hinge types it's intricate and clever. It's darn near stupid-proof.  For less than $30 to get pro quality results at very high speed, I think it's a tremendous value, and I am happy with my purchase.

The verdict II -  For a true professional, I don't know. There's the plastic issue. It's got a bit of flex to it. I had a couple slight abrasions to the guiding surface after the first hinge. Nothing that will affect my work, but I wonder how it will hold up when you need to do a couple hundred doors. I'd also want to look at replacement router bits, just to be sure you can get them when you wear this one out. Still,... the whole thing is $26 bucks. I've seen individual router bits for three times that cost.

I'll follow up later, when I've done another 4-5 doors, and let you know how it's holding up.

Full disclosure: The opinion in this post is wholly my own. I have received no compensation for it. I purchased the kit at my local store, along with an Italian Sausage, chips, and a Coke combo from the "Bad Dogs" cart out front. To be 100% honest, to my readers, I ate the whole meal before I cleared the parking lot.

<update> Pick one up at The Home Depot here:
Affiliate links inluded

How gun control will affect remodeling

Someone told me the government wants to take my guns. What?!!! I don't understand why more tool aficionados like myself are not concerned for their arsenal. My guns are for my home and family. I need them.

Porter Cable Finish Nail Gun
I'm told this sideways grip gives you instant street cred.
I understand there are critics with their standard, smug statements to throw around in the media. To this I reply, "Guns don't shoot nails, people shoot nails!"

"Nailed them both."
- Detective Roger Murtaugh*

This is getting out of hand. I'm also hearing the government wants to limit magazine size on my guns. What the heck do they expect me to do? reload more often?!! Ludicrous!  The magazine on my Porter-Cable FR350A Round Head 2-Inch to 3-1/2-Inch Framing Nailer holds two full clips of 3.76 mm round-head framing nails, over 60 shots. I need to fire those babies as fast as I can pull the trigger until the gun clicks dry., then I slam in another clip and keep shootin' . Are we going to let Washington bureaucratic, special-interest meddling interfere with our God given rights to shoot 3 1/2", 22º nails thorough six inches of kiln-dried, southern yellow pine studs?

Lock and Load
Another insanity: Waiting periods to buy guns. It's just stupid. With my Amazon Prime account, I order a new gun (AND a pneumatic hose to feed it) and it's sitting on my doorstep in two days, free shipping. Or, I can just stroll into a hardware store or home center and walk out with a gleaming new specimen, with the faint smell of machine oil lingering around the blow molded case. Heck, I should be able buy used guns via Craigslist without interference from The Man.

Porter Cable Framing Nailer
Cash and Carry
They're going to make me register my gun too. I guess I don't mind, but I really think it's ridiculous that I have to mail in a post-card, just so I can receive recall updates and access my warranty. I didn't factor the additional cost of a stamp in my purchase decision. It's just not right.

I hereby put out my manifesto: If an armed group of jack-booted thugs from "big brother" appears on my doorstep demanding to see my guns. BY GOD, I swear, my indignant response will be, "Sure fellas, check 'em out. Want to build some stuff with me?"

I'm pretty sure the Power Tex on the right is classified as a "launcher". They're not coming after launchers are they?
I leave you with this. The slippery slope. It's not just construction nuts that will be affected; it will get those of us that plink away remodeling on the weekends too. If they take our framing guns, next they'll come after our brad, pin, staple, caulkingpaint, hot-glue and tape guns. Where does it end? Next thing we know, we'll be forced to work on our projects using hammers,... hammers! like 19th century chumps?!!! Seriously?

Speak up folks, don't be sheep.

This post is meant to express my love tools with humor. This blog is not engaged in the firearms debate. I won't discuss it here, other than to state that I am 100% against people killing people with guns. In no way do I mean disrespect for victims of firearm violence. - John

* Quote - Danny Glover, Lethal Weapon II, 1989

Featured on Yahoo Finance!

A few weeks ago, I was contacted by Marcie Geffner,  a reporter for Bankrate.com. She interviewed me about the experience with our family room remodel. We talked about the challenges of time, cost, and unexpected surprises in DIY remodeling. It was a fun experience.

This morning I discovered her article on Yahoo Finance. It's exciting to be part of something like this so early in my blogging "career". I guess since I've been dragging my feet on an "About Me" page, the article can serve for now. There's lot more of my personal story here than I've posted thus far on my own.


It's cool to be to be offered as the confident, experienced DIY'er vs. beginners in an article that also includes expert commentary by the authors of Home Improvement for Dummies, especially when I often feel like a Dummy myself when my adventures go awry. Here's their book on Amazon.com.  I haven't read it, but I'd like to at some point; it looks good.

 Enjoy the article:

Bankrate.com: DIY remodeling yields rewards, vexations
Yahoo Finance: DIY remodeling is rewarding when not frustrating
Fox Business: DIY remodeling is rewarding when not frustrating
Hey Fox, What's up with replacing the pictures of me with a a younger looking dude? I'm not tool wielding eye candy anymore?

Oh yeah, before notice it. I really don't run wiring with a big ol' framing nail gun as captioned in the article.

AZ DIY Girl?

This is a blog about tools, renovation, woodworking, and just plain-old fixing stuff,.... not crafting. But, it's also about being a Dad. When I went out to check the lights in the garage/ workshop I stumbled upon evidence of a little DIY crafter in our midst. In hindsight, our little family pizza and a movie dinner had been quiet,... too quiet.

Gracie knows that projects, even crafting projects, get done in the workshop. I guess this includes the space a few feet in the door, right in the traffic path. Evidently, she does not think workshop etiquette requires any cleanup before returning to the family room to snuggle on the couch and that leaving her trip-hazard strewn minefield is A-OK.

My pint-sized worker had gotten into the wood scrap bin and pulled rocks from her toy pickup truck in the corner. She added some styrofoam, twigs, crayons, about 1.25 miles of frosted tape, and finally, the coup-de-grâce, a sack of acorns collected from the park.

Being the Master of Workshop-mans-ship that I am, I clearly lead by example. My work habits serve as the gold standard for my pupils to follow. Clearly, my practice of bringing delicious consumables into the workshop was the tidbit that Gracie chose to put into practice this day, as is evidenced by the slice of Little Caesar's, cheese "...and only little meatballs (sausage) Daddy!" pizza.

 
Feast your eyes on these one of a kind, hand made, "Decorations for Easter".


Crafting Ladies of the Blogosphere, you are hereby on notice. There's a 5 year old dynamo of pure creative genius hot on your heels, and she's not afraid to use excessive amounts of frosted tape. Reading, writing, and typing are the only hurdles; it won't be long. Stay sharp ladies.
 
The competition
 _________________________
 
<UPDATE> Once again, I'm honored to be featured by So I Married a Craft Blogger on his Man Up Link Up XII.
 
Of course, mine being the only submission by a dude, being reviewed  by a dude, through a fog of testosterone, I stand a pretty good chance of being noticed when compared to the mysteries of actual-skilled, crafty ladies. It didn't hurt that I adjusted the title when sharing to "So I Fathered a Craft Blogger?" Trevor writes a great, humorous blog about A Man's View of the World of Craft Blogging. Check it out!


Cabinets to...No

We decided to take a trip over to our closest Cabinets to Go showroom, excited to find an economical solution for our impending kitchen remodel. It's about 45 minutes from our house, so we made it a family outing / lunch out.

We'd already perused the catalog they'd sent in the mail. It looked really good!

When we entered, they had a really nice looking selection of cabinets set up along with wall displays of hardware, vanities and countertop samples. Still good...


.. until I looked up close. Sure, it's wood & plywood, but it did not have a good fit and finish. There were gaps in the trim I could see through. The shelf pins were plastic clips. A big surprise to me was that it was held together with knockdown hardware, plastic from what I could see. The painted door fronts were cracked at the seams (Which I know happens due to wood movement, but it looked rougher than I'd expect.)


Plastered around the showroom were photocopied signs that the cabinets were "ready to assemble". Ok, wait,...what? I don't recall seeing that little detail anywhere in their flashy literature.

Awww nuts. If it seems too good to be true, it probably is,...right? This stuff is IKEA-ish. It's probably slightly better, due to the solid wood,... I'll give it a rousingly solid rank of "decent-ish".  Maybe it's even a good value for the dollars. But I can tell it won't last for the long run; I doubt the install would be pleasant.

We didn't stick around long. The lone salesperson was working with another couple, and never acknowledged our presence. Later,  I looked at their website more closely. Although it had higher-end manufactures plastered across the homepage, we didn't see any of them. We had just seen the Chinese, assemble-it-yourself stuff. The fact that they are assemble-it-yourself is buried deep within the bowels of their website, under terms and conditions. Just read through those babies and decide if this is the type of outfit you want to work with on your beloved dream home. To me they say, very clearly, "RUN!!!" I couldn't find any reference to them being "ready-to-assemble" anywhere in their gorgeous, full-color 27 page catalog. It just feels intentionally tricky to leave such a detail hidden, or to bury it somewhere less than obvious. Scuzzy. I don't mind economy grade or doing assembly, but this marketing style is the old put lipstick on a pig routine.

I did a little follow-up surfing on the company. There appear to be plenty of happy customers, but just as many, or more, unhappy ones, really-really unhappy ones,.. downright pissed-off, plaster their complaints across the internet, everywhere they can find a text box ones.  There are countless horror stories about poor customer service, shipping damage, missed delivery dates and endless replacement times. As I suspected, there are poor ratings from the Better Business Bureau. Enough to scare us off, even if we were still interested in the product.

Although we could save some serious coin, I just don't think it's in the cards for us. It's still a huge effort in time and money to settle for something of this quality. Maybe if we were flipping houses we'd think about it, but even then, I'd just buy in-stock from a big-box to avoid shipping issues and the risk of poor customer support.

I really wanted this to be a win. To good to be true.

Support Tools - Not too expensive.

Building up a good collection of tools takes time and money. Sexy tools such as compound miter saws, Kreg jigs, cordless tool sets, and table saws costs big bucks. But some of the best stuff isn't too expensive at all. This is especially true with, what I call support tools (maybe there's a better name?). I classify support tools as ones that don't to the actual work of cutting, screwing, drilling, and etc.  Measuring, marking, and assistive tools are critical in successful projects. 

I'm going to show my collection, collected from the last 15 years or so, some even at garage sales. There's plenty more stuff out there, I'd still like to pick up. As usual, I'm including sourcing links if you want to order them from Amazon.com, but you can likely find it at your local hardware store or home center.

In no order whatsoever, other than how I grabbed it our of my drawers:


(1) The folding rule is handy for laying on the ground a lot more rigidly than a tape measure. Plus it's a bit more accurate when measuring using the tip, since it doesn't slide around. I don't use it much, but occasionally it really fits a need. The kids love playing with it; it's mesmerizing fun. ($8-$18)

(2) A combination square is great for measuring and transposing measurements. You tighten the wheel to lock a measurement in place. I use constantly in the workshop and on my renovation projects. I have this little sibling, a 6" combination square that I keep in my nail apron when I'm in the shop. It's perfect for setting table saw height, or simply taking small measurements. These usually have both metric and standard units of measure. These get heavy use. (12" = approx. $10 - $15, 6"= approx. $10 - $12)

(3) Tape measures are critical, period. I usually carry a 25' tape for general use, but a small 10' tape is fine for working in the shop. Most wood stock is no longer than 8' so a smaller tape is perfect for carrying in my nail apron. You can buy either metric or standard, some even come with "cheater" measurements labeled, down to 1/16" of an inch. (approx. $5 - $25, I've even seen Harbor Freight coupons for a free one)
(4) Calipers are also helpful for making tiny, precise measurements. I just use these mini pocket calipers for occasional detail work. Since I don't do machinist type stuff, it's somewhat rare that I reach for them. They make nice electronic, digital ones as well. ($20 - $25)

(5) A carpenter's square is another workhorse. It's good for measuring, drawing lines, and keeping things square during assembly. It's also seen heavy use as a cutting edge for straight line cutting with and X-Acto Knife. In a pinch, you can clamp it and run a cutting tool against it, like a saw or router. This is a mid size one. (approx. $15)
(6) This odd looking rascal is a T-Bevel. It's good for copying angles for cutting or corners for mitering. The wing nut screw tightens, so nothing slips. I've used it quite a bit for moldings. ($10 - $15)
(7) Yes folks,  it's pencils!!!!!!! Seriously, buy a whole stinkin' pack of these #2 elementary school specials and scatter them around your work area . It's an absolute pleasure to have pencils anywhere you reach. I loose them constantly, sometimes they are in my pocket or behind my ear. I hate looking around for something I've misplaced when I'm really on a roll. I do the same with 4-5 tape measures. It's nice to have a pencil sharpener out there too. (approx. $2)
(8) A compass is good for scribing lines and transferring regular measurements. An inexpensive type that takes a pencil is perfect. Mine is overkill, a relic of my days in art school. (approx. $5 -$14)
(9) A rafter square or speed square, is another heavy use item. Not just for rafters or stairs, its a quick 90 degrees. It's a quick straight edge of trimming a 2x4 with a circular saw. It has angles marked as well as a short ruler for length. This one just fits in my back pocket enough to not fall out. (approx. $18)
(10) A utility knife actually does do cutting work, but I still keep it in the support category. Mine is a Stanley quick change model, which is really convenient. Just another great, basic tool to have easily at hand. Careful, these demons send lots of folks to the ER for stitches, respect your knife safety. (approx. $5 - $10)

(11) A cutting guide or straight edge will make breaking down sheet goods with a circular saw a snap. Just clamp it down and run your saw against it. Its good for routing dados as well. I like this one because the two sections clamp together to make a 100" single edge. (approx $25)

(12) Mechanical center punches are excellent for marking an indent in metal, prior to drilling too keep the bit from wandering. (approx. $20)

(13) Scratch Awl is a basic utility tool good for marking, especially on metal. (approx. $3)

(14) I love the Calculated Industries 8510 Home ProjectCalc Do-It-Yourself Project Calculator This little guy handles full mathematic function using fractions. I know it's easy enough to do calculations by hand, but this is just great. I use it constantly. ( approx. $20)

(15) Bubble Levels, get a lot of use on remodeling projects I use a 24" I-Beam Level and I have several torpedo levels for smaller work. Don't drop them or they loose their accuracy. You can check by holding two levels together and seeing if they read the same. ($10-$20+ for 24") and (approx. $10-$15 for a torpedo)

(16) Another one of my art school veterans, it seems like I reach for this T-square for various layout work. It's quick and handy. (approx. $10 - $15)

(17) I found this large carpenter's square at a garage sale. I like it's larger size for occasional use.

That's it for now. I'm sure this list will grow, as these things always do over the years. The deal is, you can get away with a tape measure and a pencil for most tasks, but it's quicker and easier to have some specialized support tools. Most are less than $20.

Power Tool Storage

In cleaning up the garage after a couple weeks of heavy-duty weekend-warriorsmanship, I decided I'm not using my storage well enough. I'm having difficulty getting everything put away without heaping it up. There's two sets of double wall cabinets that I picked up on clearance about four years ago. They're cheap pressboard, but they're serviceable and seem to be holding up fine.

I picked some choice specimens from the scrap pile and used the illustrious Kreg Jig Jr. to screw a sub-shelf together. (Honestly, I look for excuses to make Kreg Jig Projects) I made it shallower than the shelf-pin holes so I could hang the blade-guard of the circular saw below its edge and still get the door shut. It's a better use of vertical space.
 
 
A thin (reclaimed pallet wood) shelf below the tool shelf holds extra blades and accessories. The whole sub-unit is able to slip out in one piece if necessary. There's plenty of room for more on the base of the cabinet. I stored my beloved Jorgensen Miter Saw way up top, where I'll need a step stool to reach it. I haven't used it since I got the mighty DeWalt Sliding Compound Miter Saw, but maybe I'll have a use for it and bring it back to the fighting front lines. Otherwise, I'll Craigslist (a verb now?) it later for a few bucks and clear the space.
 
I made a similar unit over in the cordless-tool neighborhood, but without the sub shelf. It needed the room for the drill and impact driver to slip in and out, with their batteries attached. I'd robbed the factory shelf for another cabinet earlier, but this worked better due to the circular saw trick. I may add a second story riser, but this is doing the trick now. I drilled a hole in the base for the charger cord so I can top up batteries right in the cabinet. This cord is pugged into a switched receptacle so I can simply shut it off from below when I close down for the night.


I ran out of time for goofing around with the Kreg Jig and the Miter Saw making these high-end, custom-crafted beauties, so I just picked up a simple wooden box I'd made when I was practicing with the dovetail jig. Perfect! Yep, that's a dovetailed, 3/4" custom sander stand. You just can't put a price on such hand crafted finery when you're stacking a pair of wood chewing DeWalt sanders (Random Orbital & 1/4 Sheet Orbital)
 
The routers are upside down to protect the bits that are set juuuuuuust right.
 
Done. All the tools are put away. I still need to re-jigger my whole storage setup at some point. I still have nail guns piled in a mechanic's tool chest drawer with other assorted stuff.
 
I even vacuumed the shop before coming in for pizza. Perhaps tomorrow after work, I'll pull out the planer and start working on interior door number three. This floor isn't meant to be free of sawdust for long.


The "Ted's Woodworking" Scam

In the normal course of working on this blog, building readership, I did a search to see how it was showing up on Google. I searched some terms that were fairly unique, like "...too busy kicking old house ass..."   before searching "AZ DIY Guy's Projects". I found this odd little link at the bottom of page one:

Fine Woodworking Plans?

Weird. It clearly referred to my General Tools EZ Pocket Hole Jig review post. Then the next phrase isn't mine. Huh? I thought I'd follow whoever shared my post and kindly ask them for a proper back-link. Here's where it went:

Huh? (Again). I kind of remember something about this from about a year ago. I checked around. Sure enough, this is the scam that Steve Ramsey of Woodworking for Mere Mortals posted several times about. Here's links to a few of the good ones: April 2, 2012, April 7, 2012, April 10, 2012.

Basically this site appears to be a shady affiliate in the Ted's Woodworking pyramid scheme of selling woodworking plans that have stolen from magazines and reputable sites around the web. There's tons of info out there on this huckster syndicate if you want to look for it, and can wade through all the paid advertising with fake reviews. I'm surprised they are still going, but these shadow scam things are hard to stamp out. I've researched a similar tactic from the Build Your Own Solar Panels for your Home scam in the past. It's all crap.

I even followed some comment links and found good old "Ted" AKA "man with gray hair smiling" at iStock Photo. Yep, good old  "Ted" himself is a $29 image from a stock photo house.

Screen capture of iStock Photo

I wonder how the guy who sold his mug to a stock photo house feels about the way it is being used. The poor schlep is likely to be recognized on the street by an angry, wronged woodworker and get socked, unsuspecting in the jaw.

I'm not posting clickable links to this garbage. I don't want to give it any sort direct traffic. Here's where it gets me: how the heck did they embed my story title and text into a Google search?

I searched around a bit and, as near as I can tell, it's coming from paid, automated software that "legally steals" or "ethically steals" back link traffic. What the hell is that? Programmers create this stuff. People behind the sites sell and operate it. Bastards all.

Selling someone's plans without permission or plagiarizing their written word's in an effort to misdirect / or trick the web surfing public into a scam site that sells the stolen plans is stealing. It is unethical. Legal or not, if you take part in this, you are a scumbag, period. You are making money on the art created by the talents of others, without their permission, and from what I understand against their express statements denying permission.

So far, I've only been slightly wronged, maybe a tiny bit of misdirected traffic. I'm angry anyway. This site is barely two months old. Others are probably suffering actual damage. Plus, the artists that created plans that have been stolen have certainly been wronged. Please don't support it by buying this garbage. Do your research. Wait until you hear about the actual product you will receive.

OFFICIAL PROCLAMATION:

I hereby prohibit any of my created works, images, text or media of any kind from being utilized in any form to support the sale of Ted's Woodworking products.

Disclaimer:

This post is written with the research I was able to do on the web. I trust the sources I found, supporting my conclusion, as good and upstanding, and have no reason to doubt their claims. If I am wrong in my belief that the Ted's Woodworking Plans operation is a filthy, scamming, operation of thieving jack-ass-dom, I will remove this post and offer sincere apologies, without crossed fingers, once I see proof otherwise. I invite the scumbags to contact me, since they cannot be contacted directly to inquire.

Back to sunshine, rainbows, and happy projects next time, my friends. Promise.

Interior Door Project

Having successfully wrapped up the first of our interior door replacements last weekend with the

new pocket door

, I'm moving forward with the project. The rest of the doors are standard hinged style. The next one to tackle is the guest (

kids

) bathroom. It's one of the most visible in the house, we'll enjoy it being complete.

Pre-Primed, and too big

Rather than the more efficient, prefab / assembly line approach of buying all the doors, trimming all the doors, painting all the doors, etc. all at once, we're going with the slower, easier on the cash-flow approach of doing one door at a time. I suppose a benefit is that I don't have to stage doors all over the place as paint dries. Plus, we get to see some finished work a little sooner. The drawbacks are the repeated shop cleaning between each door's planing and painting as well as the wait time between paint coats.

I bought another six-panel door at Home Depot this morning. I also picked up a new brushed nickel, lever-style "door knob" (

What do you call it if it's not a "knob" anyway? The packaging doesn't even say

.) and a bulk pack of matching brushed nickel hinges. By buying the bulk pack of 12 hinges, I saved over ten bucks vs. buying them individually.

Buying in bulk!

Back at home, prepping this door was exactly the same as prepping the pocket door. Only this time I managed to screw up the edge planing of the first side. I sort-of tapered the door somehow; it was 1/16" off at one end. I must have twisted the depth knob when I was interrupted by a little girl offering to keep me company in the garage,... if I'd fix her a bowl of cookies 'n cream, ice cream.  It took a bit of tweaking to get it squared up again.

I really like the Bosch planer . It took a bit of practice, but I have the hang of it now. The only struggle I have is the necessity to walk while cutting the long edge. Sometimes I get a little bobble in the cut. I ended up doing a shuffle / shimmy / slide / step-behind maneuver. It would probably be better to set the door on edge. I'll try that next time.

Grab your popcorn folks! Here's the world premier movie of AZ DIY Guy in action. I'm really much better looking in person, this particular role required a dusting of grey hair at the temple and an out of shape appearance. I think I pulled it off. It's certainly Oscar worthy.

There's a dust storm rolling in! Hold your breath and cover your eyes!

Gracie's been bugging me for a week to help with the painting, so I let her have a go of it. She did pretty good,... mostly. I had to keep reminding her not to scrub (destroy) the brush and tried to keep the splatter to a minimum. I lightly, quickly brushed over her work to keep the strokes with the wood grain. Despite the exuberant assistance, It turned out pretty well.

The paint dried fast in today's 78º, dry weather. I need to put one more coat on in the morning. Hopefully, I can get it done tomorrow.

<UPDATE>

Up before 6am Sunday morning, while the family slept, I put a coat of fresh paint on the reverse side of the door. I ran out of paint right at the finish line, dang-it. I scraped that can as clean as Gracie's bowl on a spaghetti night. I need to go grab some paint first thing and finish if there's any hope of installing it today.


Installing the New Pocket Door

I'm installing the new pocket door for the master bath today. I'd already prepared our new six-panel door, trimmed it to fit, primed the fresh edges, and painted the whole thing with a couple coats of white, semi-gloss last weekend. If you missed the story, find it here; it's a cliffhanger. The last coat of paint went on 6 days ago, so it's nice and dry, out in the workshop.

The dang thing keeps falling off its rail, plus it rubs on the inner walls of the pocket as it sways loosely from the track. I've already replaced the track mounting screws with larger screws, they seem to be holding. Look how ugly that beat up old slab door looks!

I pulled the top two trim pieces (casing?) off to access the mounting hardware, showering the whole area with bits of drywall from the rough edge behind. It isn't the best looking installation of trim I'd seen, with heavy globs of caulk filling the voids. Maybe when we redo the bathroom, I'll re-trim the whole thing with wide trim.

There was a side piece of molding that kept me from swinging the door out from the bottom. First a quick score with the utility knife to break the paint / caulk line: 
 

I used a wide-blade putty knife to slightly pry the molding out enough to stick my mini-prybar/ nail puller behind it. Having learned from several past remodeling disasters, this time I took my time, gently wiggling the tools, then the molding itself as it slowly broke free. I want to reuse it when I reinstall the door. It actually came out in one piece! If you look close, you can see the horrendous tile in the shower. Don't worry, it's on the to do list.


Jack stopped in and pulled all the nails that were left. The narrow head on the mini-prybar/ nail puller made it easy without scuffing up the paint on the remaining trim. He had fun with it and did a great job. There's another glimpse of that horrible black tile in the shower on the left.  

Child Labor Rocks !!!
I learned why the door was swinging free, dragging on the pocket sides. There were plastic guides originally installed, but they were yellowed and brittle. They had snapped off sometime in the past 30 years. I also saw old water damage from our wonderful house flood a few years ago. (A toilet feed line had ruptured - I'll cover that in future story).


I needed another set of hands for the next step. Jack pushed the bottom of the door from inside the bathroom while I lifted the door up with the top of my foot from outside. The door pivoted from the track, hanging like a garage door. It took my mini pry bar and my favorite, beefy, slotted screwdriver to pry the track and wheels apart. FREEDOM!!! The door popped out. I could see the wheels were well worn, compared to the replacements I have bought.

Looking inside the wall with a flashlight I can see I'm in luck. The track mounting screws inside the wall have not worked themselves loose, like the ones in the doorway had. I could only reach one with my screwdriver; it was tight, thank gods of remodeling. The whole plan to avoid cutting the drywall had hinged on this. Whew! 

Like most men, I have a one-track mind.
In order to replace the broken plastic guide on the bathroom side of the door, I had to pry the inside molding up a bit. Unfortunately, I couldn't get it free. The floor tile had been installed after the trim piece and was encasing it. I tried out a tool I'd never used before, a "Variable Speed Oscillating Multifunction Power Tool". It plunge cut, flush with the floor, slicing the wood like butter. 30 seconds = done! Mine is a Harbor Freight cheapie that I picked up a couple months ago on a whim; it was on sale. I'm sure it's not lasting quality, but it's a great concept. I'll definitely buy a nice, quality one whenever this one dies.


I pulled out the molding a bit, removed the old one that was installed with a finishing nail, and screwed the new one in. I'll adjust it later when the door is in.

I lugged the old door out to the workshop and laid it on top of the new one. Perfect match. With luck or possibly the benevolence of magical, midnight workshop elves visiting, I had managed to use the planer for the first time, to trim the new door down to a duplicate size without removing the old door.
It was interesting to note that the top, bottom, and pocket side edges were bare, unpainted wood. That's apparently a big no-no in humid environments. I didn't see any ill effects though.
Using the old door for placement, I matched the location of the roller hardware and installed the new ones by measuring, pre-drilling, and running the screws in tight with the impact driver. The new hardware seems a lot heartier. The big hex bolt adjusts the height of the rollers, more on that later.

I also copied the location of the latch from the old door. A very close call, I nearly cut the same size slot, but for some reason I read the instructions and learned that the new latch was 1/8" smaller. I shudder to think what foul words I would have befouled the neighborhood with if I had ruined the door by cutting an oversize hole. The old latch was painted and had a broken mechanism. My wife even cut her finger on it two days ago. I couldn't have used it.

I managed to scuff the new paint by dragging the old door's latch across the new one's face. To avoid more damage, I taped off the face of the new door, drilled a starter hole in the back of the slot and made three slow, steady cuts with the jig-saw. The new brushed-nickel latch fit perfectly. 

Go time! I tipped the new door top first into the head of the opening and slipped the rollers easily into the track. Of course that is complete bull, a bald-faced lie.

I grunted and sweated that bastard into place crawling on my hands and knees back and forth, in and out of the bathroom trying to get those rollers to get into the track. For as many times as I had popped the old door back on track, I should have been able to do it with my eyes closed. AAAAAAAGHHHHH!!!
Finally, I turned my brain on for a second and adjusted the rollers so that the wheels were completely extended. It just took a few turns with a 1/2" wrench to extend them. Having only turned on my brain, "for a second" I was quick to realize that by cranking the wheels all the way up, it drove the door down, wedging it into the floor. I couldn't budge it. Idiot.
Turn the brain back on,.. climb back up the step stool,... crank the wheels back up,... climb down the step stool,... swing the door out,... climb back up the step stool,... extend the rollers again,...


This time, a quick prying motion with the mini-crowbar on the roller and the same with the screwdriver against the rail. Click-click, POW! Locked and loaded. I adjusted the rollers back up with the wrench making the leading edge square with the wall so there is no gap. The door slid closed smooth and easy. I installed the second guide at the bottom and tightened both. This door will not rub.

The original trim goes on with a quick "skadoosh!" from the finish nailer. It was easy to place since the original razor cut-line fit back together like a tight puzzle.


I've got it on the run now! Quickly swapping the nail gun for a caulking gun, I keep on shooting.


With wet caulk, I have to pause to address the more important task of enjoying a grilled cheese sandwich, a bag of Fritos, and a Diet Dr. Pepper that Sweetie whipped up for me. There's enough time to eat, clean up, and type up the story while it dries.

After a couple hours, I hit the trim and the door scuffs with a quick touchup of white paint. It's nice that I didn't have to remove trim from anywhere against wall color paint. It was all trim on trim / white on white, therefore no masking, just a quick layout of old newspaper on the floor to avoid drips.


Finished! I think it looks 100% better than before. It really dresses up the room a lot. The ladies will be pleased that the door finally, actually locks and won't fall off the track, trapping them in there.

Overall, it wasn't a super difficult project. It did take time to prep the door, but today's portion only took a couple hours to do.

What do you think? Better?
That's the only pocket door in the house. Next, I have six standard doors, the door to the garage, and a louvered closet door to replace.