


It's tough to keep up a steady remodeling pace this time of year, with the holidays and end of year, but I'm still steadily picking away at it. In my last kitchen post, I shared a video of my first foray into demolishing the upper cabinets and part of the ugly soffit.
I'd found that the north soffit wasn't entirely a cosmetic creation tacked onto the wall and ceiling. A section wrapped around the corner that was open to the attic and all its nasty insulation. Although the west wall was full of that horrible stuff, the south wall demo hadn't been like that.
I started busting into that soffit of horror again with the FUBAR.

Weilding the Stanley FUBAR - Extreme Functional Utility Bar
Smash time
Since we have to cook and live with this construction project during the workweek, I try not to make too much of a mess when I'm demolishing stuff.
It's not easy. Plaster, paint chips and the mystery insulation seem to fly further than seems possible.
It still makes a collosal mess.

Clean enough to eat off of.
Good lord did it give me the heebie-jeebies when the mummified carcass of a long expired bird dropped onto my forearm. I bet it had been up there since the late 1970's when they sealed the envelope of the home up.

Uggghhhh. A blast from the past.
I cleaned up all the mess and sucked the insulation out of that area of the attic. We don't really need it much this time of year when it's cooler. Our winters are super mild here in Phoenix.
Problems Problems
The electrical wires cut the corner and run tightly through what will be inside the room. I'll have to replace them. The plumbing vent stack also runs up through this area. I'd hoped it would be on the other side of the sink, the direction I won't be expanding the passthrough / window into the family room. Instead, it's sitting right where I need to run the new header. Great.

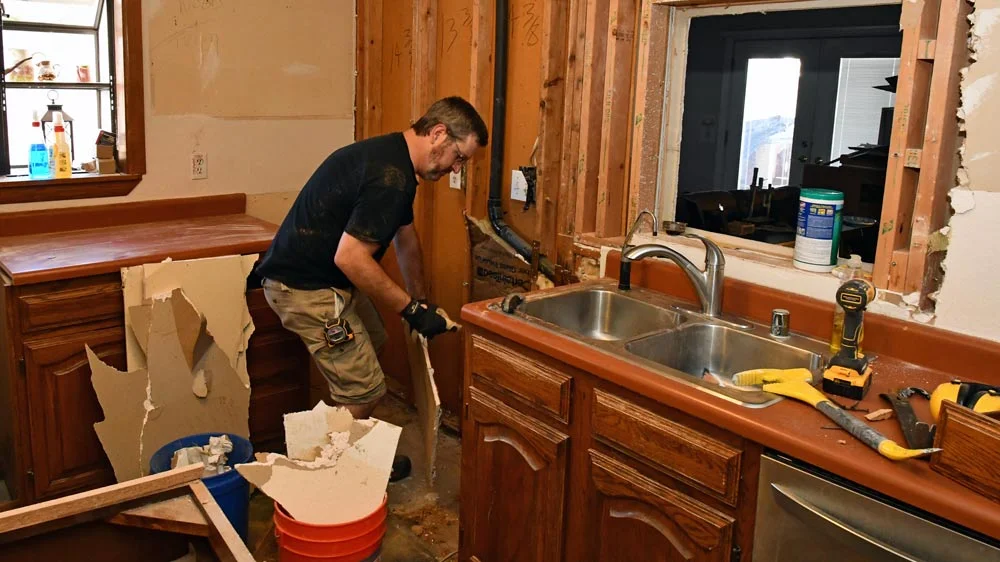
I learned my lesson with drywall when I did the south wall. Installing a patchwork of small pieces is tedious. Since I also need to get at the electrical and plumbing, I ripped all the drywall off that end of the wall before I started slicing up the countertops with my cordless circular saw.

I kept everything neatly modular so I could put it temporarily back in place. The south wall of the kitchen is basically complete now, but with the stove, pantry, and refrigerator there, it doesn't leave much countertop to work with. We'll need it for the holidays.

I unscrewed the cabinets and tugged them out of place.


With cabinets slid out of the way, I tore the rest of the drywall out, right up to the side of the sink cabinet.
Every time I bust into the walls of this house, I keep an eye out for hidden treasure. One of these days, I'm going to strike it rich. It's gonna happen. Keep following my social channels and you'll be there when it happens.
Helping Hands of AZ DIY GIRL
The pint-sized cavalry arrived, desperately wanting to help her daddy. We discussed the plan of action before I let her loose on the old, busted child-locks and wash-cloth drying thing (that we never used). Gracie is clearly a power tool bad-ass in the making.


She loved cleanup.
I loved that she loved cleanup.

She needed a tape measure too.
I wanted to keep pulling cabinets and drywall. I figured I could disconnect the water, dishwasher, and drain and reattach them as needed.
More Problems
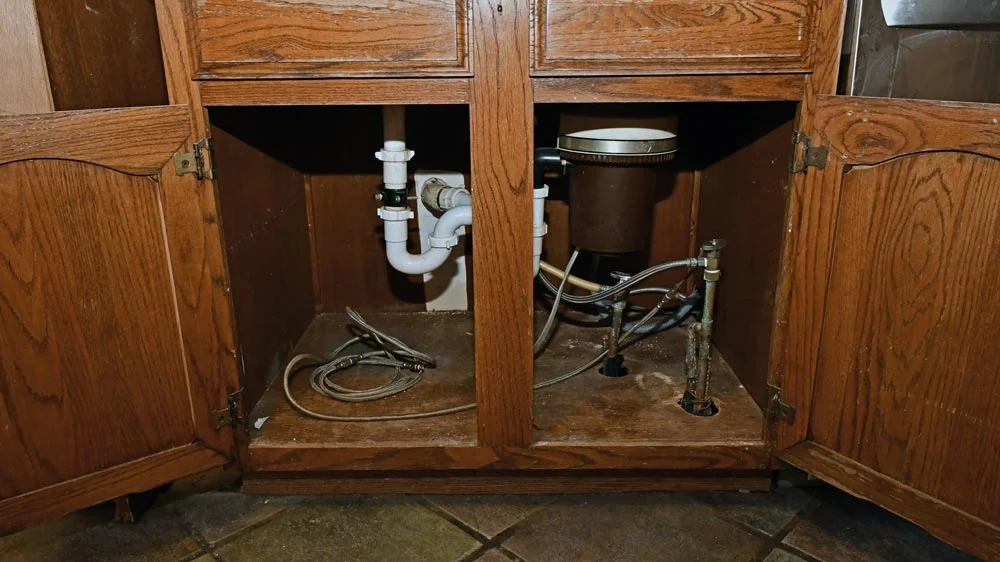
The water feed lines are stupidly placed right out in the front of the cabinet, where a drawer cabinet will eventually land. I'm going to have to move them somehow. They tear up most of the usable space in this cabinet anyway.
To cap it all off, both valves are broken. The knobs just spin endlessly, so I can't turn the water off. So much for my plan to disconnect and reconnect after each workday.
Easier said than done. We're on a concrete slab, no basement access.
With not enough time left in the day for anything major and family laundry running, I couldn't shut off water to the whole house to replace those valves.
I decided to cut the bottom of the cabinet out so I could see what I would be working with.

I cut the back of the cabinet out too.

Look at the whole mess. The plumbing stack runs left through the wall moving upward at a 45 degree angle. It does a horrible job passing through studs, leaving very little wood to support the wall. That's an item for another day too.
The water lines come up through the concrete, right near the front of the cabinet,.. with their cheap, broken valves.


I pushed the base cabinets into the wrong place for the time being. I'll get 'em in the right spot for the week.

Next up, I gotta fix those under sink valves before I can do anything else.
Stay tuned!
Need to catch up on the story so far?