


I've been banging away at our big kitchen gut and remodel project for months now. I've reached roughly a 50% point, with one wall now almost complete. It's been a challenge with all our stuff, including the pantry contents, scattered around the kitchen and dining room during the construction.
As we start migrating our stuff into the fancy new cabinets and drawers, we figured it might make our lives a little easier if we could actually open them. I'd need to install the handles and knobs, creating a terrifying prospect of drilling holes through brand new, unspoiled cabinetry.
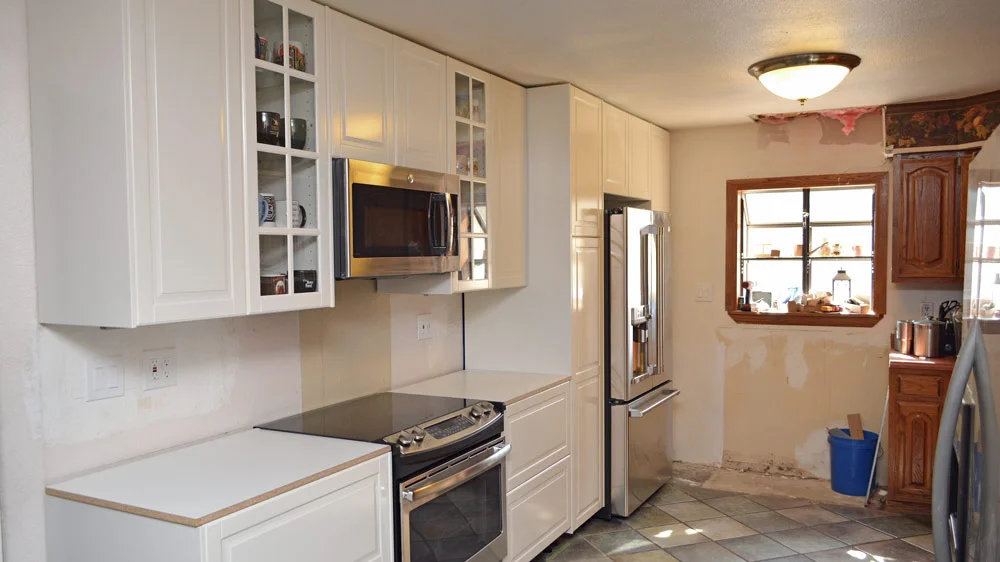
Before you ask, those countertops are temporary!
The Cabinet Hardware
We searched around for a while, online and in showrooms trying to decide what we wanted. IKEA's offerings didn't really fit us. In the end, we chose something slightly rustic and already beat up so we wouldn't have a meltdown at the first inevitable scratch.
We ordered Cosmas Weathered Nickel hardware through Amazon. It was pretty economical. We got ten, Weathered Nickel Bin Cup Drawer Handle Pulls with 2-1/2" Hole Centers for $25 and a twenty-five pack of 1-1/4" Diameter, Weathered Nickel Round Knobs for $29. The same company also offered an attractive, mushroom-head version too, but we decided on the more detailed, round knob.
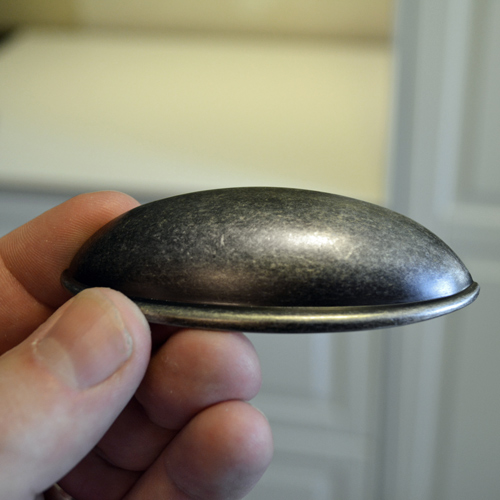
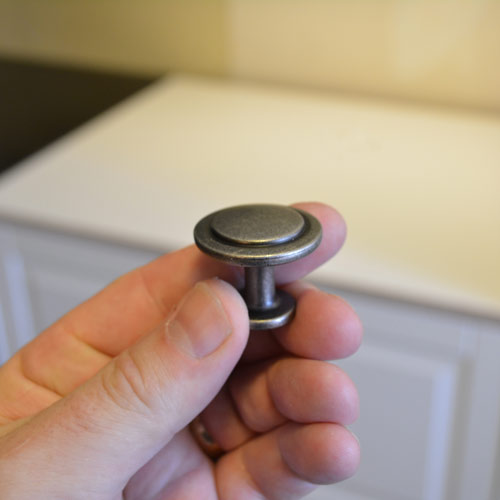
The Cosmas stuff includes plenty of versions and finish options. After working with it, I think it's good quality, especially considering the price.
On Drilling Brand new cabinets (gasp!)
I like to think I'm a fairly competent DIY'er. (I haven't even been to the emergency room in months!) The thought of drilling into these brand new cabinets and making the slightest measuring mistake was really bugging me. Sure, the herculean journey for new door or drawer fronts from IKEA would be a mind-numbing 7 minute drive from Castle AZ DIY Guy, but the cost, embarrassment, and waiting time just wouldn't do. I couldn't afford a bone-head mistake.
There are purist internet-weenies out there who will call me out for looking for an easy, precision solution instead of diving in head first with a tape-measure and drill, custom crafting my own jig, or some other old-school nonsense. They don't live in my world. I want something easy to use and repeatable, so I can use it months from now with the same results. I need to be able to start and stop with the multitude of interruptions for a weekend DIY Dad's work schedule and not screw up.
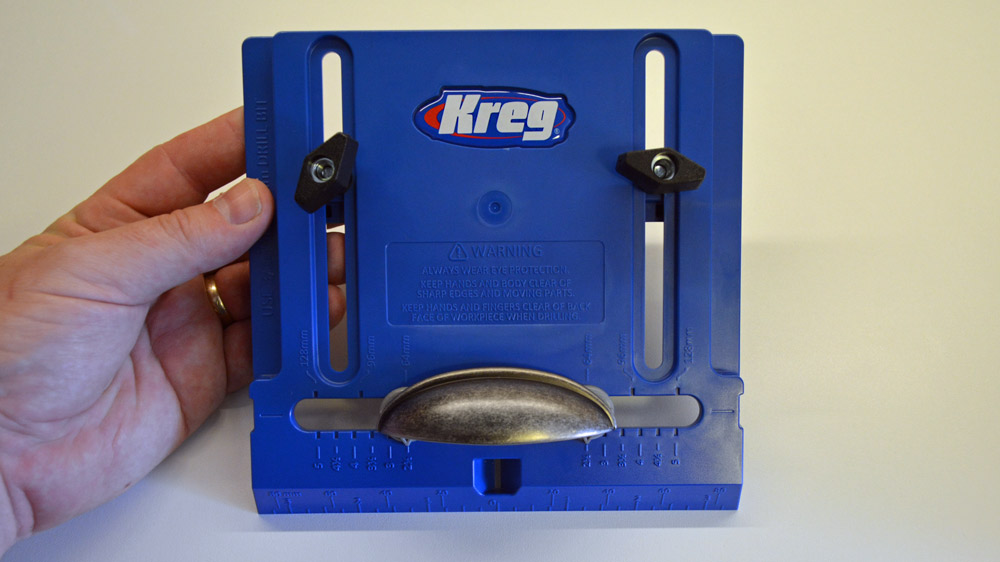
So, following my absolute love of my Kreg Jig Jr. Pocket Hole Jig (Review here), I ordered the...
Kreg Cabinet Hardware Jig
I'm about to drill into brand new cabinets! I'm going to give this sweet Kreg Tool jig a go! #dothejig #cabinet #hardware #diy #remodel #kitchen #renovation #weekend
Posted by AZ DIY Guy on Sunday, August 27, 2017
This is a heavy plastic piece with plenty of adjustments. Since there are some slightly different settings and methods between them, I'll show how I installed the pulls first, then go through the knobs. Both are super easy.
How to Use the Kreg Jig for Cabinet Pulls
1. Set the width
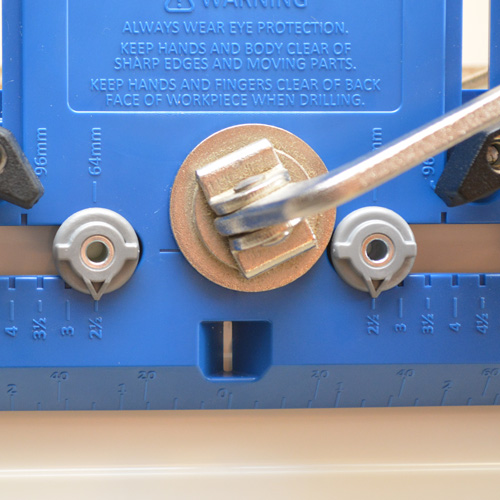
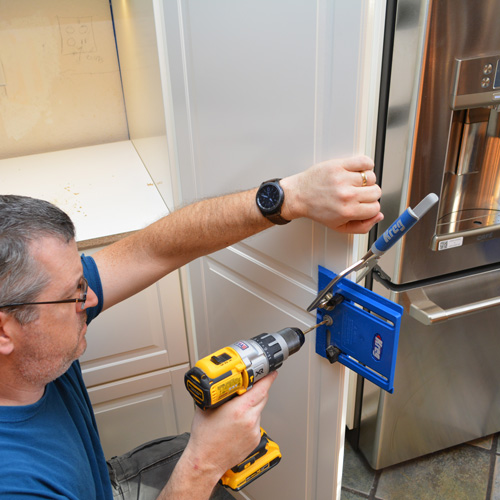
The first thing I did was to set the two drill guides (gray) in place and tighten the knobs on the back to lock them in. There are pre-set stops for the most common size pulls and handles, from 2 1/2" to 5" apart. Indexing pegs on the back side and notches easily locate the exact locations and pop into place with no measuring.

Front edge of the Kreg Cabinet Hardware Jig with drill guides set at 2 1/2 inch spacing
I tested the fit of both my hardware and the jig settings by screwing one of the cup pulls, right through the drill guides.
Perfect.
I've got it handled.
2. Set the depth
There's an edge guide on the back side with a scale to help set it precisely. I'd decided I wanted the mounting holes in the center of the top rail of the drawer fronts. I set the measurement at 1 1/8" and locked it down with the two, large T-knobs on the front face (black).

3. Mark the center location
Here's where to pay attention friends. Measure and mark the center point for the pull. If you're feeling feeble-minded with tape-measure math, double check your center-line calculation by measuring in from both directions and make sure you hit the exact same spot both times.

Finding the center
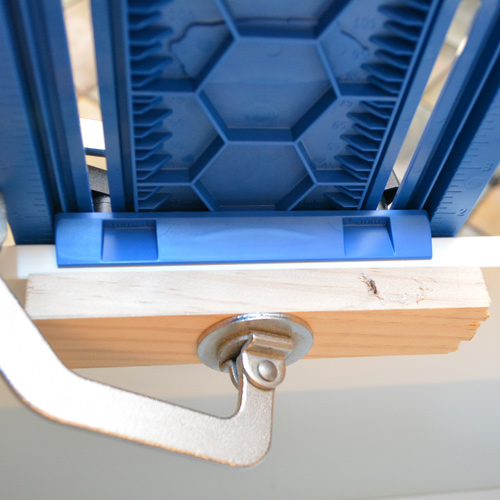
4. Clamp the jig in Place
The whole trick to getting repeatable precision and enjoying the process is to make sure the jig is absolutely secure by clamping it.
I think an attempt to hand-hold the jig in place while merrily drilling though it is certainly possible,... for macho chumps. Don't be a chump; what's the point? But if you absolutely insist on joining the ranks of chump-dom, at least pay attention where the drill bit is going to exit and its proximity to your meaty flesh. I don't want to have send you a Purple Hammer Award.
Any solid clamp will probably work, but Kreg's own Premium Face Clamp does a super nice job of it with one-handed ease. The jig doesn't come with one, but I've found that the one I bought for use with the Kreg R3 Jr. Pocket Hole Jig was perfect for the task.

Getting jiggy.
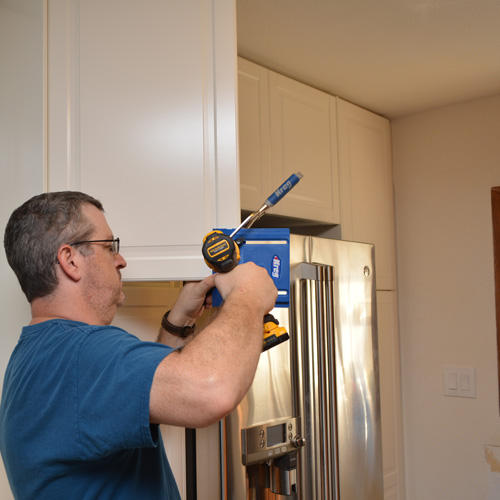
Target the mark on the middle of the drawer through the cool, little centerline window. I like to slip a sacrificial block of scrap wood on the back side, in the drawer to prevent possible splintering and blow-out when my friendly drill bit pops through.
5. Drill, Baby Drill
Chuck a 3/16" (4.5 mm) drill bit in your favorite drill and fire it up. The steel drill guides do their job by directing a perfect, 90 degree angled hole through the face.
My drill bit was probably not the sharpest one in my arsenal, but the holes still ended up nice and crisp.

Staying on target
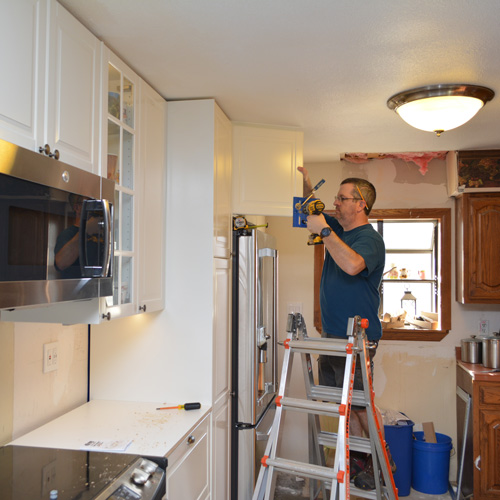
It would be more efficient to assembly-line the process and drill all the holes in the kitchen at once, before falling back to install the hardware.
I laugh at "more efficient" and choose to constantly change gears by installing as I go. I guess I just like to see progress as it goes.

The weathered nickel finish really pops against the smooth white of the cabinets. I think we made the right choice.

Here's a quick video of my somewhat dull drill-bit in action. Perfect spacing.
How to Use the Kreg Jig for Cabinet Knobs
1 Install the Drill Guide to Center
One Knob = One hole. Of course. The drill guides are easy to adjust and remove with the threaded, heavy plastic nuts on the back side.
2 Set the Height
The jig includes a scale on the front edge. You just slide it up to the bottom of the door edge. I suppose you could also measure and make a mark to view through that center sightline. It would be cool on a future version if there was some kind of pin or flip out wing to lock in the vertical measurement and take one more chance to make a goof away, but this works really well.

3 Clamp in Place
Lock the rascal in place. Be sure that rear edge guide doesn't slip or pivot in the clamping action. It would throw off the knob location and be easy to spot along a length of cabnitry. Don't forget that sacrificial back block to protect against tear-out on the back, especially since it's right near eye level.

5 Make a hole!
The best part, zap that 3/16" bit through the door with confidence.

Perfect.

One knob installed. A bunch more to go.

I held the same vertical measurement around the kitchen (the south side anyway). Each knob landed in the same, low corner spot of the cabinet doors, centered on the stile (vertical) and rail (horizontal). Only on the huge pantry doors, did I adjust and place the knob in the center of the door.
Knobs and Pulls installed!
All the hardware is installed and looking good. Now that we can open all the doors and drawers easily, we've started moving our stuff back into this side of the kitchen.

Final Verdict
I give the Kreg Cabinet Hardware Jig a big thumbs up. It's tough and ingenious. I accurately installed all the hardware in this run of cabinets in about an hour. It's well worth the pricetag, at less than $20.
With this side of the kitchen fully operational, I'm going to turn my attention to the north wall. Demolition is coming soon. You gotta love demolition.