

I’ve been remodeling the dining room, including trim and a high wainscoting / plate rail. We’ve added some new furniture too, including a dining table, chairs and a side buffet.
That buffet calls for a lamp or two. We also decided we’d like to be able to switch a light on when we enter the room from the bedroom side of the house. Flipping a switch to activate a lamp would do perfect.
There’s a receptacle; the problem is, there’s no switch at that end of the room. Challenge accepted.

It’s OK in the daytime, but in the dark watches of the night,… spooky.
I’d bought a cut-in style, electrical switch box. These things are pretty simple to install, just mounting into drywall in a wall cavity between the studs.
I flipped the box backwards and traced the outline onto the wall.
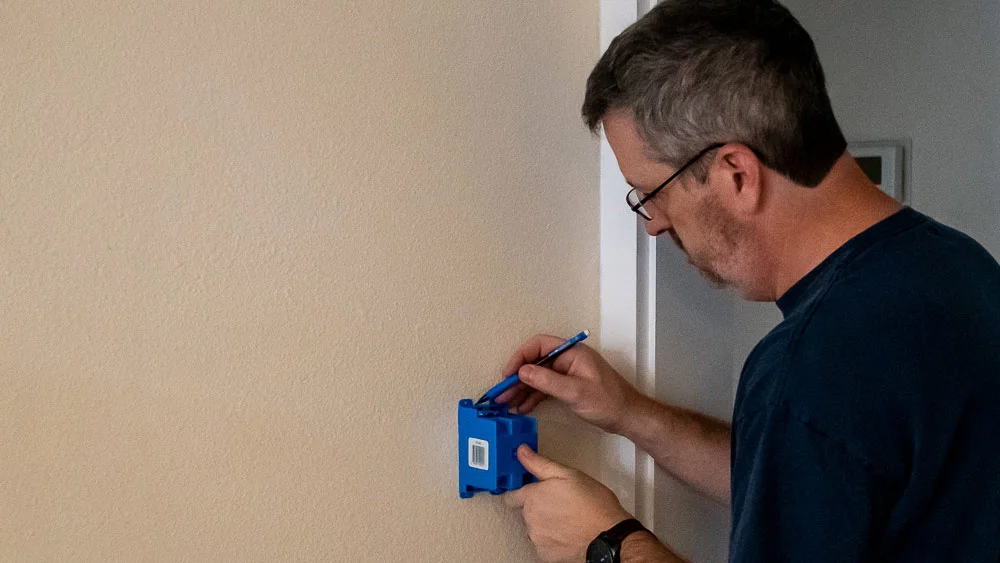
Installing a new light switch
There are plenty of ways to make a cutout in the wall for a switch box. You can use a simple jab saw, a spiral cutting tool, or my favorite, an oscillating multi-tool. The cut line is just the rectangle of the cut-in box body, not the little ears flaps at the top and bottom; those need to stay on the outside of the hole to keep the box from falling into the wall.


A new path for electrical cable
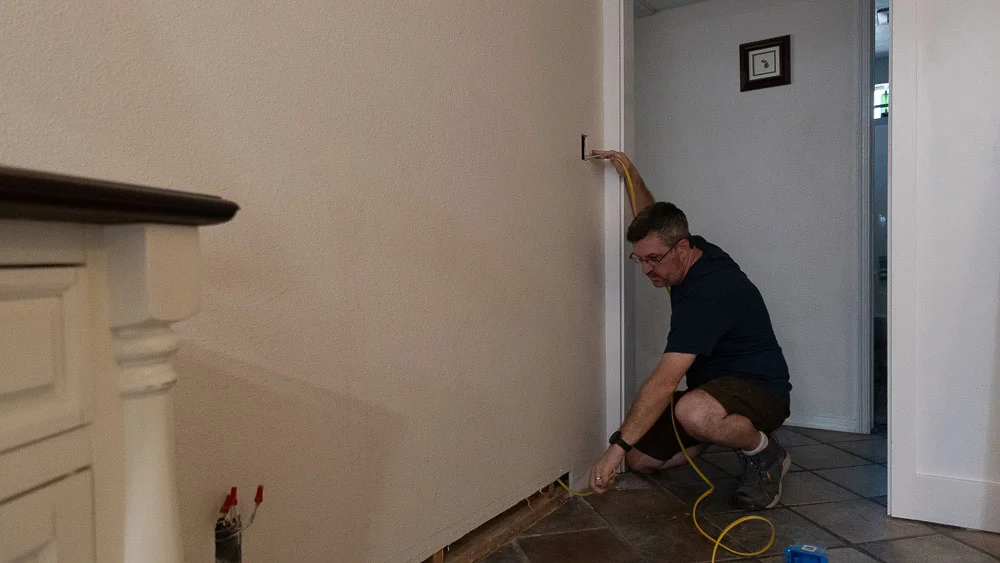
I try to avoid attic work, especially in Phoenix in the summer. Rather than fishing electrical cables up the wall, across the attic and back down to the receptacle, I chose the low road.
I’d be replacing the base molding anyway, so I peeled the old builder-grade stuff off the wall. I used the oscillating multi-tool again to cut a line between the new switch location and the outlet, just below the height of my future base molding.

The low road
Ever so gingerly, I eased pried, wiggled, and teased the strip off the wall, in one piece, with a putty knife and a painters tool. I’d want to put it back later, after I ran the electrical through the wall.

Stay on target,…
Since I couldn’t fit my drill inside the wall easily I popped in a right angle attachment and a short spade bit.

Right angle, left angle, whatever it takes.

Yeah, I nailed the focus on this photo. It’s clearly going to win a Pulitzer.
I bored through all the vertical studs between the two locations.

Fresh drilled
Wiring a new switch
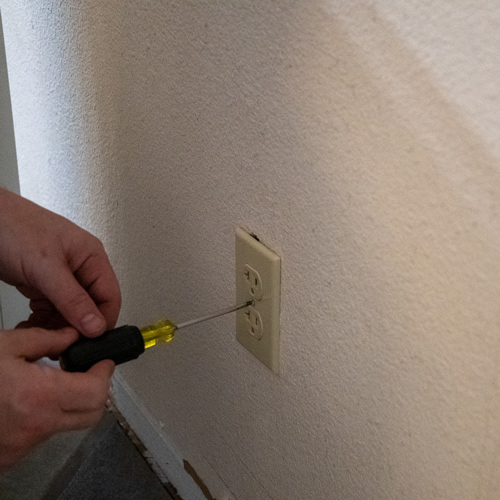
With the circuit turned off at the panel board, I removed the receptacle. I put everything back together, capped it off and turned the power back on. This circuit powers Wi-Fi for the back side of the house, we can’t have that off for more than a few minutes can we?


Sharp eyes may have caught that the existing receptacle was a 20 amp, commercial grade outlet. Inexplicably, it’s on a 15 am circuit breaker and 14 gauge wire. Not cool, it shouldn’t be there. At least I’ve never hooked up a 20 am appliance, like a small welding machine in our dining room and put our home at risk of fire.
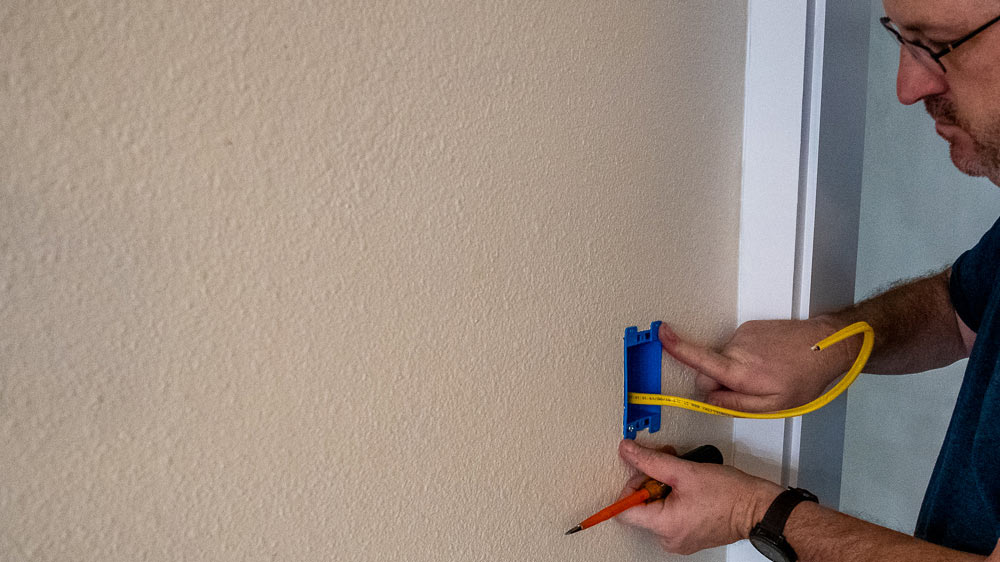
It’s OK to oversize the wire though, I fed some 12 gauge, two conductor cable down the wall (12/2 w ground).
…and it’s yellow!
The existing box was a plastic one. They have built in clamping so I didn’t have to attach another piece of hardware. I just had to pop a little plastic tab and finesse the cable up the wall, into the box.

Finessing,… finessing…
I’d install the new switch in a cut-in style, old work box.
Old work Box vs New Work Box
“Old Work” means it gets installed into existing conditions. “New Work” gets installed as the structure is built, by being nailing to an exposed stud, before drywall goes up.
These old work boxes have a set of cool, little wings that flip out as a couple corner screws get tightened.

Winging it
After feeding the cable through, I slid the box into the wall. The wings clamped the box to the face of the drywall against the front ears, pinning the it tightly in place.
With the box installed, I wired in a new switch and closed it up.


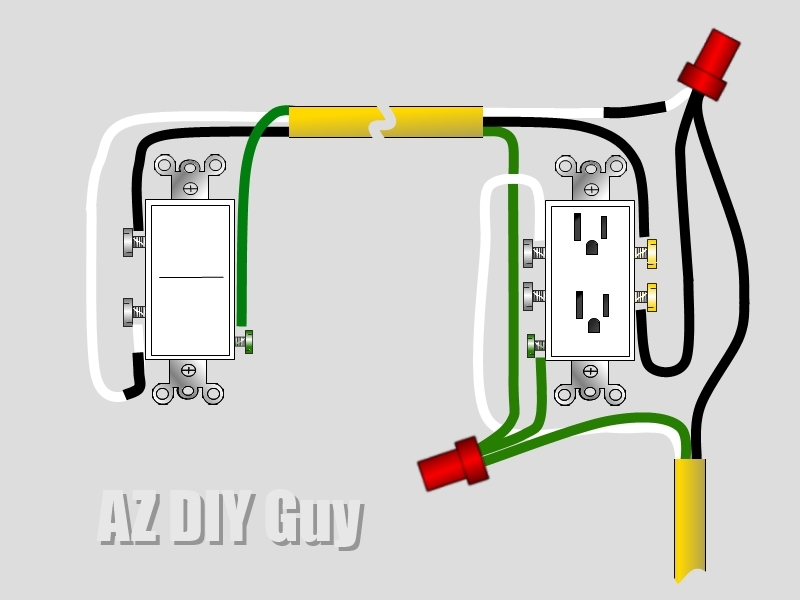
A switch doesn’t actually use a neutral wire; it simply takes “hot” current from one location and either opens or closes the loop back to the device.
I chose to break off the little tab on the hot side of the receptacle to make half of it switched and the other half always powered.

Cut it
Since my new cable only had black and a white (and green ground) wires, I identified the white as hot with black electrical tape.
Here’s a quick diagram. Note as the power (black wire comes in and hits the receptacle on the bottom and also heads off the switch).
Since I needed to screw drywall back in place, I didn’t want to take any chances of puncturing my new electrical wiring. Steel, cable protecting nailing plates would be like an armored shield.

Battle Armor
I pounded those cable protectors onto each stud, spanning across the area where I’d drilled and run the electrical line.

With that, I could seal the wall up. I shaved a tiny bit off the back of the drywall over the nailing plates so it would sit flush and screwed the original strip back in place.

Leave no trace
I killed the power, wired the clean, new 15 amp receptacle, and turned the power back on for testing. Before I sealed everything up I toggled the switch and,…

Let there be light.
One of the tricks often used in homes it to install electrical outlets with the ground prong hole facing upwards, when they are controlled by a switch. It’s easy to see the location is different from the rest of the house.

Do you know how to get there? To the upside down? - Mike Wheeler
I ran the beefy, new base molding as I continued the Craftsman-ish style trim around the room. For now a small lamp is doing the trick in the wee hours of the night when we need some light. The dining room is coming together.

“May it be a light to you in dark places, when all other lights go out.” - Lady Galadriel