

This is one of those projects that wasn't on the schedule. I had other plans. Not only did I not plan on working on this, but what started as a simple repair got an awfully bad case of project creep.
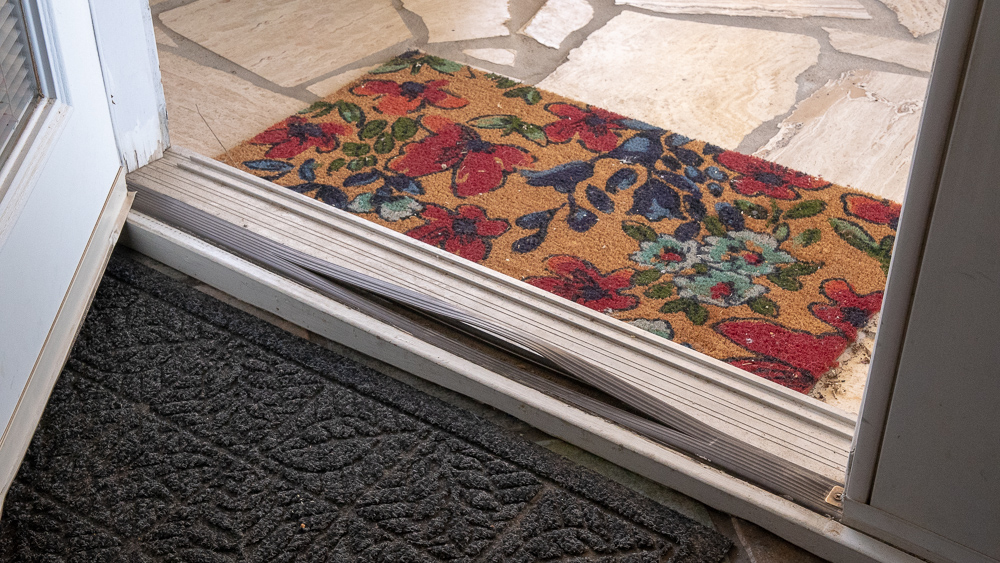
The whole sordid affair started with a split down the center of the rubbery-plastic piece sealing the threshold of our patio french doors. That little split caught on the door and became a whole big mess. We couldn't even close it without a fight.
That ain't right.
I figured I'd pop the piece out of there, grab a new one, and slip it back together. For a DIY bad-ass like myself, I'd have it fixed in about 45 minutes and be on the couch typing up an easy-peasy tutorial.
Regular readers know I'm always wrong when it comes to my estimations on a project's degrees of easy-peasiness and speediness. I started merrily, blissfully ignorant of just how much I'd bitten off.


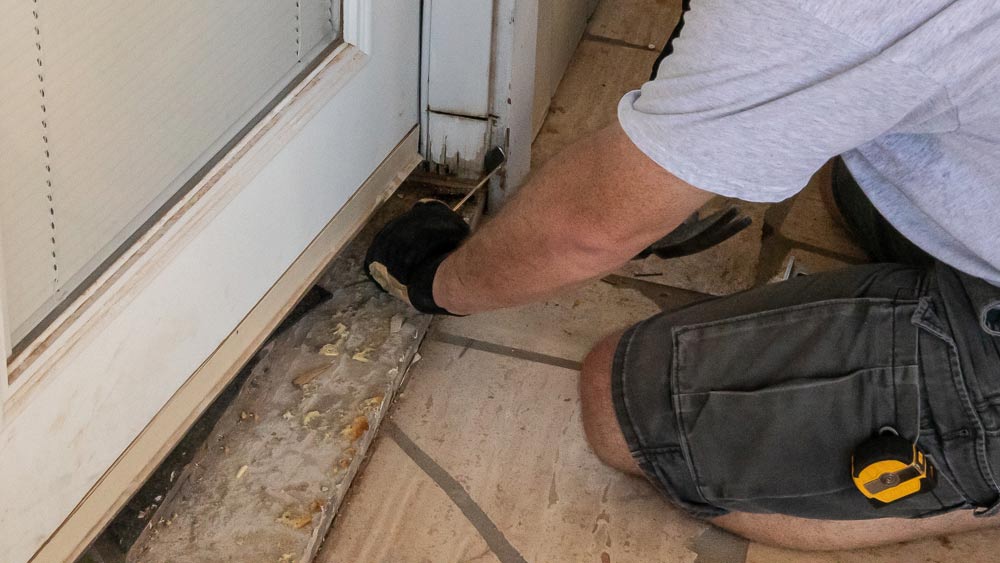
It turned out I couldn't get the piece out without removing a length of ugly wooden trim as well. The finishing nails holding it in place penetrated through the plastic piece. I had to break out the pry bar and give it a good tug.
The trim was ugly because of the woefully uneven tile work it covered. There's a good half-inch of unevenness across the span of the doorway.


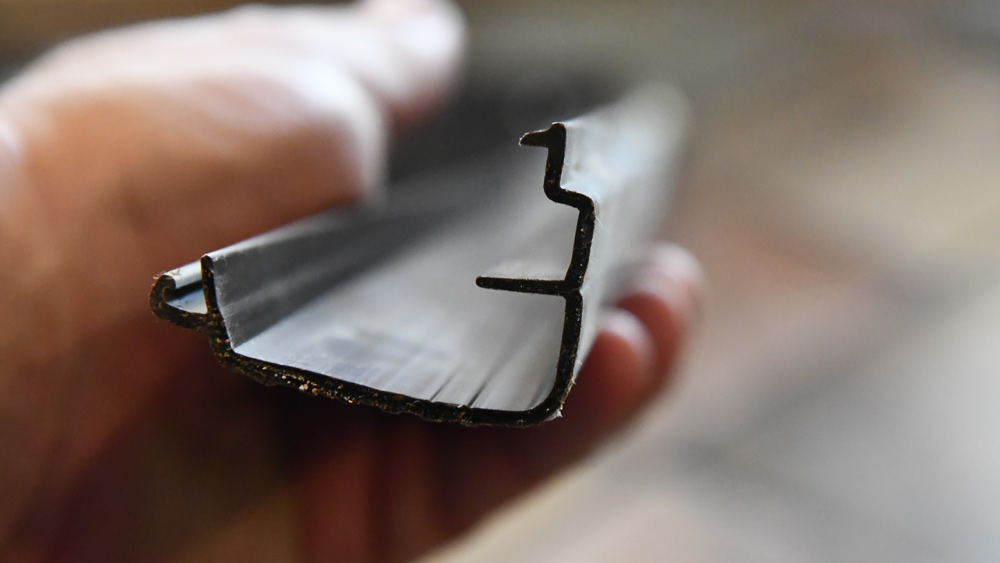
The plastic trim piece was easy to snap off once the finishing nails were out of it. I'd just run out and grab a new one. I knew Lowe's still sells this Jeld-Wen brand French Door; ethey'd probably stock the parts.
Well, that was a total bust...
Lowes, Home Depot, and Ace Hardware all came up dry. None of them carried anything like I was looking for.
I bought some puffy weatherstripping to temporarily seal the gap from creepy critters and the out-rush of our expensive air conditioning. I'd have to hunt online for the part. I'd order it from the manufacturer and wait for delivery.

Temporary weather stripping
Well, that was another total bust...
I couldn't find the piece on Jeld-Wen's website, so I contacted their customer service. Emailing back and forth, I kept getting a link to the same parts page where pieces didn't look quite right. I sent photos, asking which "Sill Riser" would fit my door.
Apparently, they'd changed component vendors a few years ago. Without being able to supply the original order for the door (how could I?), they couldn't identify which of their vendors may possibly have the part. They sent me a vendor list (dated 2004). Crawling those websites, I couldn't find anything remotely close on to what I needed. Great.

The last resort: Total Replacement
It's not really TOTAL replacement; I wasn't going to tear out whole door, but I was going to open a big ol' can of worms, beyond a simple 45 minute "sill riser" replacement. I'd have to demolish the entire threshold and install a new one.
I ordered a new threshold from Amazon.com that looked like it should do the trick.

Installing a French Door Threshold
The new threshold arrived in good shape with all the hardware included. I had been unnecessarily worried about it after reading some of the Amazon reviews. To work!
Preparing the new threshold
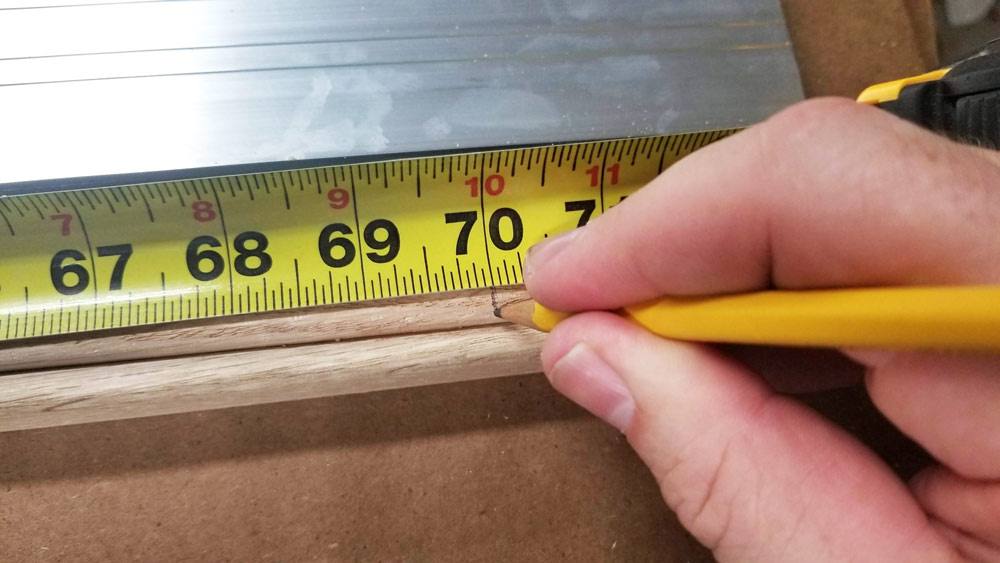
First, I measured the old threshold in place. I'd need to trim the new one down a bit, since it was a little over 72" long; ours needed to be exactly 70".

Measure twice!
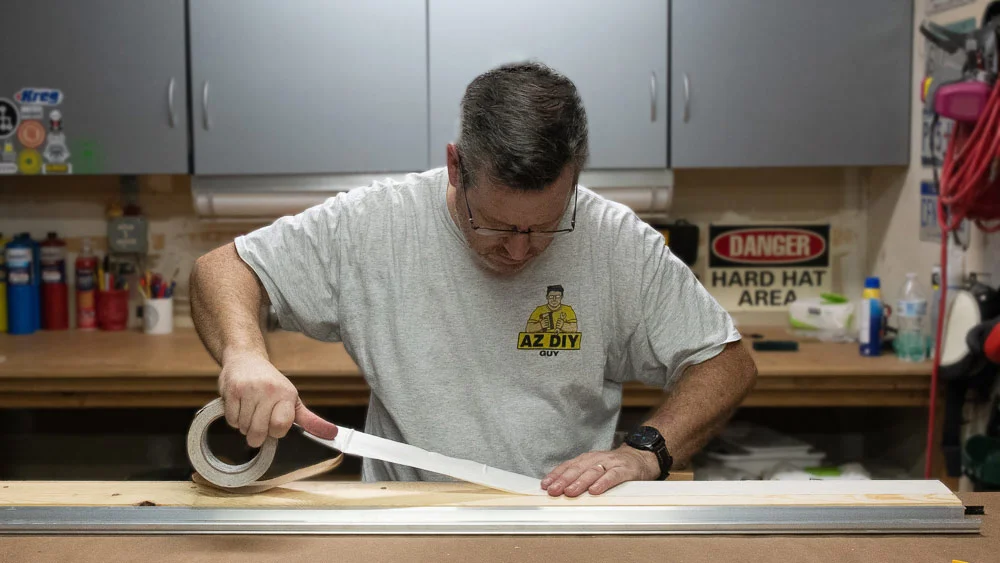
The new threshold was an assembly of milled aluminum, pine, hardwood and a weather sealing strip. I clamped it down to keep all the pieces from sliding when I started cutting.
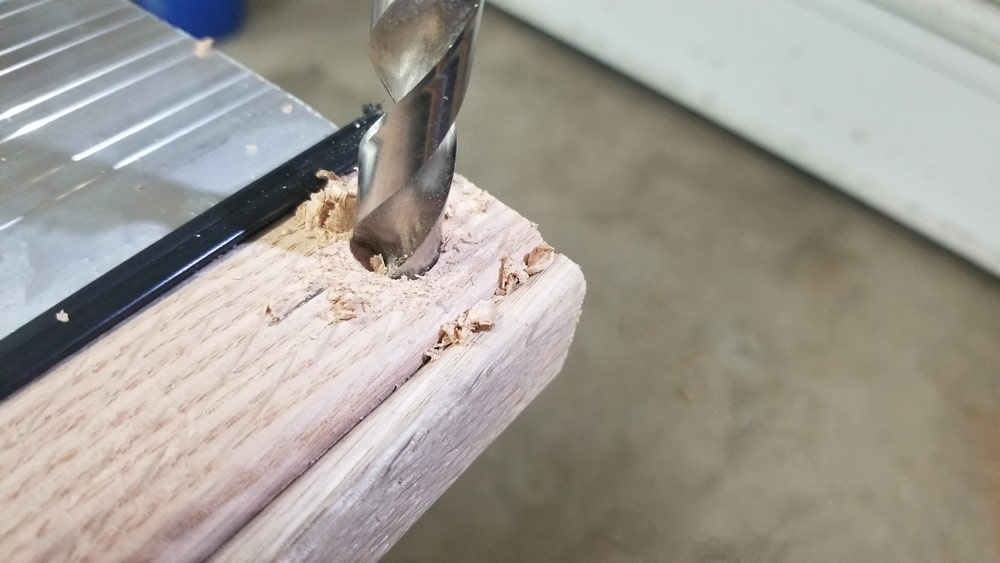
I wanted to trim a little off each end equally, but the spacing of the visible screw heads wouldn't look right. I adjusted and found a good fit for the screw holes for the main traffic side of the door. I'd add one under the right side that the door, which is usually pegged shut.

I wanted a nice clean cut. Since I'd be plowing through multiple materials, I didn't want to use a power saw that might get a little wild. I used a good ol' hacksaw with American muscle power.

Saw: Nicholson 12" High Tension Hacksaw (similar)
After I lopped a little off both ends I had to create that new hole for the adjustment screw. I didn't have a countersink bit large enough to bury the screw head, so I barely kissed the surface with a large, 1/2" drill bit.

The instructions were not really clear, but I figured out that the adjustable height feature works by pinching a tightly fitted washer against the bottom of the hardwood sill. It was too tight to push on by hand so I slipped a deep socket over the bottom of the screw and used it to tap the washer up into place with a mallet.


Inside the receiving channel of the threshold, threaded inserts got tapped into place. They'd receive the screws and allow the sill to raise up and down a quarter inch. With our out-of-square, uneven house, I'd need every bit of adjustability.e

Although, it wasn't mentioned in the limited instructions I wanted to add a little barrier between the wooden base of the threshold and the concrete, I added some flashing tape I had lying around. A layer of extra protection wouldn't hurt.
Capturing it on tape
The threshold would have to be fastened down securely, so I pre-drilled a series of holes along the length of it, inside the adjustable sill channel. The mounting screw heads would get hidden by the sill.
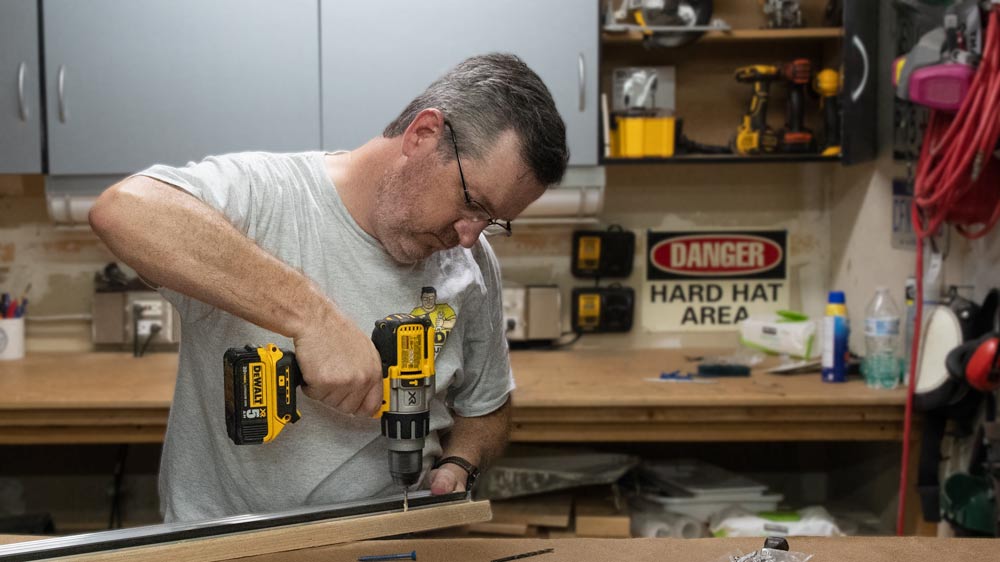
Drill: DeWalt 3-Speed Cordless Hammer-drill Bits: DeWalt Titanium
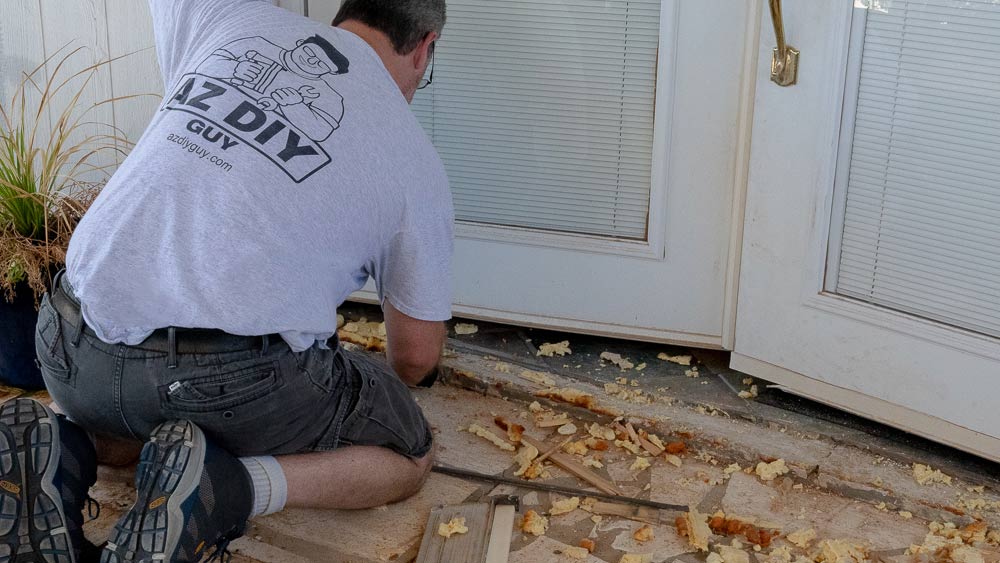
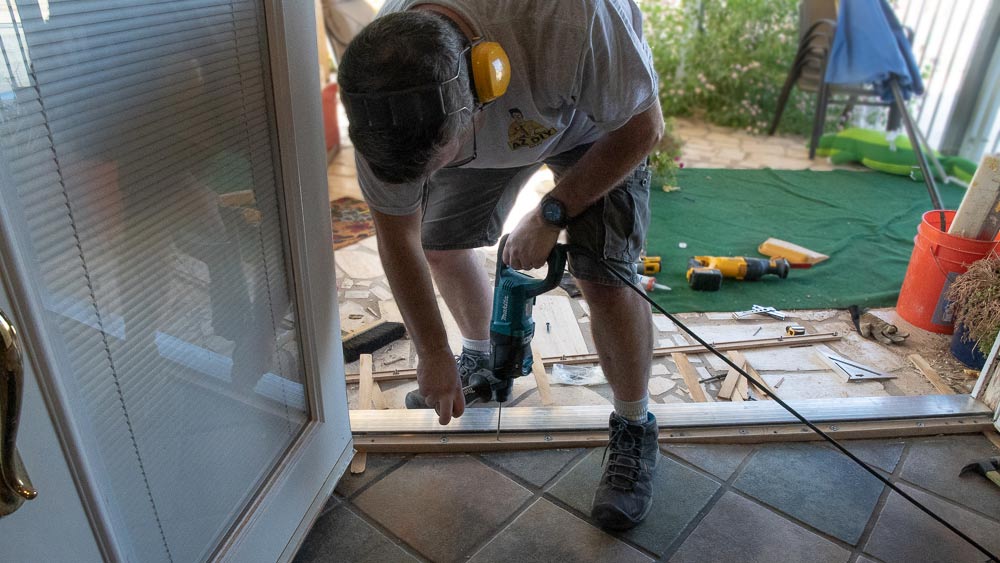
Out with the old! Demolition
Back out at the door, I started removing the threshold. Nothing fancy, I'd cut the sucker in half and lever out the pieces.a
I love the fact that I can load a blade into my reciprocating saw upside-down or sideways. It can get me into different situations where the handle and battery pack make it inconvenient. (Speaking of tight spots, as much as I love my current recip', I'm drooling over this new, compact version.)

Saw: DeWalt - 20V Reciprocating Blade: Freud - Diablo Steel Demon
I used a blade meant for cutting heavy steel. It was conveniently sitting on my workbench, whimpering and begging to chew through some light aluminum, wood and plastic. Who was I to argue?


The old threshold popped out pretty easily.
It had been sitting on a bed of expandable foam, shimmed into place. I'd have to do the same. The concrete edge was so uneven and out of level that I'd have to adjust the fit as I installed it. There were places along the doorway that were nearly an inch low.
It took a while to scrape all that nonsense out of there and clean it up.

I brought out a holdover from my brief electrician days to pry and snip the finishing nails from the door frame. Diagonal cutting pliers get a lot of use outside electrical wire snipping. With their ability to cut nearly flush on one side, they're just handy to have around in a remodel.
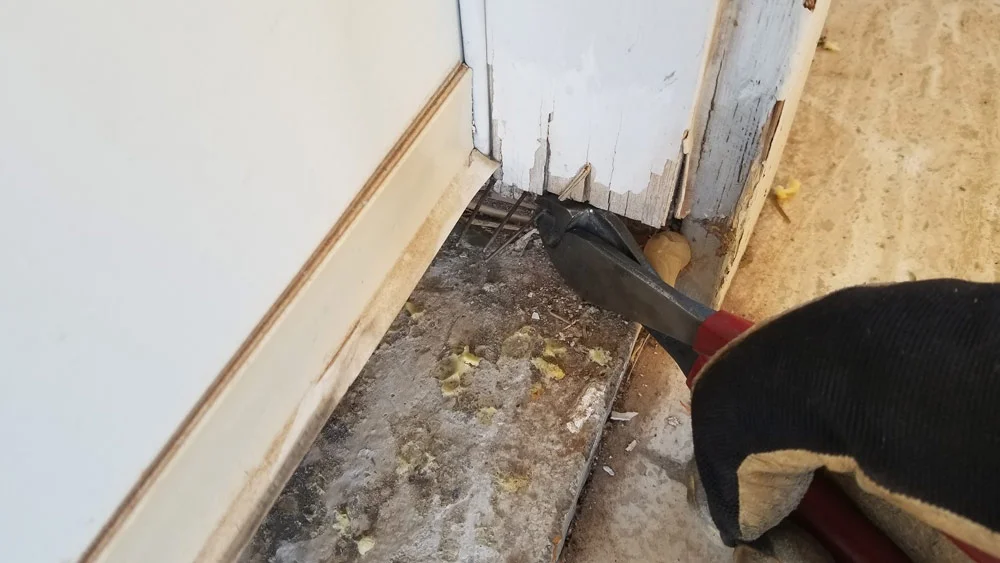
Nail Nipper: Klein Diagonal Cutting Pliers
"While I'm At it" - More Project creep
Although the door is well back from the weather, under the patio roof, there was a good amount of damage to the bottom of the door jam. I'm sure it was a result of our watering the flowers that decorate the patio as well as dripping kiddos coming in from the pool.
I figured I might as well fix this too. I stabbed the jam with my handy-dandy Oscillating Multi-Tool and cut a clean line above the damage on both sides of the door.

It took a while to scrape / chisel that bit of jamb out. It didn't pop free nice and cleanly. There had clearly been glue in-between the layers of the door frame.

Clean Shaven
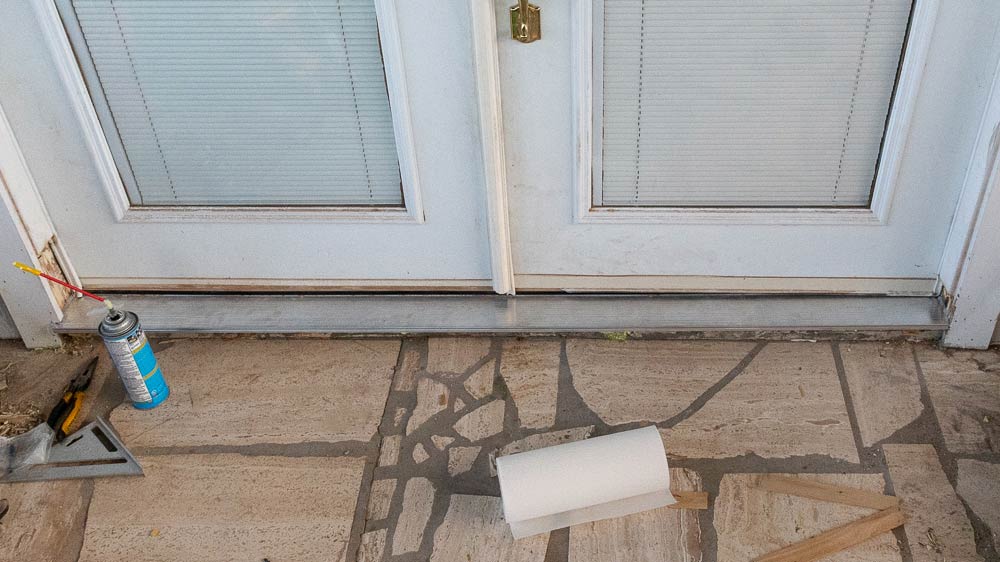
Installing the new threshold
With everything all cleaned up and prepped, the install is pretty straight forward. I leveled out the threshold with some cedar shims, bringing it up into range where the adjustable sill could reach the door sweeps.
That done, I needed some depth so I used a long 3/16 masonry bit in my big hammer drill to punch through my pre-drilled holes into the concrete slab.
For fastening, I found a concrete masonry fastener at the 'Depot I hadn't tried before. They seemed mighty, so I thought I'd give 'em a spin.

When there's space for a raised head screw, I love using hex head's. They're so much better than Phillips bit stuff when coupled with a good magnetic bit in an impact driver, it gets the job done perfectly. I've had my set for a long time and probably should upgrade them to impact rated.

I need to upgrade to an impact rated bit: Impact Ready Nutsetter Set
The Simpson Strong Tie screws worked really well. They zapped right in there and held tight.

I shot some expanding foam in to fill the gaps. It's important not to use the regular stuff because it could possibly bow the threshold out of level, I used Great Stuff Window and Door Sealant. It's a little less aggressive on the expand-iness.
If you've never tried it, expanding foam is loads of fun. It's just cool to watch it puff and grow.

Once again, laying down on the job.
I cut off all the shims, drilled a hole for the latching pin, and attached the latch plate.

At this point we're basically weather tight.
That's more than enough for one post. Stay tuned for my continuing adventures with project creep. Although it's still super hot out and I'm committed to indoor projects, I'm going to continue with this door for the moment.
I still have to caulk the inside where it meets the rough tile edge. I have to replace those chunks of the door jamb I chopped out. Heck, I'm going to replace the trim on the outside. It's ferociously bad.
