


Kitchen soffits are those boxy bump-outs above the high cabinets. We don't really love them or hate them, but they do need to removed as part of our remodel. We're going to lose a good chunk of cabinet space as we shift from a U shape kitchen to a galley style, so we're going to go for taller cabinets, all the way to the ceiling.
Before we moved too far in our planning, I had to do some investigation to see what may lay in wait. Remember when I pulled the drop ceiling out of the family room (in my very first blog post ever)? I found a weird beam protruding beyond the wall face. I had to extend the wall face out to hide it.
Harken back to yester-year. There it was, the year 2012...

This bastard cost some time and money.
Faced with hidden mysteries in modern times, I don't want to be derailed by some hidden surprise again. Duct work? Electrical? Framing? Is there even a drywall ceiling above the soffit, or is it open to the summertime horrors of an attic in Phoenix?
Investigation Locations
There are three soffits to investigate. I wanted to them in less-than-obvious locations. I'm not quite ready to demolish the kitchen, so I didn't want to leave gaping wounds in its face.

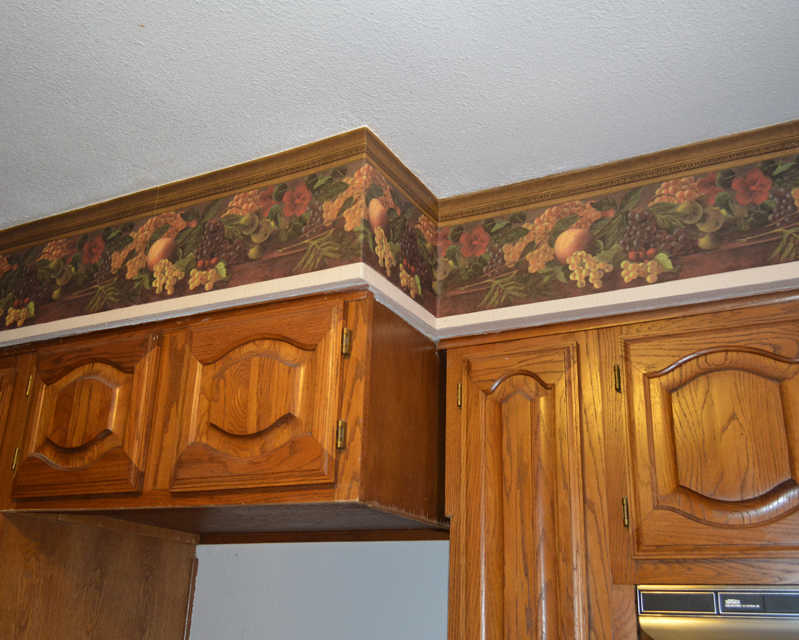
The existing kitchen layout. Soffits are over all the cabinet areas.
- South Wall - This is a protruding, upper cabinet section that used to be over the original, small refrigerator. When the original fridge died I had to move the new, standard-size one to the end and install a small piece of counter-top in its place, because it didn't fit. I'd punch through from the west side where it bumped out. The damage would not be visible from the kitchen entrance.
- North Wall - Over the sink and in front of the opening I want to widen, I'd cut in from below. This was an original, exterior wall, but now look into the family room. Coincidentally, it is exactly on the opposite side of the wall where I'd run into that stinking, money-sucking protruding beam face in 2012.
- West Wall - This is the exterior wall where I'm hoping to install a door. There's currently a single-pane greenhouse window, facing the scorching afternoon sun. I'd burrow in from below again, hiding the surgery scar behind a wooden trim piece.
Location #1: South Wall Soffit
Before I make the cut, I invite you to marvel at this delicious wallpaper. I guess the vineyard motif is only slightly horrible, for its time, but what's up with the wallpaper crown molding? Completely horrible.
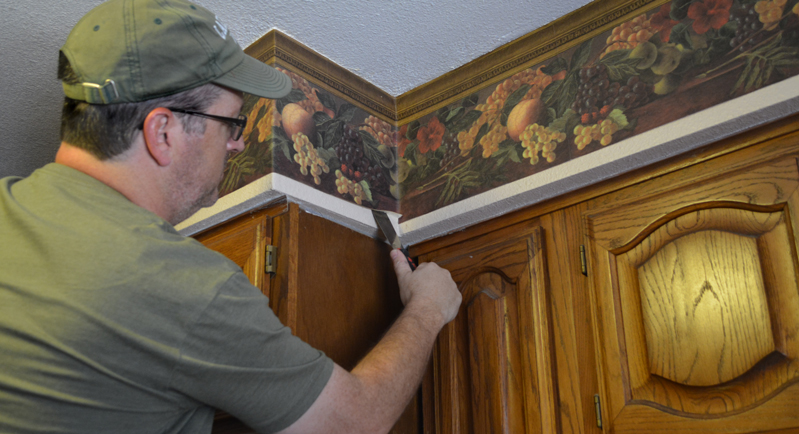
I'd hoped to cut the wallpaper back and fold it off the soffit face like a flap. I figured I'd just glue it back over the damaged spot. I sliced the corner with a razor knife and started gently siding a putty knife behind it.
That didn't exactly work out, so ehhh... I just tore it up and started stabbing with the drywall saw. It took a bit to find a clear spot to punch the saw through. I kept hitting internal wooden framing, but I managed to remove a rectangular plug.

I was hoping there's be a hiss of escaping, stale air as I broke into the vault, sealed closed since the ancient times of 1979.
Unfortunately, it was nothing as exciting a Indiana Jones sliding open the Well of Souls. At least there weren't any snakes.

Asps... very dangerous. You go first.
- Sallah
I stuck a flashlight up there and took a look around. The camera allowed me to see around the corners, wherever I could stick my arm.
Soffit #1 Action cam!
Yes!! Other than some serious 2 x 4 framing, it looks good. There is nothing bad up there that a little drywall compound can't fix. I'll have to plug that hole for the range exhaust hood when we move the stove and (hopefully) install a new microwave with exhaust.
I sealed the hole up, simply taping the cut-out back in place. That'll do for now.

ye ol' temp fix
For a moment I thought I'd quit there and assume the whole kitchen would be fine. (ominous music).
I changed my mind and continued on.
Location #2: North Wall Soffit
Finally, remembering I am a man with an arsenal of power tools, I ditched the silly human-powered drywall saw and grabbed my cordless Oscillating Multi Tool and a vacuum. I sliced into the soffit above the sink.

Apparently, those safety glasses are keeping my head safe.
I guess you don't need a full, action-cam video for this one. No issues. Just an electrical line to the over-sink light I'll have to move up into the attic. Good. Good. Gooooooooood.

Good news all around. Except...
Location #3: West Wall Soffit,... and the bad news
The best for last. I merrily sliced in,... all innocent and happy...

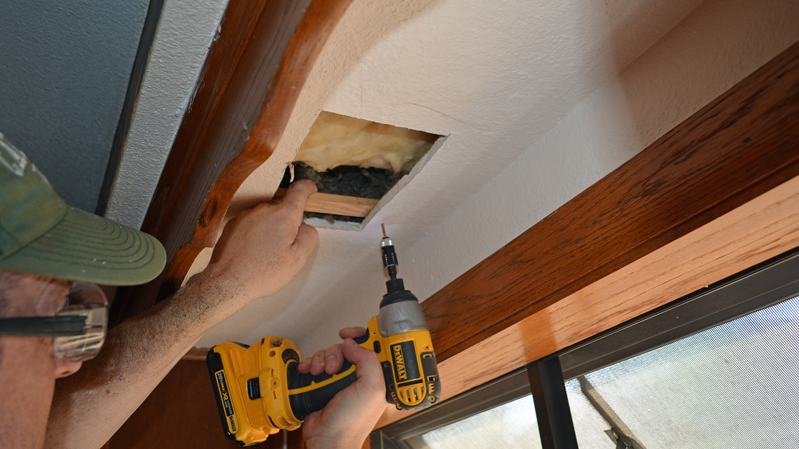
... and got a face-full of itchy, nasty blown insulation crap. Why the hell did they just fill this one full of insulation? Was it because it's the west facing wall that takes the fury of the afternoon sun?

I'd figure it out. Going in...
Soffit# 3 Action Cam!
Well that sucks.
The area I want to work on first has a soffit that's completely open to the attic. Why? I can't see a reason why. It was interesting to see that abandoned, boarded-up hole. I also spotted some sliced up framing up there.
I'm thinking this isn't an original kitchen after all. Other floor plans like ours have the refrigerator at the far end, where I want to put the door. I'm now thinking they rearranged things when they put the family room addition on, so the kitchen would get a window to the outside. There are other clues, like the textured ceiling inside the soffit space. Doesn't it seem like texture would be sprayed after they were built, if they were original? Maybe this is a late 80's / early '90's reno.
I'm not going up into the attic at this point. It's just stupid hot up there right now. No thanks.
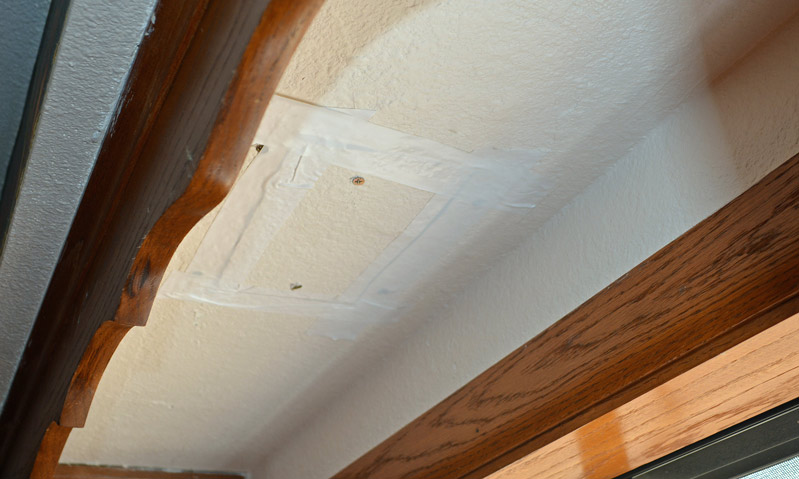
I patched the hole up by screwing some scrap wood in place to hold it and fastening the piece back.
Investigation complete. It's not that bad. Only one of the three soffits needs major work. It sure could have been worse. I don't relish opening the first one up while it's still above 110 degrees out.
What do you think? Do I have my work cut out for me, or what?