

I recently wrapped up the remodel of our daughter's closet, with the finishing touch of an adjustable organizing system. Because sometimes I'm a bit of a pea-wit, I posted the final reveal without showing the install of his final, key component. We'd picked out a wire rack style system for speed, affordability, and the ability to adjust it our kid's needs as she grows from her elementary school years.
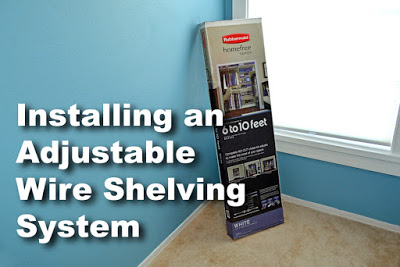
I bought a starter kit boxed system, the Rubbermaid HomeFree 6 to 10 foot No Cut Closet Kit
from Lowes. There was a display at the store along with a good stock of add-on options. I'd be able to customize the system to fit our needs.
I started the install with a blank wall, freshly painted and ready to go. Of course, if you are not a regular reader, I actually started with a single shelf, cave of doom, closet of horror, many months ago. There was sooo much work in getting the wall to its current blank condition.

The cave of Doom
The install process started with locating the studs behind the drywall. Most of the weight needed to be held from solid framing, not the painted, paper-backed plaster of drywall.
It was a good thing too, I desperately needed an excuse to pick up a new toy, since my old stud sensor was toast. This cool little Zircon Studsensor e50 Electronic Stud Finder
did the trick nicely. It found both edges and projected an arrow for me to mark the target.

stay on target...
Since the far left edge didn't have a stud, I used one of the included plastic anchors. It had wings that folded inward to slip into a freshly drilled hole.

It got a quick tap tap from Sweetness to set it flush with the wall.

Sweetness!
Finally, there's a included little set-tool widget that comes with the kit. You push it into the drywall anchor, forcing the wings to splay out behind the drywall.

With the top rail screwed into that end anchor, I could pivot it until it was perfectly level. I pre-drilled through the drywall, into the studs and drove heavy screws with an impact driver.
.

This particular kit is expandable from 6 feet to 10 feet. The adjustability is accomplished by overlapping the top rail pieces, and telescoping outward until the space is filled. I drove the heavy screws into each stud, including the overlapped area.

There's a snap-on cover that helps space the verticals. I added a small one to space the first hanger a couple inches away from the wall.

The verticals simply hang on the horizontal bar.

A full-size spacer snaps into place, marking the location for the next vertical.

Each of the verticals got anchored to the wall with those same plastic anchors, just to hold them steady. The load bearing would be done from the horizontal rail, mounted securely to the wall studs.

The kit included extensions that hung from the verticals using a metal clip. They too got anchored in place.

The shelf hangers snapped securely in.

The wire shelves popped onto the hangers. At the rear of each hanger, was a sliding clip lever that locked it into place. Like the back rail, the shelves overlap and telescope to whatever custom length is required.

The shelf hangers do double duty by supporting clothes rod hangers as well.

I played around with several configurations, until I found one that I liked. I went with vertically stacked, double hangers, for the hanging clothes and a variety of shelves to hold her stuff.

I figure I at least quadrupled the horizontal storage on that wall by tearing out the single shelf and replacing it with this multi-level system.
A top shelf, high overhead would keep seldom used items for long term storage (or stuff that I want to get rid of, but our pint-sized pack-rat wants to hang onto forever).

No more wasted space, the entire wall is put to good use. I'm really happy with this Rubbermaid system. Although I was a first time user, I installed the whole thing in about an hour. It was incredibly easy to and looks pretty good for a kid's closet. The only negative I see is that we have to store her books horizontally or they will slip through the shelves. No biggie, I could lay a thin sheet of hardboard across those sections, if necessary.

There is even a shoe slipper (?) rack. Apparently it's so cool that our little lady actually puts her shoes away on her own, without being asked. Magic!

It holds Rudolph, rainbow star-spangled, AND panda slippers!
I had enough pieces and parts left over to customize a little section above the closet entry door, for more of that seldom used stuff. I had to take a hacksaw to the vertical pieces to fit, but it still worked out great.

I hope she doesn't spot that pain in-the-butt EasyBake Oven soon
Overall, it was a fun way to finish up the closet remodel. It was the step that made the little room functional, once again.
I may install the same system in our teenage son's closet too. It's a standard, front-facing closet layout, but it still uses that same single shelf with hanger setup that this walk-in originally featured.
The Rubbermaid system we picked up had plenty of expansion options on display, like drawers, baskets, and extra, original kit parts. I was able to build the configuration I wanted with the basic kit, right out of the box. I even have a few parts left over. I grabbed this particular kit for $178.00.
What do you think of wire shelving? I probably wouldn't use it in a master bedroom closet, but for kids, a pantry or a laundry room, I think it's perfect.

Non-Sponsored post.