

It's been a year and a half since we replaced our aging water heater. The old one had become filled with sediment, rusted, and its elements burned up, destroying the unit. A water heater is an expensive appliance to replace. I don't want to do it again anytime soon, so I decided I'd do annual maintenance on it.
I also wanted to upgrade the cheap, plastic drain valve from the factory. With all the experience with soldering I've gotten this year as a Bernzomatic Torchbearer, I figured I'd craft a custom valve assembly that would allow me to direct a drain hose in a gentle sweep towards the out-of-doors. More on that in a minute.
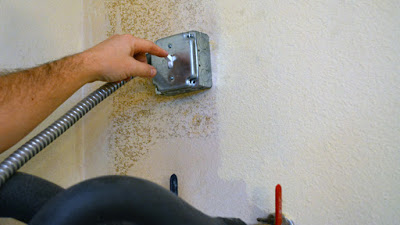
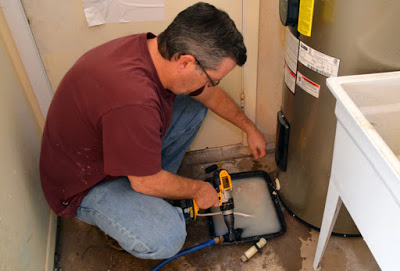
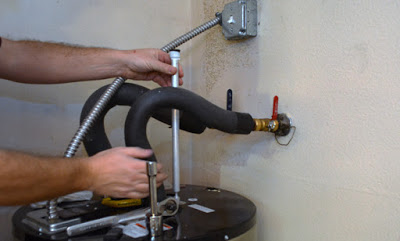
The project is easy in concept, disconnect the unit (power and water), drain it, check the sacrificial anode rod, and replace the valve. Piece of cake , in concept. Disconnecting electricity was the easiest. I'd installed a simple shut off switch a couple years ago. It was an easy project that keeps me from running outside to shut off the power at the circuit breaker. Flip the switch and the unit is dead.
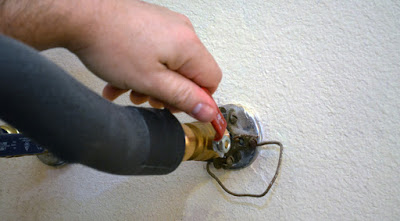
The water was also easy to disengage. When I'd installed this unit, I'd added valves on both the hot and cold water lines. (Of course, I'd reversed the red and blue colors for some pea-witted reason). I also turned on the hot water to the laundry tub, to empty the line a little.
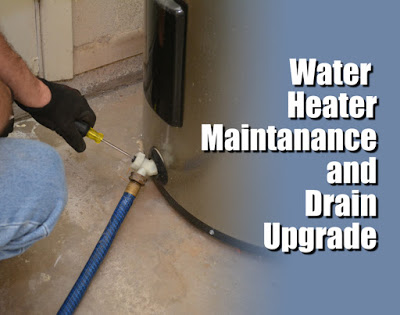
Moving merrily on to the next step to drain the water out, I attached a garden hose and opened the valve with a screwdriver to let the water flow freely.
Yep -"flow freely". Dang it. It was completely jammed up with sediment. I couldn't get a drop through the hose. Even with the valve removed, only a dribble of water seeped out. This would not be the easy, piece-of-cake I'd imagined.
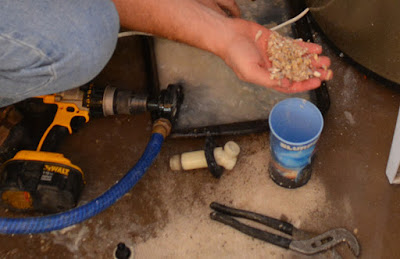
I started poking a piece of electrical cable in through the drain hole and twisting it around. I got a little water and oatmeal-looking sediment to come out.

After a healthy bit of poking, I got water and crud flowing a little faster. There wasn't enough pressure to push all the way through the hose, so I used a handy drill-powered pump to suck the water out of the broiler pan I was using to catch the gunk (shhhh...don't tell my wife). I started making a pretty nice mess, too.
Uuuughhhh...
When I figured I had enough water out of the tank, I opened the pressure release valve to reduce the vacuum in the tank. It helped speed up the flow.
After a while, I was able to hook the hose up with a 6" threaded nipple and empty the tank. I turned the cold water back on and off a few times to flush the rest of the sediment out of the tank.
Temporary loose valve.
Finally, I got to start building my new drain valve assembly. I wanted a threaded 90-degree bend that was close enough to the tank to prevent tripping over. It also needed to be removable, in case I had another sediment clog.
I clamped and cleaned a piece of 3/4" copper pipe and a threaded fitting, preparing them for soldering.

A little flux on both sides of the joint and the first piece was ready for the heat.
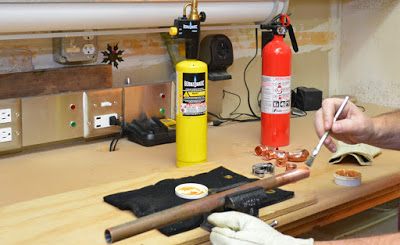
I laid down the heat on the fitting side of the union causing the flux to sizzle and bubble. The TS8000 High Intensity Torch is the sweetest, smoothest torch in the Bernzomatic line. I love its one-handed operation and the ability to upgrade from propane to hotter MAP-Pro gas.

The Bernzomatic TS8000 High Intensity Torch

This particular torch is good for larger pipe. On this 3/4" stuff, it was an absolute breeze. With the flux quickly bubbling under the ultra swirl, high intensity flame , I clicked the torch off and touched the seam with the solder which melted and was sucked into the gap.

A quick quench from damp rag and the piece could be safely handled.
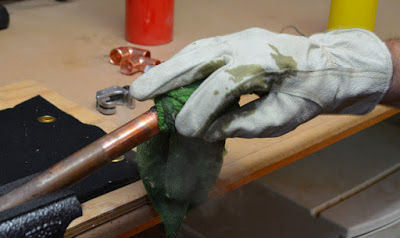
Since this is going to be an exposed piece, I touched it up with a quick dash of sandpaper. Beautiful.
I've really come to enjoy the satisfaction of making a nicely soldered piece. It's actually fun, when you get the hang of it.
I'm really sold on the MAP-Pro with the TS-8000. It gets the piece hotter faster, really speeding up how quickly the solder will liquify. I think I'm sticking with MAP-Pro for my future soldering projects.
I repeated the same steps as I pieced together the new drain assembly.
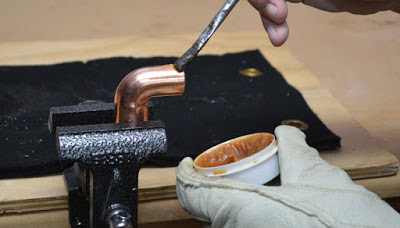
Clean and Flux

Heat the fitting side until the flux bubbles and sizzles

Melt that solder!
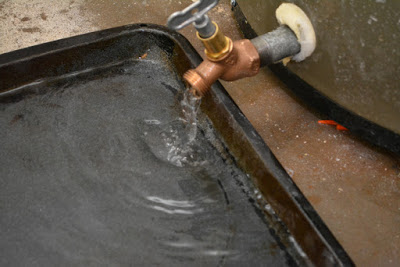
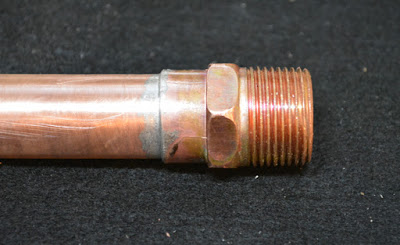
The custom drain elbow was competed with a cleanup and a few wraps of teflon tape to the threaded fittings. This custom piece is quite a bit longer on one end due to the extra thick insulation of our water heater.
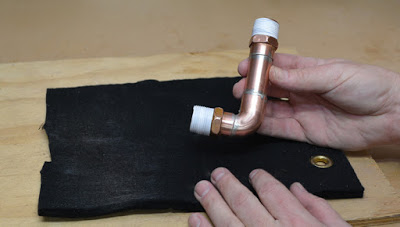
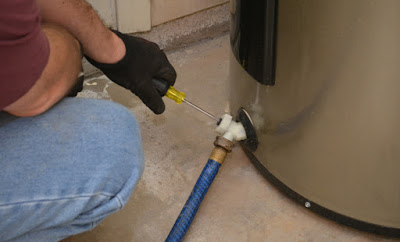
Back at my now soaked and spattered worksite, I threaded the new piece carefully into the drain hole of the heater. When I measured for the elbow, I'd marked the pieces to ensure that it would be parallel to floor when the piece was full threaded in place.
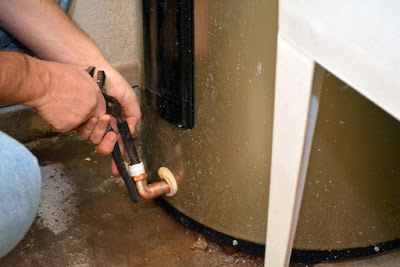
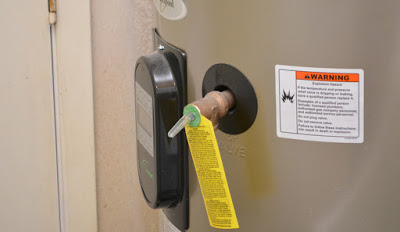
I'd chosen to install a threaded faucet rather than a soldered-on model so that I could remove it and spin the whole assembly off later. If I'd permanently attached it, the assembly would be too large to spin off in the event of another clog.
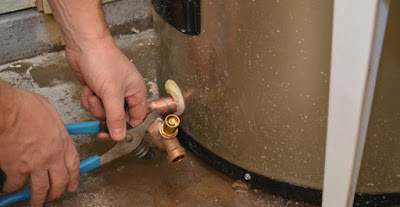
Done deal! The faucet I installed had a removable handle, so I could avoid having little hands messing around and spewing scalding hot water on themselves, flooding the garage. I hid the handle on top of the unit.

The last maintenance step was to check the anode rod. These are sacrificial shafts that stick into the tank from above and corrode over time. It's made from a material that is more susceptable to corrosion due to electrolytic action, so it gets eaten up before the lining of the tank. It greatly extends the life of the unit.
I'd picked up a rod when I was at the home center, so I was going to replace it regardless. It was a matter of popping a cap off the top of the unit, scratching some insulation out of the way and unscrewing it with a big 1 1/16 " socket, on a 1/2" drive ratchet.

It was a little chewed up, but would probably last another year or so. Still, I wanted to replace it anyway while I had the tank empty and the water off. Water heaters are expensive.
It was tough to get out because there was a low ceiling in that area due to a heating and air conditioning duct. I had to bend it.
The replacement anode rod was actually jointed, allowing it to flex in order to drop it into the tank. Handy, eh? Just a little teflon tape on the threads and screw it into place.
Note that this unit is an electrical model. I shut it down with the flick of a switch. If you have a gas model, you're going to want to turn off the heat before draining it. Check the manufacturer's instructions for a safe shutdown. Make extra sure there's no gas escaping while you work, especially if you are doing some flaming torch work in the area.
I filled the tank back up, fired up the power, and cleaned up the tools. Maintenance done. Next time it will be easier if I don't wait for the thing to fill up with gross sediment. Plus, I have a nice metal valve to speed the process. I think I'll adjust up to a 6 month draining schedule, just to keep it ship shape. I'd
autopsied our old one after I tore it out. I never want to see that absolute horror again.
Maintain your heater and save serious money down the road.

This is a sponsored post. I am a proud to be a Bernzomatic Torch Bearer, though all opinions expressed are 100% my own. I won't recommend products I don't believe in.
The Torch Bearers are a group of tradespeople, DIYers, culinarians, adventurers and artists brought together to create projects using Bernzomatic torches and share their knowledge and ideas with you. Check them out here and get inspired to create with fire.
Visit the other awesome Torchbearers and see what they are up to on the Bernzomatic Torch Bearer Site.