


After repairing the emergency water leak in our wall, I decided to take advantage of the opportunity to replace the bath tub valve in our guest bathroom. Ours was an old-school classic, a 1979 "flush-the-toilet-and-scald-the-hell-out-of-you" style valve.
It was also in positively horrendous shape. In addition to the nice flush-n-scald feature, the old valve's temperature selector was a dicey affair, requiring constant fiddling to get it just right. The knob fell off regularly, and the built up hard water stains made for an ugly mess. I'd never replaced it, because the guts were hidden back in the wall, behind a one-piece fiberglass tub / shower enclosure (which we'd like to replace someday too).
As luck would have it, I just happened to have a handy new access hatch on the other side of the wall, in our master bath. It was in the form of a jagged hole that looked like the after effect of a disastrous frat party. I'd ripped out all the soaked drywall during the leak repair and cleanup. For multiple reasons (other disasters, a vacation, and small projects), I'd let it dry out for,... ahem... three months.
It should be dry now.

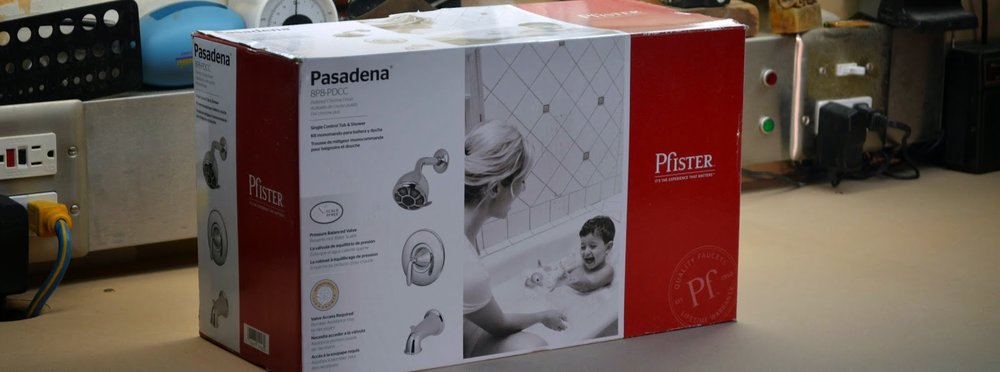
With the laundry for the week still running, I couldn't turn the water to the house off yet, so I went out to the garage for some prep work. I'd picked up this sweet Price Pfister Shower Faucet Set months ago, so it was pretty much acclimated to the temperature and humidity of the house. (It works for wood flooring right?).
As shared in several plumbing repair posts, I'm a recent fan of the new-fangled, push-in plumbing fittings. I'm using them again for this project.
I started the prep work by neatly wrapping all four of the valve's threaded inlets with teflon tape. (IN: hot (left) and cold (right) OUT: Tub (down) and Shower(up))
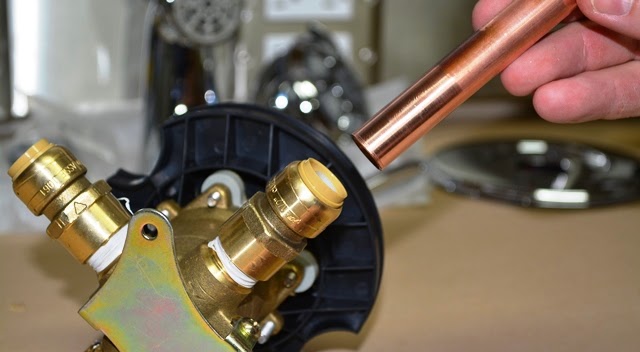
Next, I threaded the four Sharkbite connectors onto the valve. I had to put a some muscle to it, to make sure they were on good and tight.

The next trick was to figure out exactly how much space the new valve would take up in the existing plumbing since it was substantially larger than the original one. They make a gauge for this sort of thing, but I MacGvyer'd it by sticking scrap piece of copper pipe into one of the connectors to see how deep it would go.
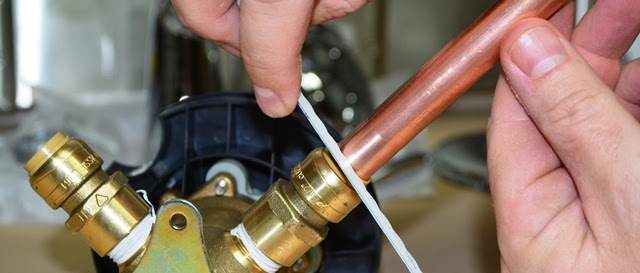
With the pipe fully inserted, I used a hack saw blade to score a line on the pipe at the furthest point of the connector. I didn't want a pencil or marker line to rub off.
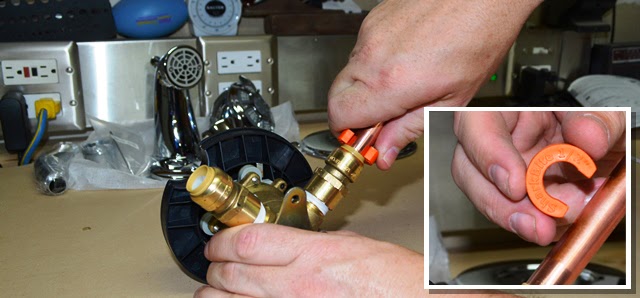
As easy as it is to stick a pipe in, the Sharkbite connectors grip super tight when you want to pull it back out. You have to use this special little plastic horseshoe looking widget to get it to release it's mighty hold. It takes a bit of muscle and dexterity, but it sure beats hack-sawing and re-soldering any day.
I measured across the valve from the furthest points. Then, using the line I'd scored on the scrap pipe, I measured the depth the 1/2" connector eats up, 7/8".
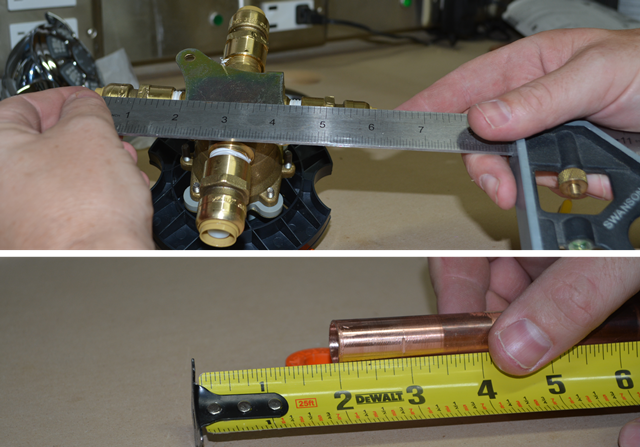
Quick tip: Don't measure from the tip of a tape measure if you need accuracy. That hook thing often has 1/8" or so of wiggle.
I deducted 7/8 of an inch for each connector leaving me with the opening needed in the existing four pipes horizontally and vertically.
I like to sketch my stuff out, partially because I'm a dork, partially because I tend to get sidetracked with a house full of kids and places to take them on the weekends. When I've been distracted, I like to be able to grab my notes and diagrams and jump back into the project without too much head scratching. Seriously, get one of these Moleskine notebooks. They're make a great archive of all your project notes and are fun to flip through occasionally (a mini personal blog, just for you).

Old School Tablet Computer
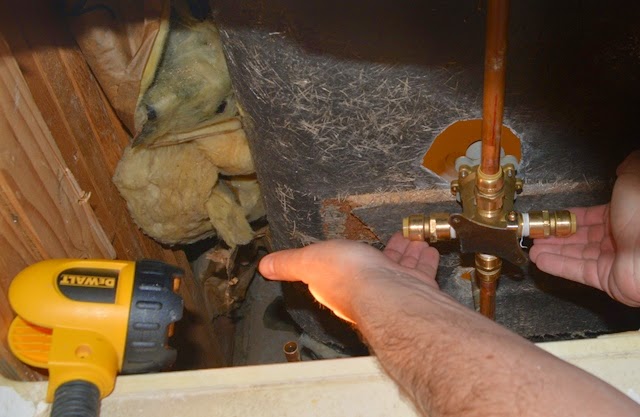
Cleared for for action with the laundry done, I headed to the job-site with my tools and parts. The original valve was still exposed and easy to get to. The fresh repair I had done was holding strong, with out a drip (on the left). That black thing, which looks like the cancerous lung photos they showed us in Jr. High, is the fiberglass back of the shower enclosure.
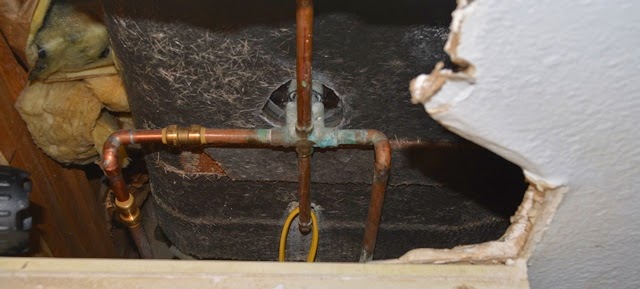
Do you see the problem ("challenge for today") I didn't see yet?
I transferred the measurements from my notebook to the vertical pipe leading to the shower head to the bath spigot, making sure to work from the exact center of the valve. To double check, I measured between my two marks to ensure the total distance was correct.
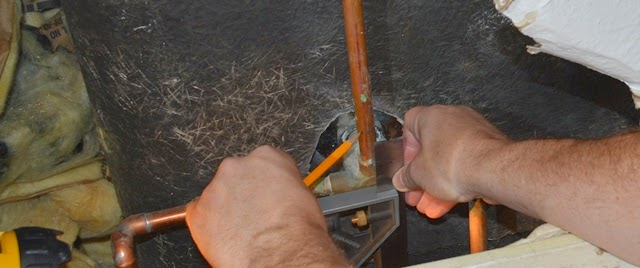
I made the two cuts with a mini-tubing cutter. At this point, the water to the house was still on. I like to shut it of for the briefest possible time. As long as the valve was closed (tub water wasn't running) there was only a little dribble of water in the pipes to contend with.
BTW: The weekend stubble isn't required, but it really helps. Sorry Ladies.
Back on the other side of the wall, in the tub, I removed the screw holding the knob in order to pull it and the selector lever off. The big, round escutcheon plate (flange thingie) was attached with a small set screw from the bottom, into the valve shaft. With that loosened, the plate slid right off. Now, I'd be able to pull the valve out from the other bathroom behind it.

I turned the water off to the house and opened up the valve and a nearby sink to bleed the water from the line. As I measured for my cuts, I finally , I noticed my challenge for the day . At the location I'd need to cut the hot water line, there was a soldered 90 degree elbow blocking my tubing cutter, plus the corrosion on the pipe was so cruddy, there was no way I'd be able to clean it up smooth enough to slip a SharkBite fitting onto it and feel safe that it wouldn't leak.
Great.
I'd need to cut the whole hot-side section of pipe back and rebuild it, lots of soldering.

Crud-tastic
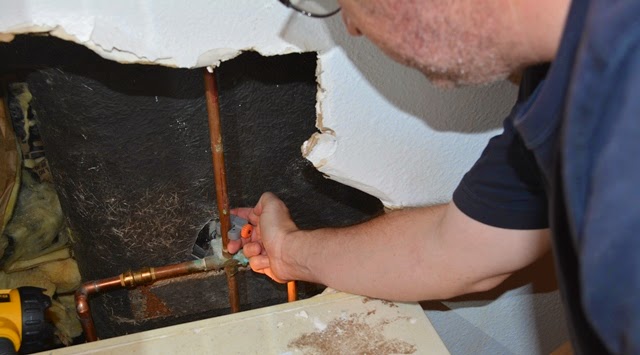
Since the whole thing looked cruddy, even the lowest elbow, I cut it back about 8 inches to the right. It was not a comfortable maneuver for a middle-aged dude that needs to loose a few pounds.

I released the Sharkbite connectors from my original repair on the cold side, so I could pull the whole valve out of the wall. Should I host a giveaway? Don't you think some lucky reader will want a piece of AZ DIY Guy history? I think a twisted piece of heavily-patinated copper with the corrosive crust of 30+ years would look gorgeous on your fireplace mantle!

Ohhhhh yeah. This would look great in your house! With that mess out of the way, I cleaned up the pipe with my little Four-in-One Copper Pipe Brush . It's an important step to clean it, using the push-in SharkBite style fittings or soldering.

I popped the valve in quick, attaching it to the shower and tub spigot. I love these push in fittings.
Thinking it over while I worked, I recalled a comment I'd gotten on an earlier plumbing post suggesting I try "Pex" tubing. I did some quick research and decided to try this plastic, flexible tubing. It gets good ratings, it's easy to install, and does not require a bunch elbows and couplings that could fail.

I ran out and picked up 5 foot pieces of red and blue 1/2" Pex for $1.89 each. By comparison, a 10 foot stick of copper pipe was priced over $13. You can buy 100 feet of Pex for less than $30!
That savings really helps makes up for the cost of the push-in fittings I've been using. I also grabbed some 90 degree reinforcing elbows to ensure I bent the tubing to the proper 3" radius and also allow me to fasten it later.
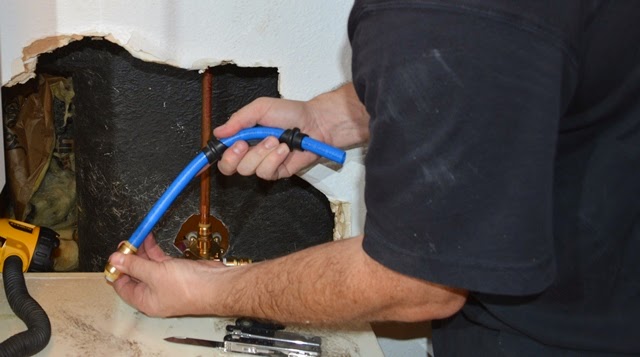
This stuff is easy to bend by hand.
The Pex works with the exact same push in fittings and cuts easily with a sharp knife. I admit I actually enjoy the flame and molten metal approach to soldering pipes together, but I always hate the mad dash from the water valve to the location of the repair, fearing a leak.
I had the new hot and cold lines installed in just a few seconds, turned the water on and dashed back to see how it held. Perfect.

The valve is done, all that's left is to install the trim and control handle.A new shower head and faucet spigot came with the kit so I'll install those as well.
Since this is such a gargantuan post already, I'm going to hold off and bring you the next phase of the adventure soon. Although, it's an easy project, there are always some unusual challenges around here to share with you.