

Despite the kids going back to school, some crazy weeks at work, the still oppressive summer heat, I managed to regain forward momentum on the interior door replacement project. It's getting to be routine now: purchase, plane to size, paint, rout hinge mortises, hang the door, drill and chisel for the door hardware and install the handle / latch assembly. Not a pro, but I'm getting better at it. (Here's where I started)
This time it was Jack's bedroom that got completed. His door had sat, half-painted for four months or so, while I tackled other pressing projects (see the index, April through July). I do get off-track.
I pulled his (young) man-cave door, complete with HAZ-MAT warning and an electrician's lockout tag-out tag out off it's hinges.

I've also started monkeying with the new DSLR camera and tripod, so "action shots" of yours truly are possible. Although, seeing my mug isn't much of an improvement, I can finally show some better photos than the ol' camera phone, and share some updates to my methods.


This time it was Jack's bedroom that got completed. His door had sat, half-painted for four months or so, while I tackled other pressing projects (see the index, April through July). I do get off-track.
I pulled his (young) man-cave door, complete with HAZ-MAT warning and an electrician's lockout tag-out tag out off it's hinges.
I've also started monkeying with the new DSLR camera and tripod, so "action shots" of yours truly are possible. Although, seeing my mug isn't much of an improvement, I can finally show some better photos than the ol' camera phone, and share some updates to my methods.
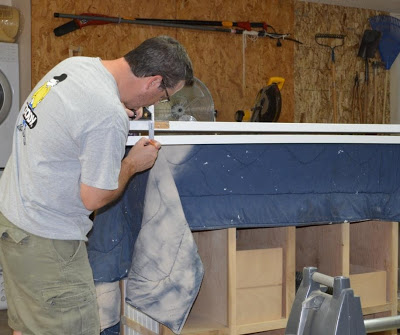
I've started using Bench Dog - Bench Cookie Work Grippers to keep from scratching a fresh door with the old one, when I'm transferring hinge measurements. mmmmm coooooookies!
 |
| Cooooooooookies!!! |
I like to transfer marks directly by using a little pocket combination square rather than a tape measure or ruler. It's fast and accurate, less chance for me to screw up when there's no tolerance for error on door hinges. A slight miscalculation from my melon-head and the door won't fit in the original location.
You'll also notice I like to wear free t-shirts. It's an important step to keep Sweetie from killing me for wrecking, yet another, nice work shirt in the garage. I just thought I'd lob that out there for Jeff over at Home Repair Tutor, who has been known to DIY in a shirt and tie.
 |
| Yes,.... that's the mighty, still not finished, organizer project under there. I'm not proud. |
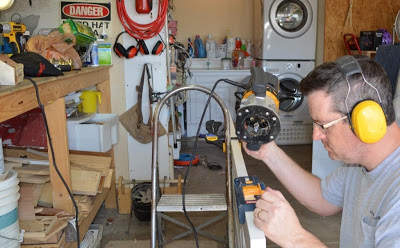
I zapped the hinge mortises out. The Ryobi template is still doing awesome, several doors in.
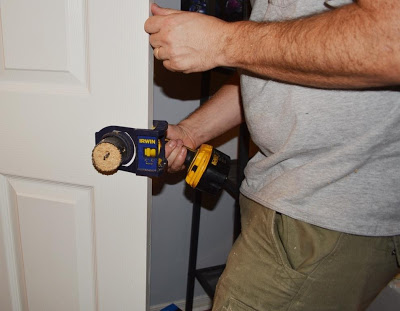
I'm still using the Irwin door lock installation kit that I've had since door #1. I'll do a review at some point, but honestly the jury is still out. It's not blown me away like the two cool Ryobi products I've tried, but it's done the trick,... mostly. Yeah,..mostly good.
I recently shared I tried and reviewed a new tool to cut the mortise for the latch plate. Read my post about the Ryobi Door Latch Installation Kit if you want all the juicy details. It sped up the process and gave me better results than my previous method.
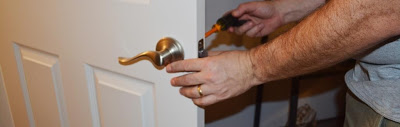
Then a quick bit of door latch installation action (with an insulated screw-driver for some reason).
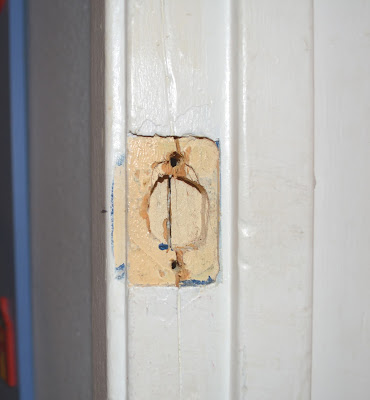
Then, a hiccup. The latch plate mortise in the doorjamb was simply too worn out to hold screws. It's obvious this particular doorway had experienced some violence, sometime in its existence, before our loving family took possession. At some point, the wood had been blown out, obviously kicked in by Genghis Khan's marauding Mongolian hordes. There had been feeble repairs.
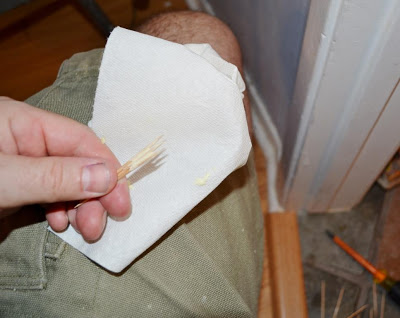
I employed the old 1-2-3 wood glue and toothpicks approach to fill the void. Here's how it's done. Warning, it's isn't pretty, but if you want to know how the soup is made, read on.
Step 1: Slop some glue on toothpicks. Make sure to open the box in such a way that you spill them all over the floor as I have, otherwise the technique won't work. If you're wearing nice clothes to work in (ahem, Jeff), a damp paper towel is nice to have on hand.
Step 2: Jam a three or so gluey 'picks in the hole and savagely snap them off. There's no need for ceremony here. We're cleaning up after barbarians. Note: The spattered glue on my hands is a controlled exercise, just an educational illustration of one possible outcome, if you get overzealous in the glue application. It would never happen to me in real life. I'm sacrificing for you, dear reader.
Step 3: Run the screws in. Pro tip: I like to turn my screws in clockwise, otherwise known in the scientific circles as "righty-tighty". Do it your own direction, I'm just sharing what works for me. Again, I used the insulated #2 Phillips tip screwdriverbecause, well.... I don't know.
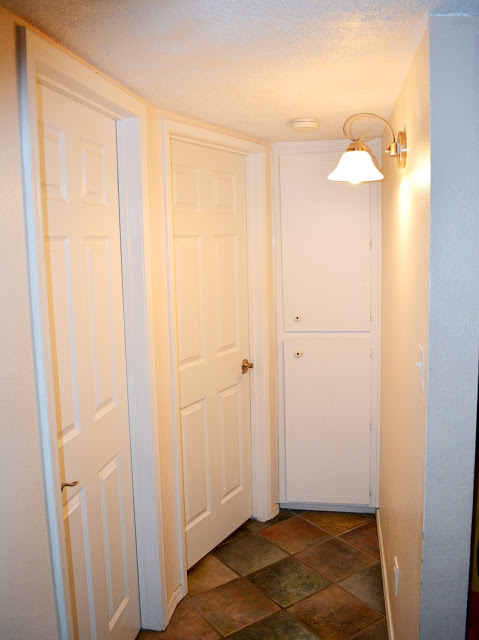
I'm going to come back and touch up all the door frames at the end of the project. I'll fix that damage. For now, we've got this end of the hall way 100% done!! Except the ugly light fixture,... those old hideous linen closet doors and hardware,.... the paint,...the baseboards,... and the chips in the drywall corner. Yep, besides that stuff, 100%!!!