

Even though I'm currently on a big home / yard maintenance and repair binge, I occasionally have to get back into the fun tools and do some upgrade / renovation work, or I'll go mad. I interrupted the yard work for a bit this weekend to replace our exterior fixtures.
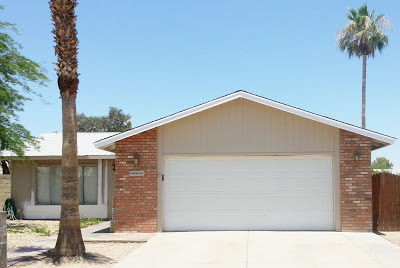
There's two on the garage face, one by the front door, and one on the side of the garage. They were beat up, mismatched and ugly. Sweetie and I headed over to The Home Depot to pick out some replacements. We wanted something dark, to offer a little contrast with our light beige and brick home. We picked out the
Waterton Wall-Mount Ridge Bronze Lantern by Hampton Bay. It's so dark, it looks black.


 |
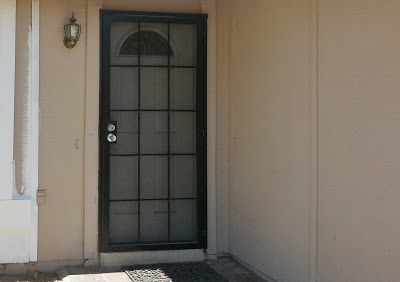
| I know, I know,... there's still primer on the front. I'll get back to painting,... honest! |
Waterton Wall-Mount Ridge Bronze Lantern
The original brass fixture at the front door had been hidden behind the crazy entry way tunnel that I'd just torn down. Now, it just looked really bad next to the black screen / security door we'r repainted.
With the circuit off, I loosened a couple hand-tight nuts and removed the fixture from the wall. There were only two wires to remove from the wire nuts. Not good. The ground wire was unused, which could lead to an electrified metal fixture, in the event of a short. Typical crap left by our DIY predecessors.
There were two black wires (hot) and two whites (neutral) in the junction box, each tied together. This means that the "hot" current carrying conductor goes somewhere else, in addition to the switch that controls it. In this case, it feeds an exterior GFCI convenience receptacle below. Therefore, the receptacle, is controlled by the same switch that controls the light (really convenient for Christmas / Halloween light decorations).
I tied the new fixture wires into the existing wire joints.
Scary warning: Don't mess with electrical, unless you know what you are doing. 120 volts of household current can kill you just as dead as much higher voltages, it just lets you suffer longer, and folks can recognize you in your casket. Plus, electrical issues can do a heck of a job burning your house right to the ground. Get a professional electrician. If you do the prep work, this project is a snap for someone who's trained; it shouldn't cost too much. Even if you know what you are doing, I recommend you work it like it's live, even if it's not.
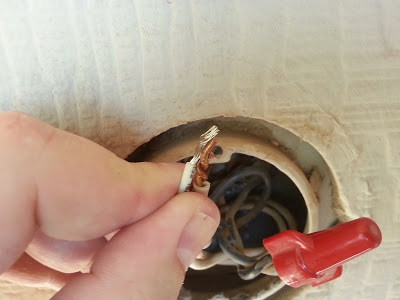
Tip#1: When I am wiring a smaller wire to a larger one, I stick the smaller one slightly beyond the larger wire and hold it tight when twisting on the wire nut. Note how I'm only touching the insulation, not the copper. Also, see how I have my knuckle on the metal (grounded) box. In the unlikely event that somehow the circuit is (or becomes) live, despite my precautions, current would go through my fingers only, not through my chest / heart.
Tip#2: Make the connections in this order GROUND (normally bare copper or green), NEUTRAL / "COMMON" (normally white), HOT (normally black or red). Don't trust the colors, because there are situations where the white and black can be reversed, in switching, and there are regional differences in wiring practices. Electricity is color-blind.
I always give a quick tug on the wires to make sure they're locked in tight.
Next, I install the mounting bracket. This one is pretty neat. It's fully adjustable from a vertical to horizontal screw holes. I laid a torpedo level on it to make sure the counting screws were level, and tightened it down. It's a little awkward working with the fixture tucked under one arm to keep it from hanging from the wires, but it's light and can be done.
Tip# 3: Whenever I'm wiring to a screw, like this ground screw, I always wrap the wire clockwise around the screw. This way, as the screw is tightened, it pulls the wire tight against it, rather than pushing it away. I also give it a little tug to make sure it's on there good and tight.
I slipped the new fixture up on the mounting screws and added the mounting nuts. What I found to be typical of all four fixtures was that the mounting screws were 1/4" too long. The nuts wouldn't tighten the fixture to the wall.
I had to pull it down and remove the mounting gadget. Luckily, my wire strippers have a built in screw cutter. I threaded the 8/32 screw into the hole, and gave them a quick squeeze, "SNAP!" = shorter. Unscrew it from the strippers and put the whole thing back together. Back in business!


Moving to the garage face, I pulled down another fixture. Lovely. No junction box, nothing sealing the fixture to the wall to keep water out, no attached ground wire (stuffed back in the wall), and only black electrical tape wrapped around the wire nuts. Dang these hack-job / drunken meat heads that preceded me!
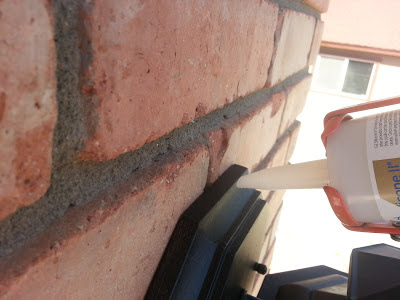
I mounted the bracket, attached the ground wires, and used silicone filled wire nuts, facing tip upwards. I put a bead of silicone caulk on the top of the fixture and filled the mortar-joint groove with silicone so water would not get in from above. It's much better than what was there.
Gracie was fascinated by the hundreds of insect carcasses left behind following their unsuccessful attempts to eat flaming hot light bulbs over the last many years. I piled the beat up fixtures on the bulk-waste pile out by the curb. someone actually snagged them within a few minutes. I'm glad they won't end up in a land fill.
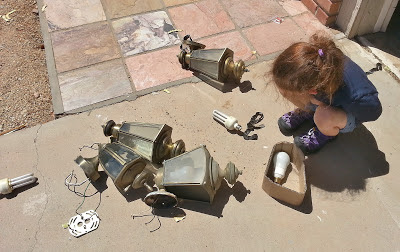 |
| Bugzzzzzzz |
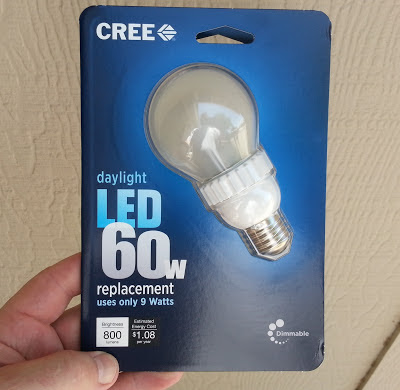
I replaced the incandescent lamps and a couple compact florescent with new Cree 9-Watt (60W) Daylight LED Light Bulbs from Home Depot . These should last a looooooong while, save money, and don't' have the hazardous disposal issues that CFL's have.
Done! They all work perfectly and look much better.
 |
| I don't think I can avoid painting for much longer. |
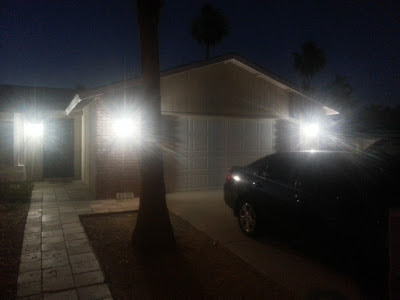
We have the garage lights on a Programmable Timer Switch with Astronomical Clock that keeps them on at night and off during the day. We've kept them on all night ever since someone tried to help themselves to my last truck hammering a massive screwdriver into my passenger door lock. Bastards.
We think it looks much better. Not bad for a couple hours easy work eh? I had to take the address plaque off to fit this new light. It's time for a new one anyway. The DIY wooden one was looking rough.
I can't get the camera phone to take a decent shot of a nighttime view, but you can see these lamps really throw down some light. I hope they don't divert air traffic to land in the drive way.
What do you think?