

The Weekend Warrior is back. After a getting back to work for a week, we get back in action on the weekend. Real progress continues with more framing, insulating, and the actual installation of the ceiling planks gets underway.
Spoiler Alert!
If you've stumbled into the mess without first reading the exciting prequels to the saga, head over and start from the beginning at
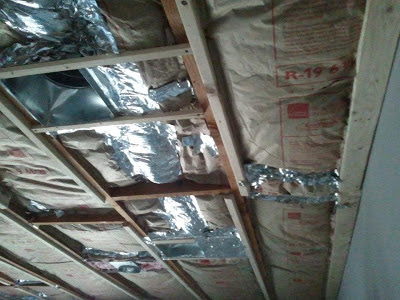
All tucked in.
Workday 11:
Saturday: I managed to finish the framing at the sloped edges of the room to allow for end fastening of the planks. I had to rip some 2x4's on the table saw for the width of the room and create a bunch of short brackets to hold them. A slow process, since no two framing members were alike up there. I managed to get them up and finished insulating and taping the ceiling by the end of the day. Once again, the DeWalt Chalkline Laser Level was invaluable for getting everything level.
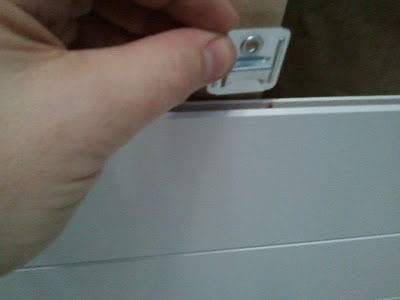
A close up of the clip for the groove on the planks.
Workday 12:
Sunday:
Finally,
the ceiling planks are going up. It's a neat system. It took a bit to do the math, rip, and fasten the first edge piece, by face screwing the edge into the framing.
Once that was done, the planks started slipping in quickly. It's all tongue and groove with a screw-in clip for each rafter.
I launched a bunch of those screws around the room throughout the day, before finally realizing I needed a #1 Phillips driver bit instead of the standard #2. I used my impact driver to drive the screws which really sped things up and was lighter than lugging the full size drill overhead all day.
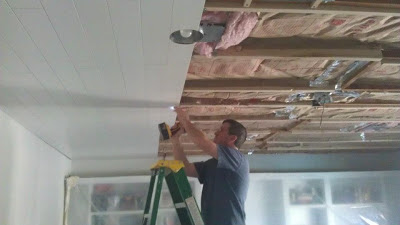
It's starting to look like a finished project!
The can lights and vents slowed me down a bit, due to all the cutting with a jigsaw. Masking tape on the shoe of the jigsaw kept me from scratching the finish. I had to make cuts on three to four planks for each can light because the openings were wider than the planks. I used a paper template that came with the cans. By the end of the day, four cases were installed, about 1/3 of the room. The room already looks better and is holding temperature nicely.
I really like the plank system. As I mentioned in Part I, they are Woodhaven 1148B Ceiling Planks by
Armstrong Residential Ceilings 5" wide x 84" long x 3/8" thick. They are an engineered board, like hardboard with a smooth, white painted finish.
We ordered them online through Lowe's and picked them up at their local home center.
It's a good looking system. You take the cut end from a finished row and start the next row with it. This way the plank seams are nicely staggered, creating a diagonal pattern.
Next, I'm derailed by family tragedy, but return with: The Great Family Room Remodel Part VI

