

The remodel gets truly underway. I unleash an unrestrained fury of cleanup, rough wiring, and hard-core, precision nail-gunnery.
Spoiler Alert!
If you've stumbled into the mess without first reading the exciting prequel to the saga, head over to
The Great Family Room Remodel - Part I
April 21, Workday 2:
Pretty much a cleanup and haul out day. There were mountains of stained ceiling tiles, heaps of itchy, dusty insulation rectangles, and a mess of twisted metal t-track to get rid of. I had Gracie, the little "helper" demanding to be part of the action. It slowed production; I had hover to make sure she didn't hurt herself, but I wouldn't have it any other way. It was some good old Gracie &Daddy fun time .
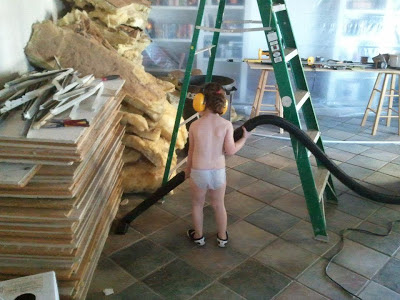
Sometimes on these DIY remodel projects you just have to
swallow your pride and bring in a seasoned professional.

Today, I had an apprentice Electrician.
Workday 3:
Jack helped feed a couple cables to feed existing lighting on the back porch. He was a big asset, while Mommy kept the little dynamo occupied in the other room. With an open ceiling it's easy to route the new cable around the room. It's a 20amp circuit, so I'm using 12/2 wire (2 - #12's plus a ground). We're going to add switching next to the French doors for the patio, rather than the opposite side of the room where my predecessor put it. We're taking this opportunity to get the switching the way we want it.

Gracie got ahold of the camera.
With workday #3 is complete, it's the last day of my pint-sized superintendent being underfoot; she's back to pre-school tomorrow. Basic rough in of electrical is complete. New cable TV / Internet home runs have been pulled through the attic (at a delightful 102 degrees today). A new data cable is installed from the office internet router to the X Box under the TV. A new phone line is coiled in the attic for a future expansion.
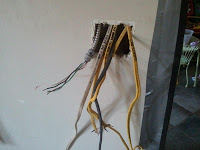
Raticus Nesticus
The rats-nest will be a 3 gang switch box. There will be switching for can lights, the ceiling fan, and a receptacle above the bookshelves for holiday lights or maybe a string of rope-lights for ambient lighting. There are also cables from here to the back patio door area where I'm relocating switches for exterior fixtures.
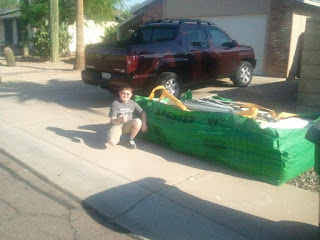
Green baggin' it today
Workday 4:
Jack's hanging out with the Bagster Bag before heading off to school. All the old insulation, tiles and track fit, no problem. There's still some room for topping off. $29 for the bag at Home Depot, about $100 for Waste Management to come get it.
We have an empty room to work with.Blitz Week begins. 8:00am and it's already 90 degrees. I have the castle to myself.
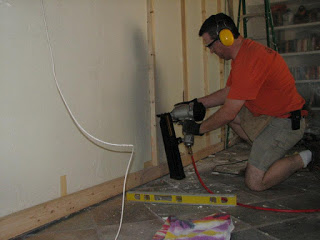
Skadoosh!
I decided to fur (furr? phurr? pfurr? ) out the wall with 2x2's. I don't know the best way to hide that header, but this is what I chose to do, for timing. I'm really sold on the new framing nailer. I'm running it with a 2 gallon Porter-Cable pancake compressor, sitting outside to keep the noise down in this unfurnished echo chamber. Compared to using a hammer and nails or driving screws, it just gets the job done, right the heck now. Plus, it's good fun!
I like to say, "Skadoosh!" when I pull the trigger. I managed to still feel manly when saying it due to the good 3 day stubble beard.
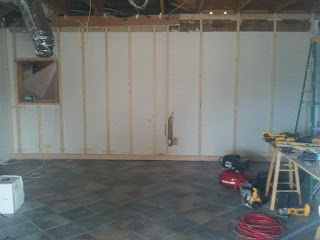
A tidy worksite is a happy worksite
Done for the day. The wall is furred out. Only nailing to the studs inside the wall, it's weird that half the wall is 24" stud spacing while the other is 16" spacing.
I even swept up and put everything away, nice and neat, before the family came home, and met them at the door with a smile. Out for dinner everyone! I'm sure I'll do this every day.
<UPDATE: What an idiot. Later, the project, the room looked a cruise missile hit, and I was working past dark, exhausted beyond belief.>
Overall, a good day with a lot accomplished. I cannot wait to use the framing nailer again. I've had a 3 gun set for a couple years (brad, finishing, and stapler), and they really do their jobs, but this big beast is heavy-duty fun, big board, big nails, and big BANG!
It's a Porter-Cable FR350A Round Head 2-Inch to 3-1/2-Inch Framing Nailer that I bought on Amazon. I did my research first and I'm really pleased with the choice.
Please leave me your comments on the project so far. I'm figuring this out as I go.
Next, I'm looking forward to the experience of large scale dry walling. I've done a couple small projects over the years like patching the removal of an in-wall medicine chest. Easy stuff, how hard can a one whole wall and a 12" band around the top of the room be? <UPDATE: Idiot. Drywall work suuuuuuuuks!>
Check it out in: The Great Family Room Remodel - Part III

