


This is a sponsored conversation written by me on behalf of Cricut. The opinions and text are all mine.
SO WHAT THE HECK IS A CRICUT?
When I was approached to be a brand ambassador by Cricut, I only had a foggiest idea what it was. I remember seeing something in craft stores that I thought has a scrap-booking machine. I did some research and was shocked to find a massive community of makers creating all kinds of cool stuff with these cutting machines. I also noted an immeasurably small part of that community being men. I didn't see any stubble-chinned, sawdust-spewing, remodeling-neanderthals like your's truly in the mix either. My new friends at Cricut are broadening their horizons. DIY dudes must be a nearly untapped market.
These machines are outstanding! They’re basically CNC machines for scoring, drawing, and cutting thin material. Compared to what I’ve spent on single power tools, this system is incredibly affordable, coming in for less than $250 most places, software included.
first Cricut Project: Location Markers for Hidden Chargers
The Cricut Explore Air 2 came to me at an absolutely perfect time. Our college student son, Jack has been slowly upgrading his bedroom from a teenage spot to a high-tech lair. He’s been doing the research and design along with most of the building. I step in with tools and support from time to time. It’s been great father / son bonding time and a great chance to help him build his DIY skills. One of the projects we’d worked on was installing wireless chargers, hidden in the surface of his desk.


The tricky thing was apparent once he got the chargers working; it was difficult to locate the exact area to place his mobile devices to get them to charge. He’d ended ups sketching targeting marks on the desktop with a pencil. With such a crisp and clean high-tech bedroom design, it just wouldn’t do.
He’s the one that came up with an idea for some kind of targeting stickers. Luckily, I had the perfect new tool to make them! This would be a perfect project to try it out!

I’ll see if we can pencil something in.
Creating The Sticker Designs
Jack told me ideas that was thinking of for the design, so I started putting ideas together in Photoshop. You can download images or design directly in any other image software, but Photoshop is my go-to. I created a “charging” logo, a watch face, and some outline shapes for each of his devices.
After I’d created the various designs, I saved them in png format and uploaded them into Cricut’s Design Space software. I started by assembling a single collection with the pieces I’d want to cut.
Design Space is a surprisingly powerful cloud-based program that is easy to learn and work with, especially if you’ve used any image creating/editing software in the past.
I set up my target designs for a smart watch, blue-tooth earbuds, and a cell phone. I’d cut them all out at once.

Cutting with the Cricut
As should be expected, Murphy’s Law merrily showed up to play. The very day I planned on doing the work, my wife’s computer took nosedive. We had to leave it with the store for trouble-shooting and hopeful repair. She had a bunch of work to get done, so I gave her mine to use. As I moved towards a change of plans for the day, the defining phrase of our times popped into my head…
“There’s an app for that.”
Of course there’s a app! I’m no chump! I grabbed the free Cricut app from the Google Play Store (available on iOS too) and logged into my account. All my stuff was there, exactly as I’d set it up on my computer. I didn’t need to bring my laptop into my workshop at all!

There’s an app for that
The Explore Air 2 came with a USB cable to attach it to a computer, but I didn’t need it to do the project. This rascal has Blue-tooth connectivity.

There’s a bit of sci-fi geek service here. Pressing the “open button”…

… activates a release, opening the unit up with a satisfyingly smooth action. All that’s missing is the whine of gears and streams of venting steam.


The Cricut’s moving carriage has two tool holders. One (A) is for a pen, if you want it to do drawing and writing stuff. The other (B) is for cutting and scoring blades. The cutter that comes with the Cricut Explore Air 2 is the Premium Fine Point blade. It’s a retractable, German carbide-steel fine point for precision work with card stock, paper, poster board, iron-on, vinyl, and other thin to medium materials.

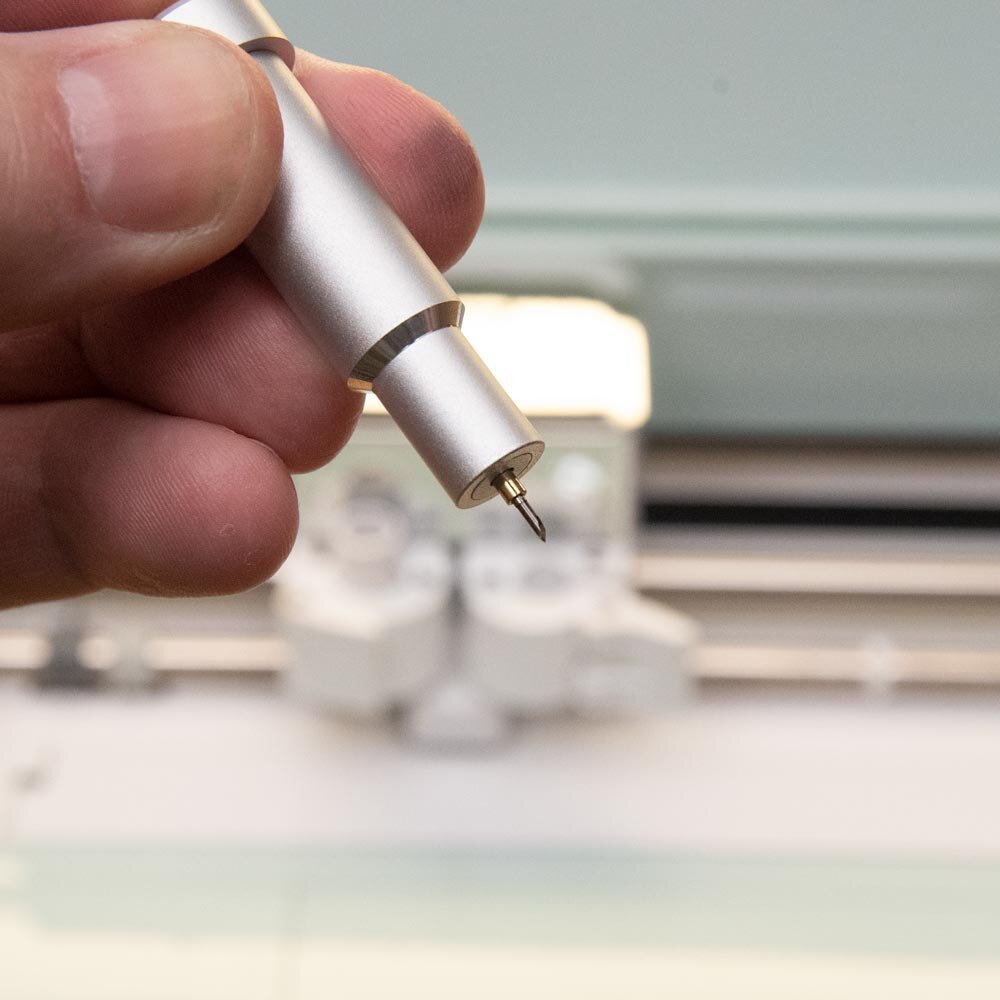
The Cricut cutting-system uses semi-adhesive mats to hold material flat and in place. I pressed a sheet of silvery gray vinyl onto the blue, LiteGrip Machine Mat.

The Cricut has a precise, depth-of-cut setting ability. By setting the machine to vinyl, it would “kiss cut” the material, slicing through the sticker part, but leaving the peel-off backing perfectly intact.

Depth setting
Controls are simple. The double-arrow button loads a mat into the machine; the rubber rollers grab hold and slightly pull it in. Pressing the Cricut logo’d button starts the cutting process.

Go time

Cutting
As a human, it is physically impossible to step away at this point. Watching the Cricut do it’s thing is absolutely mesmerizing. The cutting head whips side-to-side like an ink-jet printer, while the machine mat zips back and forth.

Mesmerized
Soon you can see cut design appearing from under the carriage. It’s a sharp, razor-thin line.

It only took a few minutes to cut my entire collection of designs. I popped the mat out of the Cricut machine and peeled the sheet of vinyl from it.
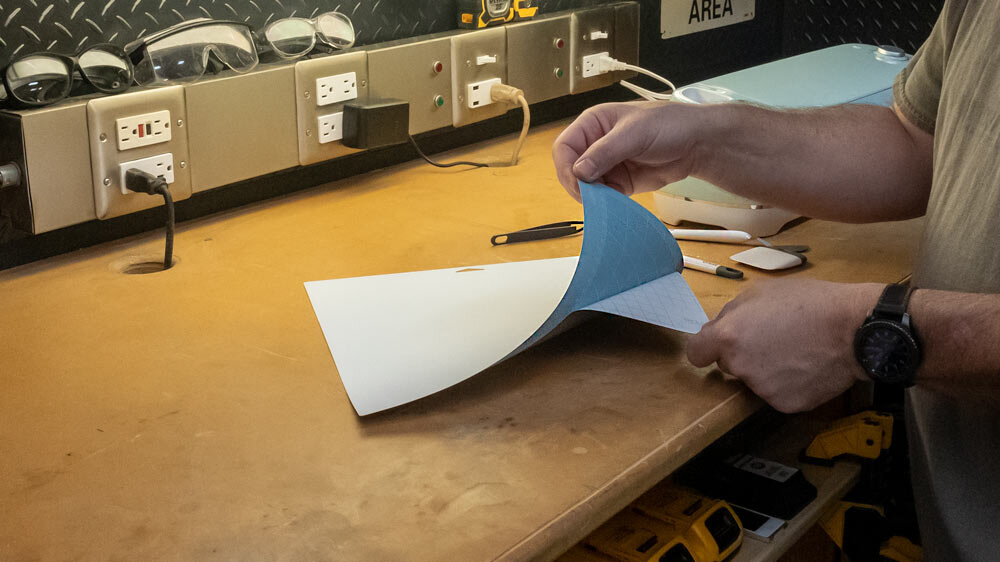
They call the next step “weeding”. All the parts of the design that are not going to be used get carefully peeled off. Cricut makes a nice hooked, weeding tool that makes it easy to get the edges started.


With the designs all cleaned up, they got covered with a sheet of clear transfer tape. It would hold everything in place when we peeled the backing off the vinyl later.

At this point, I still hadn’t realized I’d completely goofed the sizing of the images for the watch and the earbuds. I merrily completed them anyway, obvious to my error.
We’d decided to discard the numbered watch face design anyway. We liked the lightning bolt for all three items so much better.


I cut out each of the pieces with a sharp pair of scissors.

I re-cut the watch and ear bud case designs, slightly smaller than my original goofs. I was able to do all the corrections on my cell phone, spinning charging logo by 90 degrees while I was at it.
Applying the Stickers to the Desktop
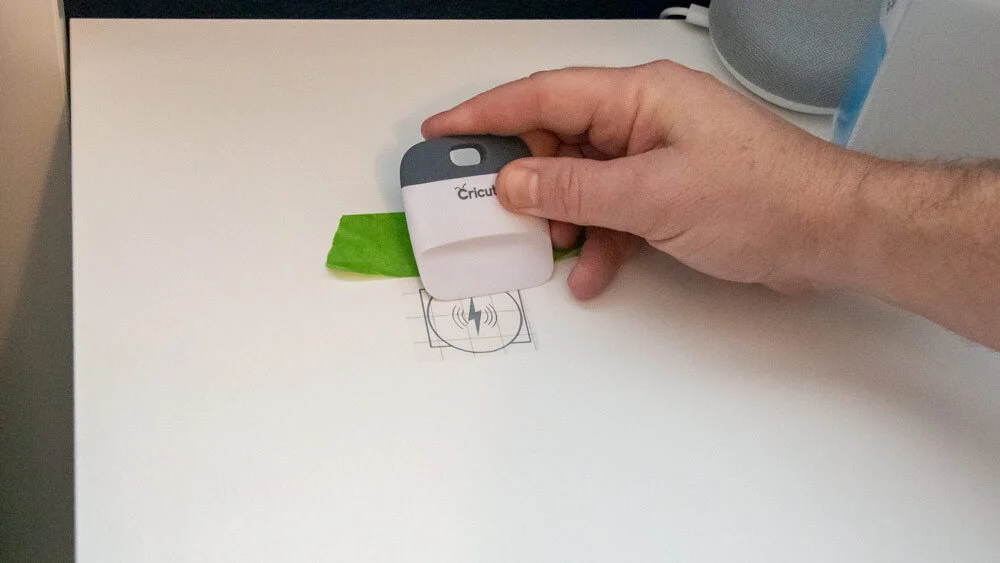
We laid the first finished piece down, straightened it, and verified it was in the correct spot by placing his watch on it. When it confirmed our placement by starting to charge, we taped the piece down on one edge with masking tape.

Using the tape as a hinge, our new decal sticker flipped up out of the way. Jack cleaned the area with a cotton swab and some rubbing alcohol. It removed any dust and finger oils, along with the pencil marks. A quick rub with a bright orange microfiber cloth picked up any stray strands that might have been left behind by the cotton swab.


The masking-tape hinge held the placement precisely while I peeled the backing off the vinyl target.

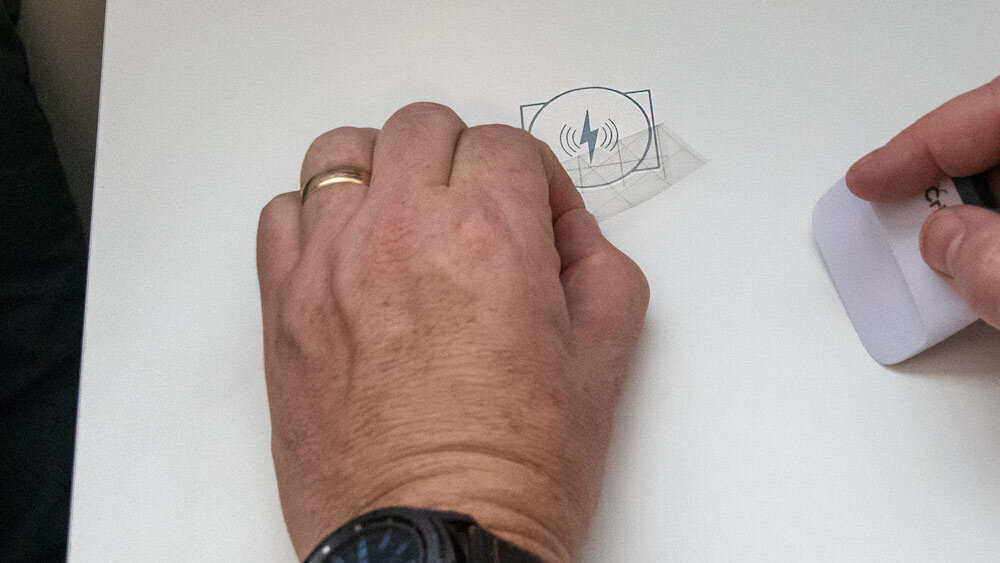
It’s really cool, moving the vinyl from one surface to another.
The transfer tape is stickier than the original vinyl backing material and the adhesive on the sticker is stronger than the transfer tape. The vinyl moves from one backing to the other super easily.
I had to be very careful with the very thin lines around the lightning bolt; I think I was pushing the envelope on just how small I could make a piece. I managed to get them placed, peeling the transfer tape up and leaving the design behind.
We kept repeating the process. The earbud’s charging case went down next.

The big cell phone sticker was the easiest. It had thicker lines and long, straight edges that made for easy layout.

All three locations at Jack’s bedside were done. They looked a whole lot nicer than sketchy pencil lines. I cannot imagine a better way to do this.

The last test was to drop the devices in place and see if they charged. Can you imagine if the the thin layer of vinyl was enough to interfere with the charging process?
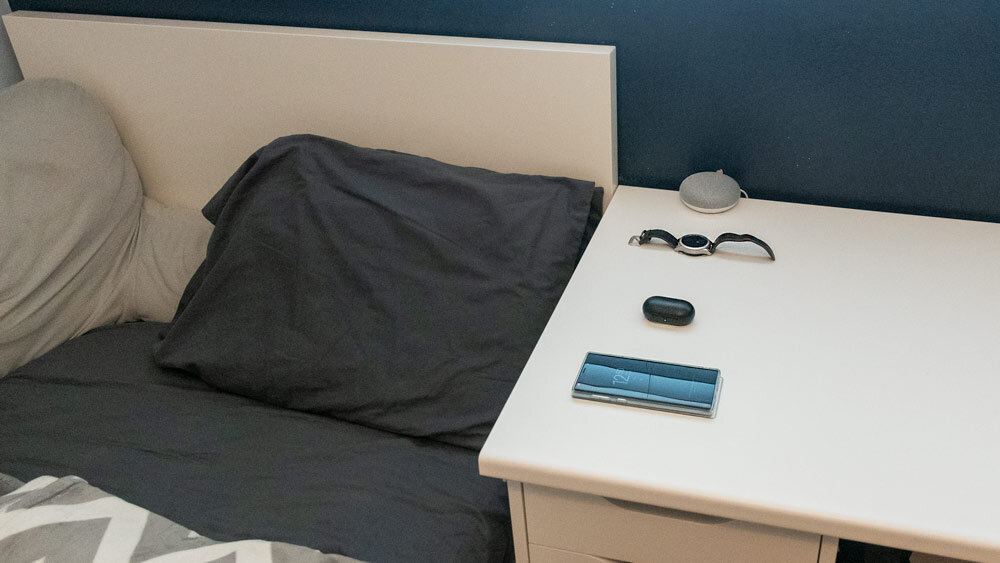
Everything in its place.
No problem. Who was worried? We took all the devices on and off the charging locations several times. It was so much easier to hit the magic spot each time with our precision targets inn place.

We have charging!
Jack has a second charging location for his phone, right by his computer station.
We popped the other phone sticker down and declared the project complete.

What a cool project! We’d been discussing how to neatly mark the charging locations for a few months. The Cricut was the perfect solution.

Back to work!
I’m thinking about a ton of projects to do with the Cricut, now that I can see what it does. Stay tuned!
