

Maybe with me taking some time off, you’ve been wondering what the next BIG project to be tackled at casa AZ DIY Guy might be? Now that I wasted an entire, beautiful winter and the infernal flames of summer sun in the Phoenix have begun to scorch the desert, I’m going outside. like an idiot.
Patio Remodel: Episode 1
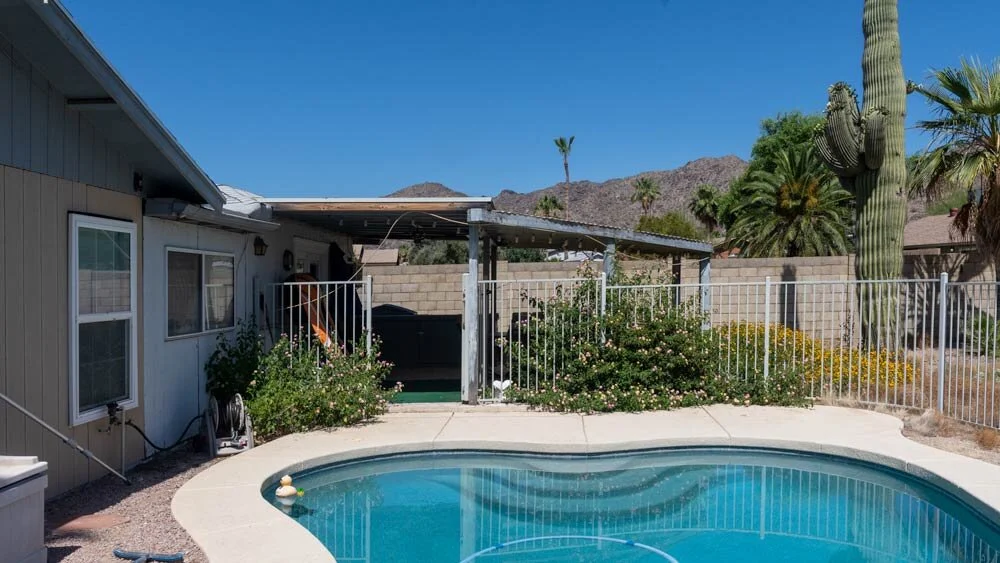
As I have done in the past, I like to start with the horrors left to us by preceding owners of this middle class, basic home. Our patio is just such a gem that I’ve rarely let it enter the edges of my photography during other projects.

Not too bad,… from a distance.
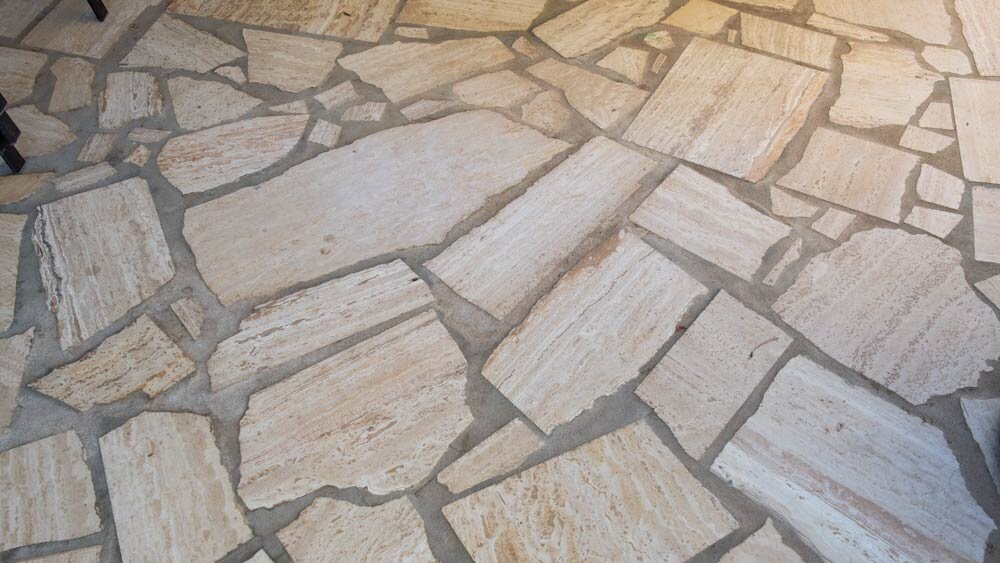
One of the choice bits about the patio is the stonework. It’s most likely some kind of material remnant’s left over from another project. There and there, strait edges and 90 degree corners appear in the oddly spaced patchwork.
It’s some kind of stone material that gets really slick when wet. You may recall the same thing was around the pool. It forced us to bust out the whole deck: THE BIG POOL RENOVATION STORY AND REVEAL
The roof framing is rotten and weathered. It’s going to need some serious work.

It belongs in a ghost town
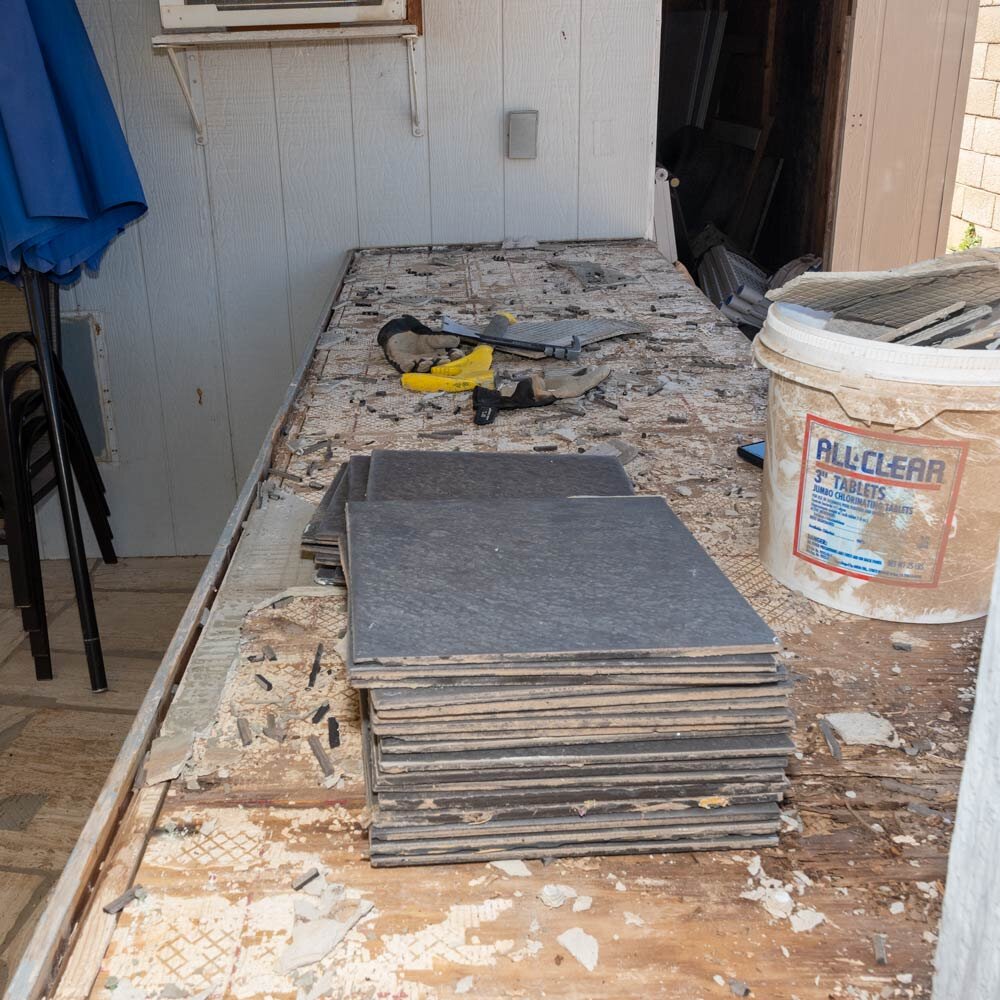
The showstopper of course was the outdoor counter. The wood was so weathered that it was disintegrating. I’m a little embarrassed to show you just how bad I’ve let it get.

Delightfully Rustic Chic
The afternoon sun had been hammering at the back side of it since I’d cut a lattice and climbing vine network down a couple years ago. I was able to pop a piece of weathered plywood off by hand. I’d forgotten all the junk that was inside there when I screwed the sagging doors shut years ago. Agh.

Trashed. Just trashed.
The counter-top was tiled,… somewhat. They were popping up from the back as the supporting structure crumbled.

Gorgeous
Starting demolition
I’d let the cool winter months slip through my fingers. Since our quarterly, curbside bulk trash pickup was coming on fast and wouldn’t be back until the end of summer, I decided to push forward with some demolition, without even having a good project plan yet. I’d be able to get rid of the debris without storing it; I’d be able to haul it from the tear-out directly to the curb.
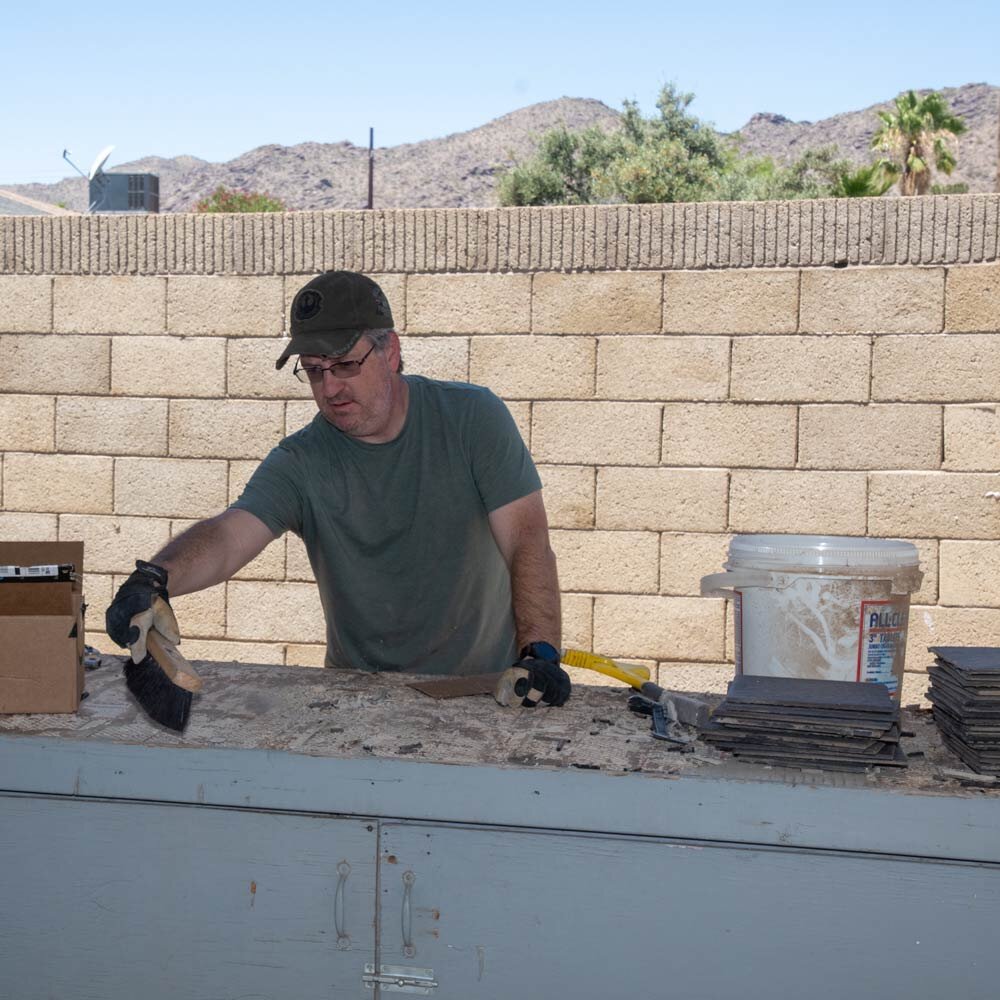
I started with the easy stuff. I smacked the tiles with a gloved hand. They just started popping off.

Slapping ‘em silly
The tile was adhered to some kind of cement type board. It was in rough shape, so I was able to pry them up with my trusty FUBAR demo tool without breaking them into a million pieces.

Poorly installed or just worn out, it made quick work
If you follow my projects, you know I’m normally not one of those HGTV style demolishers, where they smash and trash everything in a flailing frenzy. I don’t throw hammers through plate glass windows, lob toilets off the second floor, or run through drywall like a linebacker. I cut things into pieces, unscrew, and pry nails as I go. It makes messes so much smaller to clean up and generally keeps me from injuring myself.
This time, I had to swing the wrecking tool to do some crashing and smashing. The crumbling cement board was glued down tight in places, so pounding it into submission got the job done quickly.

Just like Thor!
I pulverized it into bits before scraping the surface and popping the nails out. Sweeping it up and pouring it into a bucket at counter height was a lot easier than crawling around the ground later and picking pieces out of the gravel.
There was no point in trying to save any bit of the material for recycling. Other than the tile, it was completely shot.
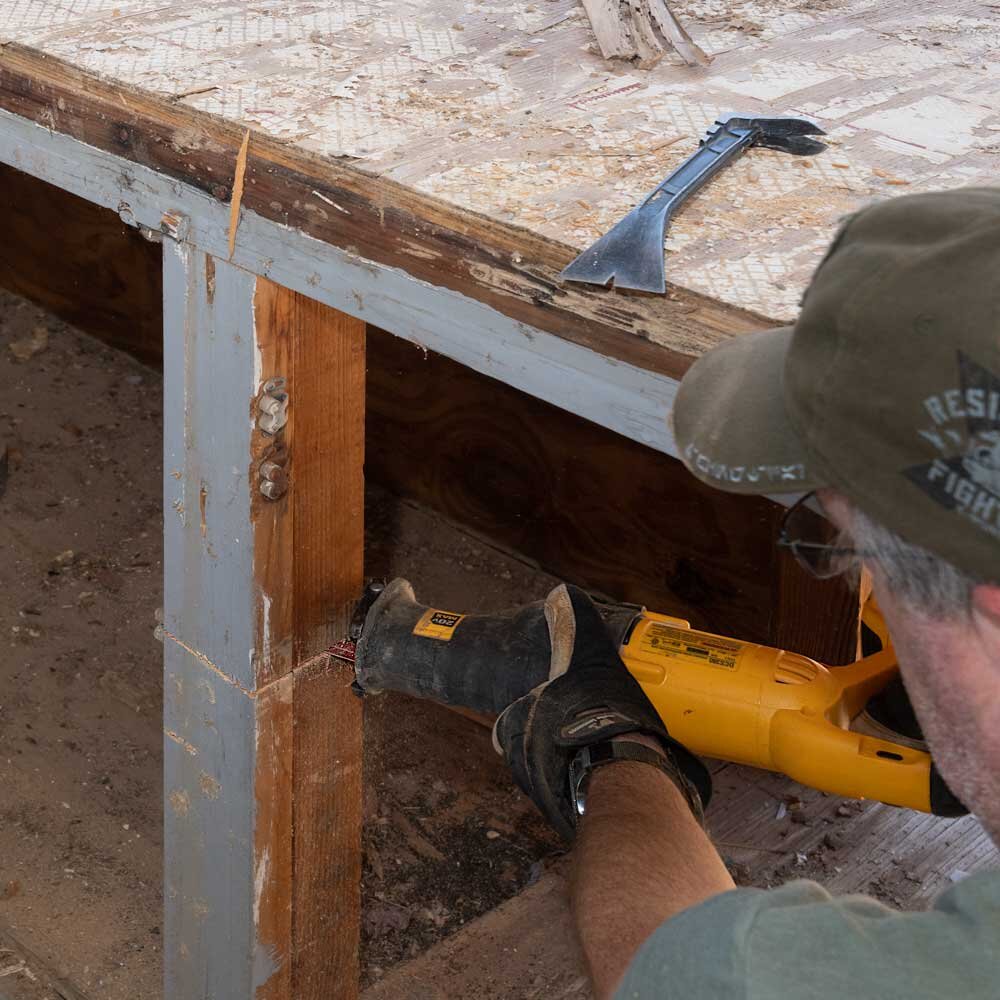
I plunge-cut into the old door panels using a reciprocating saw loaded with a carbide tooth metal cutting blade. I love that thing; it absolutely chews through wood and nails.

Chewing,… chewing,…
If only the new-construction part of a project was as fast as the demolition part.

A demolisher in his element
The cabinet had been constructed of 2x4’s, 4x4’s, and plywood. It was probably 30 years old or so and really dry. It was easy to demo with the reciprocating saw, the FUBAR demo tool, a molding pry bar, and a pair of size 12 shoes.

It was just a big box, laying on the concrete and screwed poorly into the siding. I lopped it up, roughly in 3 foot sections to make it easy to haul out.


I’d just replaced the wheelbarrow’s wheel with a solid, flat-free tire. My days of pushing it around with a mushy, leaky tire filled with cactus spine holes is now history.

Loaded for the long journey around the house
I fired up my high tech cordless sweeper to get the last bits of debris, just as the temperature peaked at 111° F for the day. I was pretty much robbed of any interest in doing much more than rolling the last of the waste out to the street and sitting in the AC with a cook drink.
Surprisingly, my sweet, Dewalt cordless fan unit had made a bit of difference in keeping me a little cooler. I’d moved it around while I worked so it was blowing on my legs. It had been a gift card fueled impulse buy that turned out to be a winner.

Cordless!!!
The entire wreck got stacked into a somewhat cube-shaped pile, out by the street for the City of Phoenix bulk truck to pick up the next week. I stacked the tiles to the side. Picker's would surely be by within hours to cart them off to parts unknown.

Come and get it!
The first of the challengeS
This project is going to bring plenty of challenges. The first one is pretty obvious. Back at the scene of the crime, I noticed the support post had a good twist in it.

Thank you for your support
At the top it was attached tight and square. Even though the horizontal beam was rotting from the end, it seemed like there was enough solid wood-meat to be structurally decent for the moment.

“Structurally decent”
Moving downwards to the point where the support post had penetrated the counter-top, there was a lot of visible damage. I’m not entirely sure it was all rot; it looked like some insect damage too. My painter’s tool could carve through it easily.

In engineering terms, this condition is commonly referred to as “not good”.
The bottom is even worse. The post is positively devastated. I can pull chunks out with my fingers alone. I cannot imagine it’s giving much support at all.

What a rotten thing to do.
I’m going to have to deal with post immediately, at least as temporary solution. Maybe I can find a jack post or something. I’ll have to figure that out first, while I start planning the rest of the remodel.

Before. What’s it going to look like after?
I don’t have a full plan at all, I pushed into it at this time to take advantage of the bulk pickup. Next, it’s research and design time.
The basic objectives are:
General repair, paint, and beautifying
Some kind of surfacing to cover or replace the ugly, slippery stone
Removal of the center of the three support posts
Lighting / ceiling fan / electrical improvements
Replace the counter-top / outdoor kitchen
Replace the ugly fiberglass panels (with a lattice?)
Install west facing sunscreen of some sort
That’s a lot to do. Welcome to the next big project (one of them at least).
Why did I wait for summer?
