

I have a lot of projects on tap before the infernal summer heat comes to Arizona. This is not one of them. After chasing down the source of a leak feeding our guest bathroom's bathtub, (here) and punching through the soggy drywall, the first order of business was repairing the plumbing.
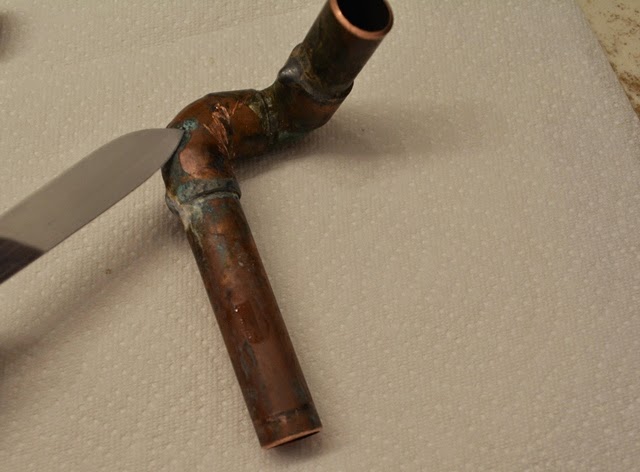
With the section of pipe cut out of the wall, I had to plug the end and blow on it to find the minuscule pinhole that had been wreaking havoc on our home. It wasn't a failed solder joint, but a hole right through the elbow, near a tiny dab of corrosion.
Awesome! this means the rest of our 1979 home is simply a ticking freaking time-bomb. Good luck sleeping tonight, folks in homes from even earlier decades.
I've done a little soldering before, and been generally successful, although admittedly not always on my first attempt. It's a theoretically an easy process, if you've watched enough of the reigning Grand-master of Plumbing, Richard Trethewey , on This Old House (and I have).
First I cut the pieces to size and dry fit them. It was extra with an original part to copy.

Next, I cleaned the connections with sandpaper and applied flux to both pieces where they would mate. They never show it on TV, but I know it's important to wear a Detroit Red Wings shirt. I suspect Richard hides this step from the cameras, because he'd be lynched by rabid Bruin's fans.
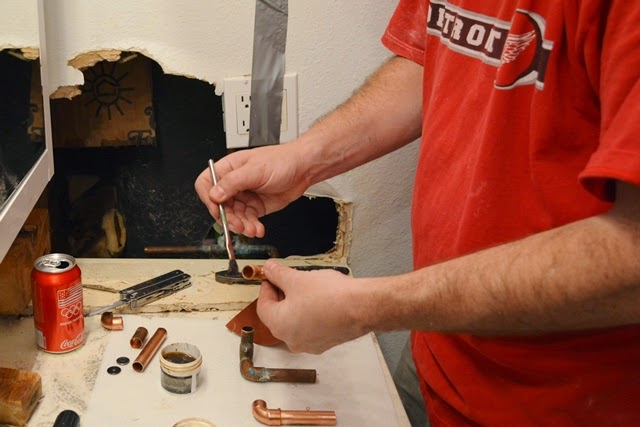
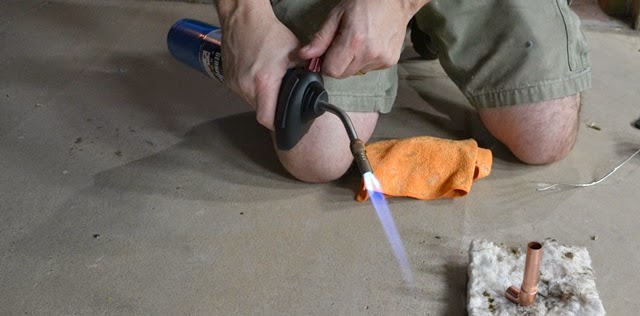
I did the soldering on the floor of the tile shower, with a flame protective shield, since I didn't want to burn the horrid 1970's acrylic, gold veined counter-top, I didn't get a photo of the process, because it was an absolute train-wreck and I was too frustrated to pick up the camera. It went nothing like the easy cake-walks on This Old House. The solder didn't melt well, then when it did, it beaded and ran down the outside of the joint. It was almost like the flux repelled it. I made two attempts, wasting parts, even my spares. It was obvious it wouldn't hold water.

It's like dropping a whole sheet of burned cookies in the trash.
Great. I noticed the solder was lead-based after breathing the smoldering crap. Back to the drawing board, and with daylight dwindling, I went out and picked up a load of new stuff.
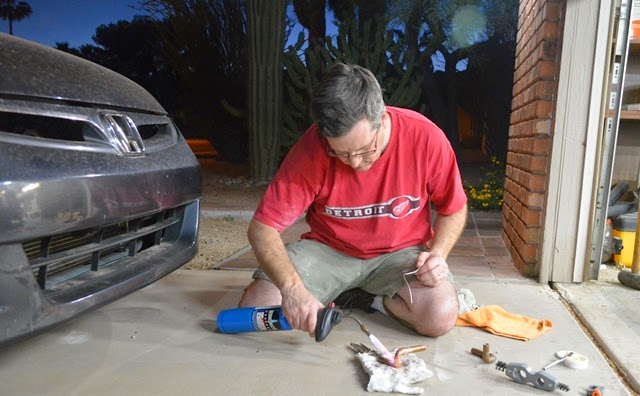
Step by step this time, out in the fresh air of the driveway as it grew dark I set up for another attempt. I was under the gun, with the water turned off in the house. It was nearly time for a pint-sized, evening brushing of teeth. Go time.
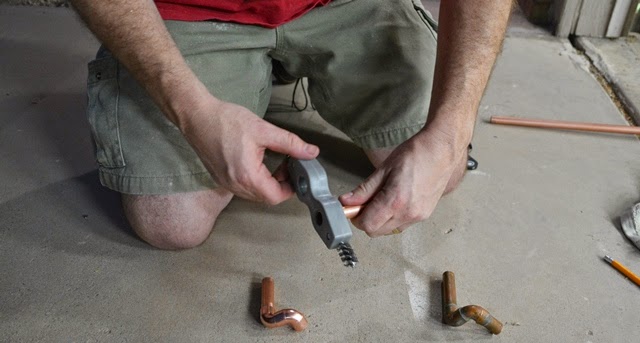
1.) Cut the pieces to size, with a fresh bladed mini-cutter, and dry fit them again.

2.) Forget the sandpaper; Daddy picked up a new tool and cleaned both mating surfaces with this sweet wire brush widget that does both 1/2" and 3/4" pipe.
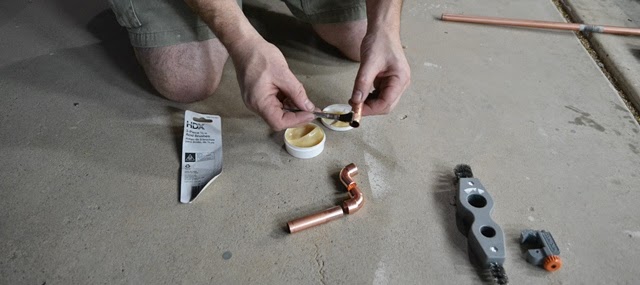
3.) Apply the flux to both sides of the connection. This fresh new batch looked more like creamy deli Dijon mustard than my old stuff, which resembled something a sick dog might cough up.
4.) Next, my friends,... I bring you FIRE!!!
"I am Fire..."
-Smaug the Terrible
5.) I heated the pipe until the flux started to bubble, keeping the heat on, and I touched the seam with solder. The silver flowed like it was alive, perfectly filling the space, slithering greedily around the pipe before cooling and gripping the pieces, permanently in its tight clutch.
By God! I have engaged in torch-ery this day!

My friends, I torched like a warrior-poet. I torched because I was the very essence of fire. In the end, I rose victorious. A champion solder-ist. A self-crowned welds-man of the first order.

Again and again, I returned to the fray, spewing blue hell-fire and molten metal into seam after seam, each time better and faster than the last. I attacked my task, in front of that filthy, unwashed Honda, beneath the deepening desert sky. Frustration was a thing of the past; I actually began to enjoy the battle.
Suddenly, it was done. A gleaming prize copper beauty. Would Trethewey give me the nod of respect? I like to think so. Would it hold up to the pressure of city water? I pray so.

My gleaming, fresh-forged success in hand, I returned to the crime scene,... with one more trick up my sleeve.
I've soldered inside wall cavities before. It was hell. I could never feel certain that I'd gotten a good weld on the portions I couldn't see and I always had this pesky fear of blasting fire inside the walls of a tinderbox, dry wooden house. But, this time, a magical little beauty had caught my eye when I was buying parts. Check out this Sharkbite push-fit fitting. I had bought a little orange horseshoe looking tool too, to make sure I could remove the fittings if necessary. With luck, I would spare the walls from my flame.
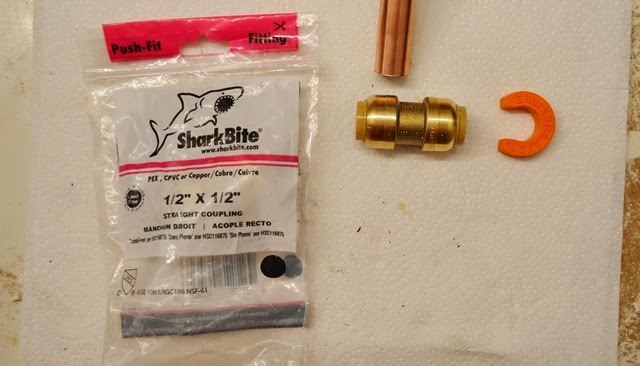
I pushed one of these push fit couplings on each end of my freshly fabricated piece by hand, making sure I'd cleaned the ends nicely first.
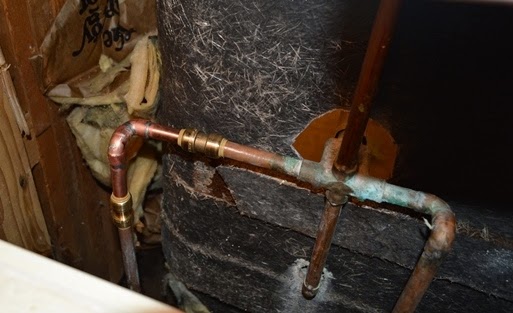
Here's the sweet part. I reached in and installed it by hand. 20 seconds. Done. Tight. No torch. No fumes. No kidding.
Of course, a beautiful, gleaming copper and brass plumbing assembly is nothing but scrap copper and brass, if it won't do it's sole task, deliver water without leaking. So it's a quick trip back out into the dark to turn the water valve back on...
... followed by a break-neck sprint back into the house, bouncing off walls in an mad race to the scene. I'd need to pull a quick turnaround and race back to the valve, if it was gushing.
Oh sweet, drip-free dryness, how I adore you.

We are whole again. The shower will work. Now it's a matter of drying out and cleaning up the mess, before serious wall repair can be done. It's a shame this wasn't a planned renovation, I'd really like to replace that shower valve with a modern, scald free version while the wall is open. It's just not in the budget or the schedule.
But, the existing valve is nasty looking. It's also horrible when someone flushes the toilet and the temperature spikes. Probably unsafe.
Aghhh, The expense. The time. The third trip to the hardware store.
BAH!!!

It's going to be a few days before I can attack it, but it's going to happen before I seal that wall up. Those other pesky projects will wait,... crown molding will taste paint, two trees will be felled, and doorway will get its new casing. Eventually.