After
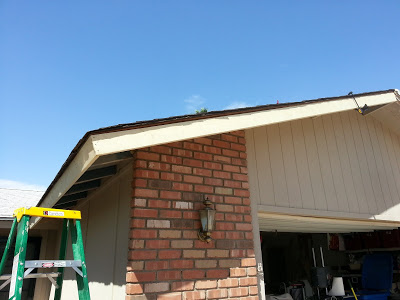
tearing off the front overhang on our house, we need a new facia board. While I'm at it, it's time to fix the sun-beat, peeling, rotten soffit that's along the whole front of the garage. Surely, the HOA will soon ding us on that as well.
I started the day at Home Depot, then Lowes. Both were down to
fuuuugly 2x6x16 boards this morning. There were twisted, knotty, and split misfits. 'Depot was nearly picked clean. Hopefully, this is a good sign for our economic recovery; people (besides me) are working on their homes again. I managed to dig through the entire stack and find three serviceable boards at Lowes.
Loading the big 16 footers into a pickup with a 5 foot bed was a challenge. Even shoving them through the sliding rear window left too much hanging out the back, so I opted to go upstairs with it:
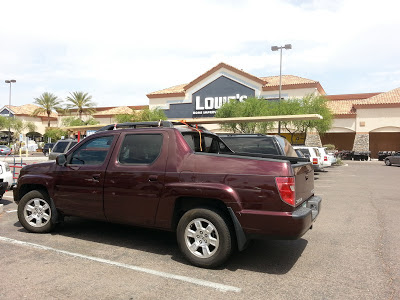 |
| Not a surfboard, dudes. |
Lugging those big boys onto the truck, I started thinking the idea of a solo soffit install might just be beyond me. Working with a heavy, 16 foot board atop a ladder and trying to nail it in place now seemed more difficult than it had earlier.
I thought I'd make some sort of custom contraption with 2x4 T-braces, but I realized I had cut up my stock of 2x4's building the
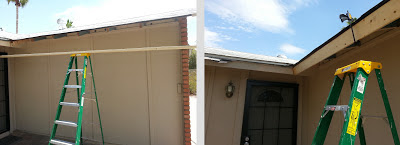
miter saw bench. After some stubble scratching thought, I came up with a workable method. I put the ladder in the middle of the run and balance the board on it. I lifted the board, held it, and used a one-handed woodworking clamp to secure it in place. Bingo!
 |
| Clampeyness |
The door-end of the board required a compound miter cut due to the angles of the two soffits combining on two planes. I used a piece of scrap to scribe a pencil line, front and back, and then connected the two lines across the bottom of the board.
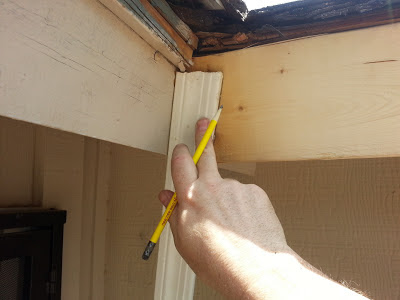 |
| Scribing the outside angle. |
I took the board back down and set up to cut both angles, on
B.A.M.S.
(
big ass miter saw - as coined by Kit over at DIY Diva). This was the first time I'd actually used the saw to cut a compound miter. It paid for itself today, slicing and dicing 2x6's with precision and ease. My homemade,
beefy saw bench was priceless when man-handling those massive boards. At one point, it stuck out so far, I had to open the door into the house and stick it inside.
 |
| B.A.M.S having lunch. |
After clamping the board up again,
B.A.N.G.
came out to play (
big ass nail gun - I claim that one). I shot the board into the rafters and then again through the decking, resetting the clamps as I worked across to keep it tight. I actually hit the framing rafters behind,...
most of the time.
 |
| Bang - Bang - Bang |
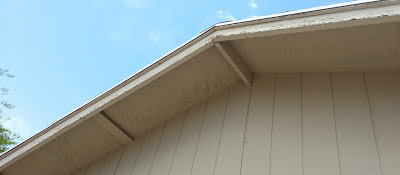
Rounding the corner, to move up along the garage, the old facia looked even worse up close. I don't think the wood was ever primed.
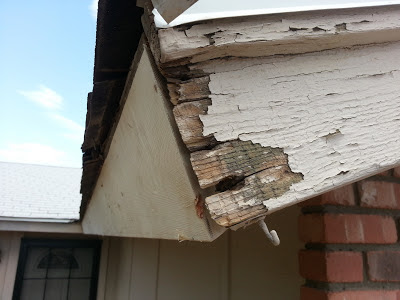 |
| Mr. Hook, it's been lovely, but you'll not hold Christmas lights again. |
I had to work my way up slowly, gently prying the shingles up and pulling out the staples that held the metal drip edge. This was precision work, best suited for a small
prybar / nail puller
.
It also was tedious work. There were a million of those pesky staples to pry out. The sun started getting to me so I broke for lunch, a healthy dose of sunblock, and my sexy hat. Oh yeah, I know the ladies will be drawn to the floppy lid, but too bad, I'm taken. And no, I'm not going to share a source link for this sweet slice of melon shading headgear.
 |
It's a Stubble Sunday, but you just can't take your eyes
off the ol' chapeau can you? Don't be jealous. |
After the 1x2 behind the drip edge popped off easily with a
Wonderbar Pry Bar
, I tried to pry off the old facia. It wouldn't come off without damaging the decking and framing, because it was nailed both through the top and the face. I pried the decking up a bit and cut nails with some diagonal cutters for a while. Finding that a pain, that still left some nail-nubs behind, I changed tactics. In came the reciprocating saw with a bimetal blade which sliced the nails off flush as I ran it down the seam, a
much better approach.
 |
| Ye old nail slicer. |
A couple hearty whacks with the
FUBAR
sent it tumbling to the ground with a clatter. I'm really glad I'd moved the cars out of the way. I used it to trace the angles to the new board before taking it in for a visit with B.A.M.S for a quick bit of slice and dice. No compound cuts this time, just nice simple angles.
The clamp trick worked perfectly again. I skadooshed it into place with B.A.N.G and called it good for the day.
A heaping helping of cleanup was in order, again. I'd managed to blast debris in a wide radius around the work site, which is where (inconveniently) we park our vehicles. I hired out some skilled labor to police up all the nails and staples. She drove a hard bargain, but it was cheaper than buying a new tire.
There's still lots of work to do on this project. I still have half the garage face to demo and replace. I need some 1 x 2's, drip edge, primer, and paint.