

You know how much I love gadgets and cool tech stuff for the house. I recently set up a simple security/notification system, the Guardline Wireless Driveway Alarm. I installed it to watch over several areas around the house.

Guardline: Long Range Wireless Driveway Alarm
This post is a paid partnership with Guardline, who sent me a basic kit, plus a couple extra sensors. The experience and opinion is 100% my own.
When Is a smart home too smart?
"Ok Google, ask Alexa if Siri is listening in on my conversations"
— StockCats (@StockCats) May 25, 2018
Cortana - "if you aren't doing anything wrong there's nothing to worry about"
I’ve become uneasy with the idea of some of the smart home stuff lately. I know it’s inevitable; heck, I can have our refrigerator brew me a cup of coffee while laying in bed with a smartphone (not kidding!).
It’s the voice activated, always-on / always-listening thing that bugs me. It’s creepy that conversations within earshot are cataloged in the digital vaults of a companies with unknown motives.
I’ve read some articles, like this one, that just give me the creeps. Maybe it’s not that bad, but I’m just not sure I’m ready to go fully smart home yet.
The Guardline is a premium outdoor DIY motion sensor alert system, but it doesn’t need to connect to the internet and share your private info. It’s high-tech, but simple and expandable. I had my three sensors mounted and working perfectly in about 30 minutes with the ability to expand to 4 zones with up to 16 sensors at some point if I want.
Here’s how easy the install went.
Getting Started - Pairing, Zones, and Sounds
The basic kit comes with a one sensor and the base unit. The sensor is weatherproof so you need to unscrew the cover to get inside.

It takes (4) regular AA batteries. I always have a good amount of regular alkaline batteries on hand so I’m going to see how long they last, before possibly upgrading to rechargeable.
There are some dip switches inside to adjust various settings. It’s also really cool that there are contacts included to control auxiliary items. If you have a 12 volt, powered item, there are both normally-open and normally-closed contacts that could turn a device on or off when the sensor triggers, like a light or something.

Power it up
The base unit takes (4) AAA batteries and a plug-in, AC power cord. It works perfectly with just the batteries, which is super handy for walking around and testing the sensors once they are installed. It needs to be plugged in for regular use though. My first set of AAA’s only lasted a couple days without it being plugged in.

The four zone receiver unit
The instructions were easy to follow. I connected three sensors and assigned each one of them to its own zone. Each zone got a unique audible alert melody of my choice so we’d know exactly which sensor was sending the alert. There are some simple melodies and tones as well as some really fun stuff (more on that later).

The only three buttons
Installing Wireless Sensors
My 3 Security Zones
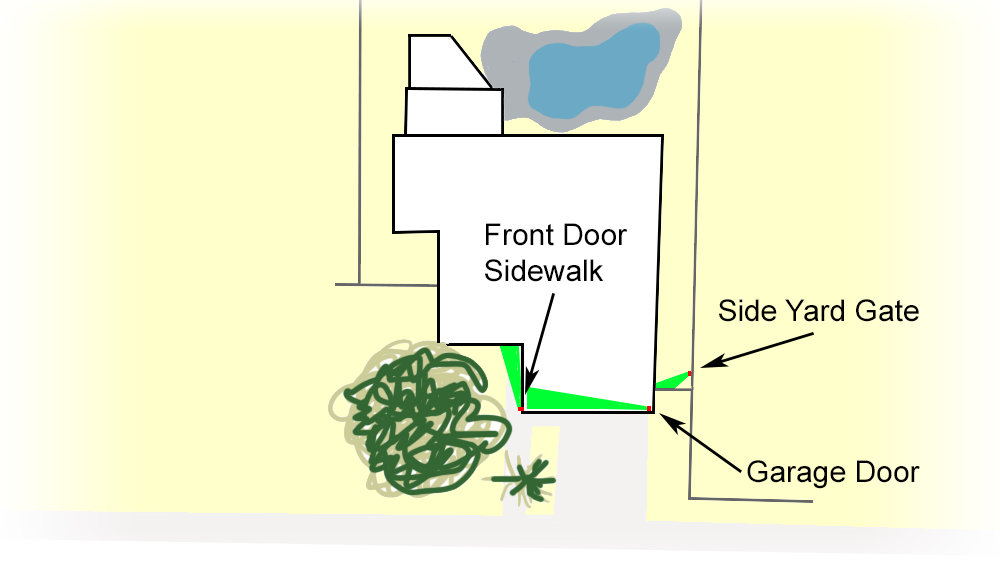
The Front Door: For some reason, we don’t have a doorbell; we’ve never really missed having one. Most of our front door visitors are those blue, polo shirt wearing hucksters selling windows, duct seal, magazine subscriptions, or some kind of concentrated cleaning product. We also get some kindly people pushing their brand of religion, politics, or cookies. (In the interest of full disclosure, I do open the door for the Girl Scout cookies). We get a fair amount of deliveries. An alert when those get dropped would be great.
I chose a barking dogs tone for the front door zone.

The Side Yard Gate: Around the corner from the front door, on the other side of the garage where we can’t see it is a gate to the narrow, alley-like side yard leading back to the swimming pool. We also get packages dropped over here from time to time. More importantly, we’d want to know if someone is slipping around the house. Beyond a delivery, there’s no good reason someone would be skulking around over there.
I chose a bubbling-water tone.

That gate needs some work doesn’t it?
The Garage Door: The garage is my workshop, filled with my tools and stuff. I love to work with the door open, especially in the late fall through the early spring, when Arizona is pretty great.
When I need to run into the house or I’m going back and forth to work on a project outside of the garage, I don’t feel comfortable leaving with the door open. Someone could slip in there and help themselves to my beloved stuff. I figured it would be great to get an alert if someone unscrupulous decided to make an opportunistic grab-and-run raid.
I chose the Raider of the Lost Ark theme. “Nah-nah-nut nahhh,… naht-nah-nahhhhhhh….” to let me know it was time to deploy back to the garage with a bull-whip and fedora to keep those thieving Nazi’s away from my tools and priceless antiquities.

I know, I know, I just cleaned this, and it’s already a big mess.
Installing The Side-Yard Gate Sensor
The gate does take a bit of effort to open, which is good as a first defense for stopping neighborhood kids from getting into trouble with the pool. Still, I can just reach over and slide the latch, which means others can do the same.

Behind this gate…
I decided to put the sensor on the fence (block wall), just inside the gate. It would shoot it’s invisible beam across the the opening and snag anyone that passed through, before they could even see it was there.
I used a masonry bit and hammer-drill mode to pop four, 1/4” holes into the block fence. You can do it with a regular drill and a masonry bit; it just takes a little longer without hammer mode.

Hammer Drill Mode in action
The Guardline sensors came with plastic, masonry anchor sleeves and mounting screws.

tap tap tap
The sensor is hooked to the mounting plate on a ball-swivel so it’s easy to move out of the way to get to the screws. The kit even comes with the little screwdriver.

It’s a cute little screwdriver. I have 3 now!
With the narrow, alley-like side yard, this sensor wouldn’t be in the direct sun too long. There would be plenty when it was blazing directly overhead. The Phoenix sun is a heartless monster in the summertime. I snapped the included weather hood on top to protect the lens from the elements.

I angled the sensor slightly towards the gate opening and moved on to install the next two.

I seeeeeee you….
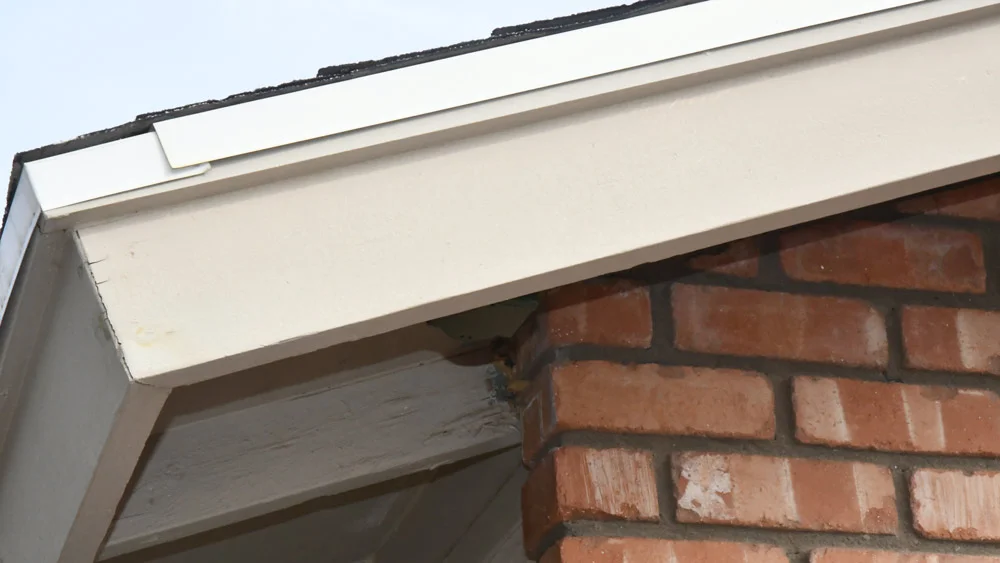
Installing the Garage Door Sensor
This one got installed up high, on the back side of the fascia board, overlooking the garage at a sharp side angle. Since it was mounting to wood this time, I pre-drilled some holes with a small bit.

I’m doing this in January. So yes, I am wearing long pants. It’s chilly.
I use the included screws and attached the back plate of the sensor to the wood. This one would always be out of the sun, so I didn’t include the shield.
But why so high?
The instructions say to mount the sensor about 3 feet off the ground to avoid critters setting off the sensor. That’s a great idea for our side yard. It’s also fine where normal people, bunnies, and an occasional cat might stroll by. But I know better. In our yard, there are things in the night. Horrible things, like El Chupacabra, the legendary creature of folklore. Yeah, hangs around our front yard.
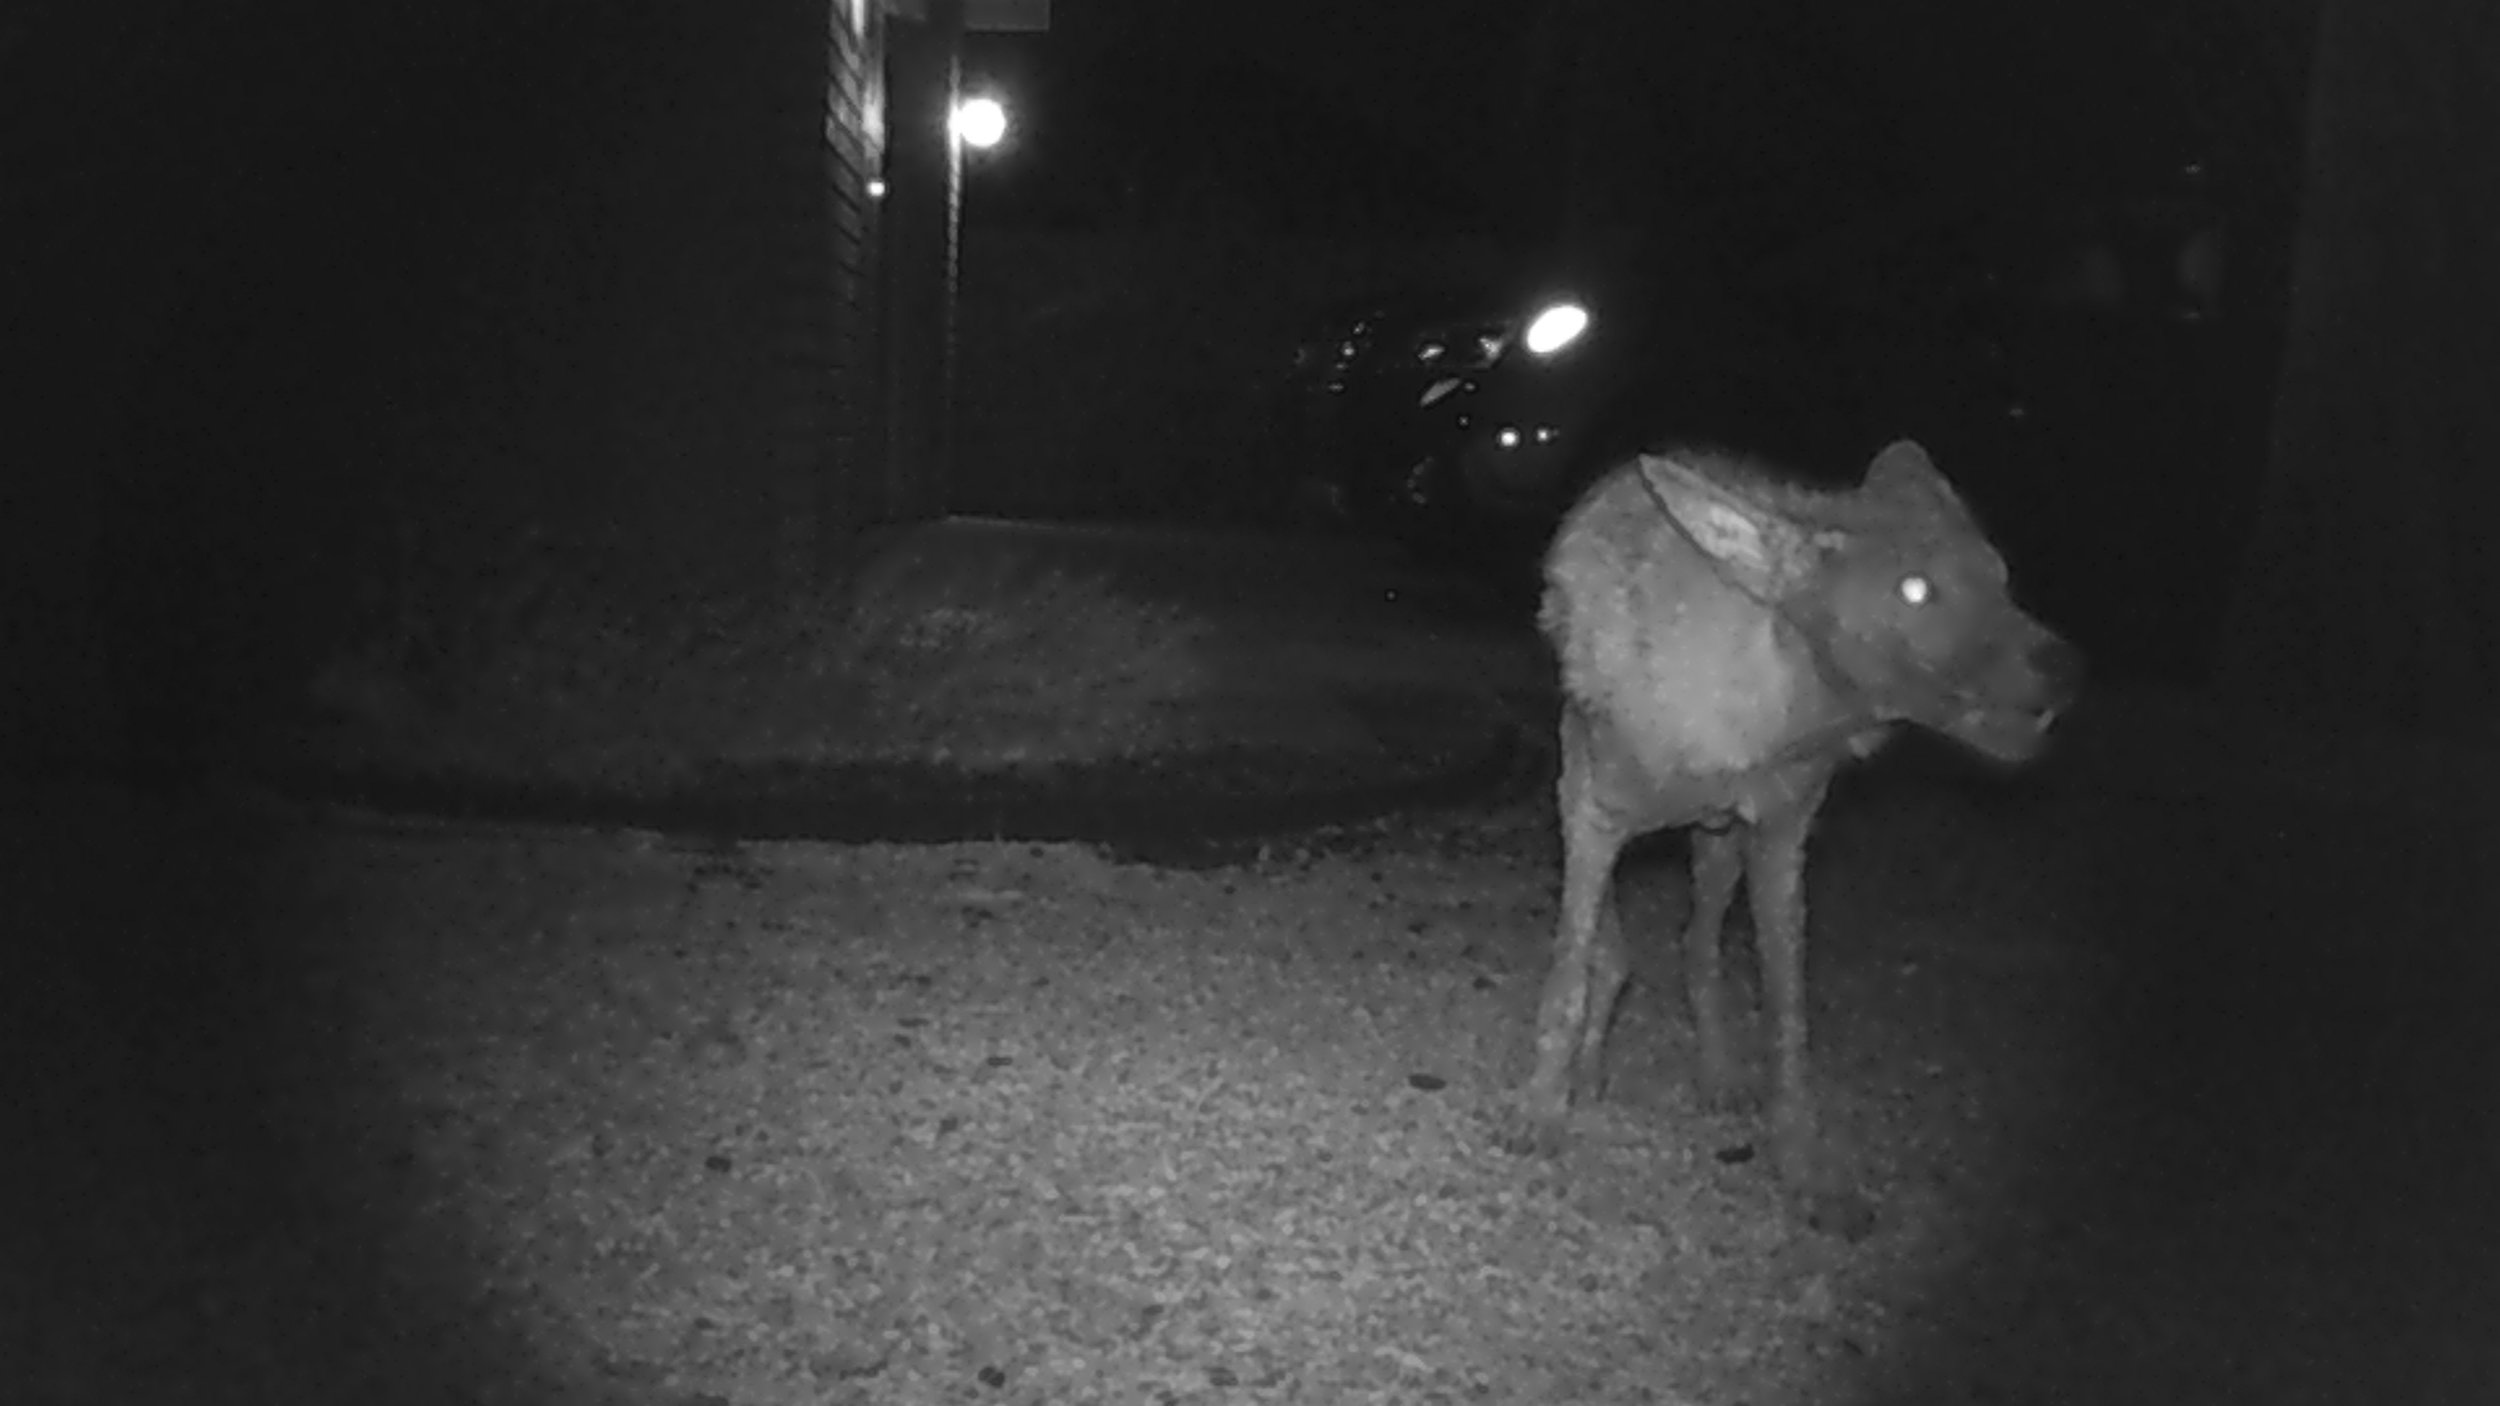
Read the whole scary thing: Notch, Bigfoot, and the hunt for El Chupacabra in our front yard
“Up high” was also a convenient location because I didn’t have a good spot to mount them otherwise, no obliging tree, post, or fence that would grab the line-of-site that I wanted, yet not pick up other random stuff.
So I angled two of the sensors to look down from above, and keeping their field of view tight to areas where the big creatures probably don’t haunt in the deep, dark night. Therefore, the third sensor…
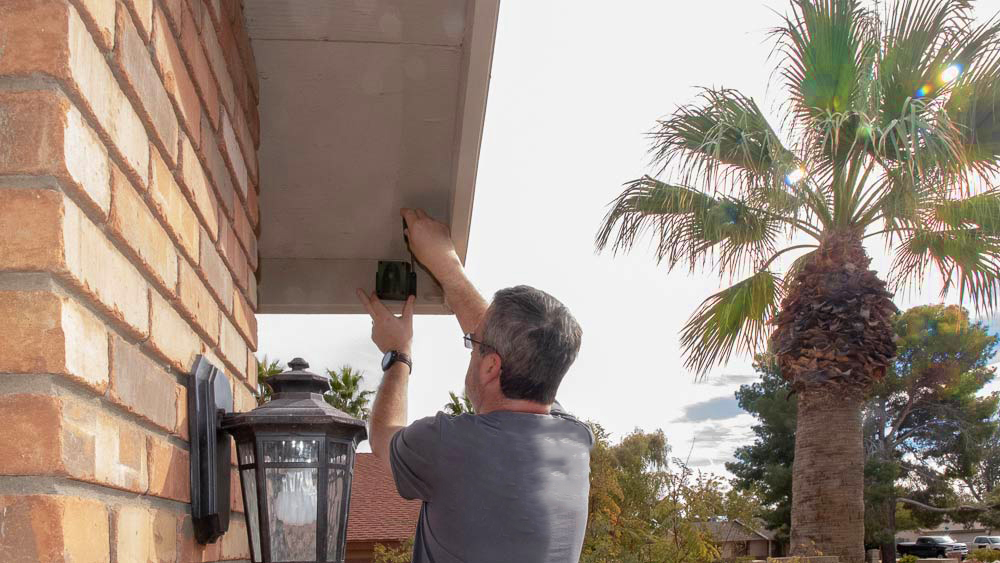
Installing the Front Door Sensor
This is my favorite. Someone approaching the front door can’t even see it unless they are walking backwards and looking upwards. I set it looking at an angle to be triggered when someone was about four feet from reaching the front door.

It’s also screwed directly to the wooden fascia board and doesn’t need the shield.

Always watching
Walking the walk
I’d paired the receiver to all three earlier and had it running on batteries. I strolled around with it in hand testing the angles to see exactly when I’d get picked up by the sensors. I tried to sneak past them without getting caught. Moving fast, skipping, spinning, or slowly tiptoeing like a member of the Scooby Doo gang after a crook, I had no luck; the sensors nailed me every single time.
There are all kinds of adjustments that can be made, angle, distance, field of view, etc. I wanted to make sure I had everything right, especially with the two high mounts, while I had the ladder out.

Testing the sensor locations
All three of my installs worked perfectly with the “out-of-the-box” settings. I didn’t even have to adjust the eyeballed angles I originally used. Not only does the receiver play the chosen sound and light up the number for each zone, the sensor lens itself turns red briefly when it gets you.
Here’s a video walk of three locations to get a sense of how they work and hear the of the fun sounds I chose as alerts.
What I think
We’ve had the system working for a little over a week since I installed it. It’s working perfectly. We love the confirmation that someone is at the front door rather than wondering if we heard a knock. (Amazon delivery!!!)
I think my wife was ready to kill me when I was unloading a truck full of lumber into the garage. She was sitting in the living room reading (where I placed the base unit), when the Guardline and I treated her to an extended concert of the Indiana Jones theme song. The next time I was going to do some in-and-out garage stuff, I simply hit the pause button before I started.
Shhhhh,… It’s hiding
This is a cool system. It’s a super simple and quick install. It’s smart, but not “too smart”. It’s not gong to share your info with the dark data-banks of the world.
Get some for yourself!

Visit the Guardline Amazon store.
Thank you to Guardline for partnering with me on this post. I had a lot of fun and I've really enjoyed having the sensors working on the house.
Thanks for reading friends!