Regular readers may recall the cool lap desk I built a while back. I did the bulk of my blog work comfortably on the couch with my computer and a beverage happly on my lap. It's perfect. So perfect that it's regularly absconded by my beloved family. I've actually gotten in the habit of using a rough piece of drywall on my lap.
I wanted to make another lap desk. Something even cooler, for the family to use. This one would be a smaller, antiqued desk with a decorative, metal inlay. It's a pretty easy project.
Woodworking
Rather than building the desk from board planks, like I did the first time, I opted for a piece of plywood. I cut it the exact same size as my ugly drywall piece (17" x 14 ½") . I knew it would work with my computer setup (Surface Pro).
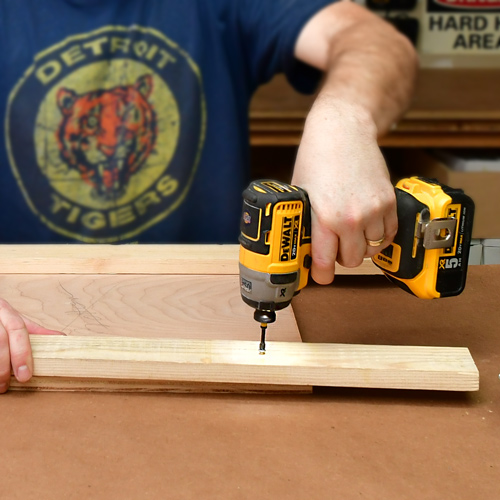
I screwed a couple boards to the back so I could clamp it to my workbench and loaded a ¼" straight cutting bit into the router.
With an edge guide to keep everything straight, I plunged the bit into the board and carved a channel, inset along each edge.

For an added visual element, I also routed a cactus shape into the face of the board. The edge guide helped with the straight parts, but I needed to do a little free-handed work to finish the design.

I did the cutting with a handheld router, but there are many other ways to make a recessed design. You can use various saws, hand chisels, or if you are super blessed a CNC wood router.

I swapped the straight cutting bit for a piloted roundover bit. It has a bearing / wheel that rolls along the edge of the board for a clean cut. I round the sharp edge of the board over on each side of the board.


Crafting The Metal Inlay

Bernzomatic TS-8000 Max Heat Torch with Propane
Usually, when soldering, you heat the metal workpiece and let it melt the solder. This time I trigger started the torch to life, and directly flamed an extended piece of solder. The torch liquifies it really quickly.
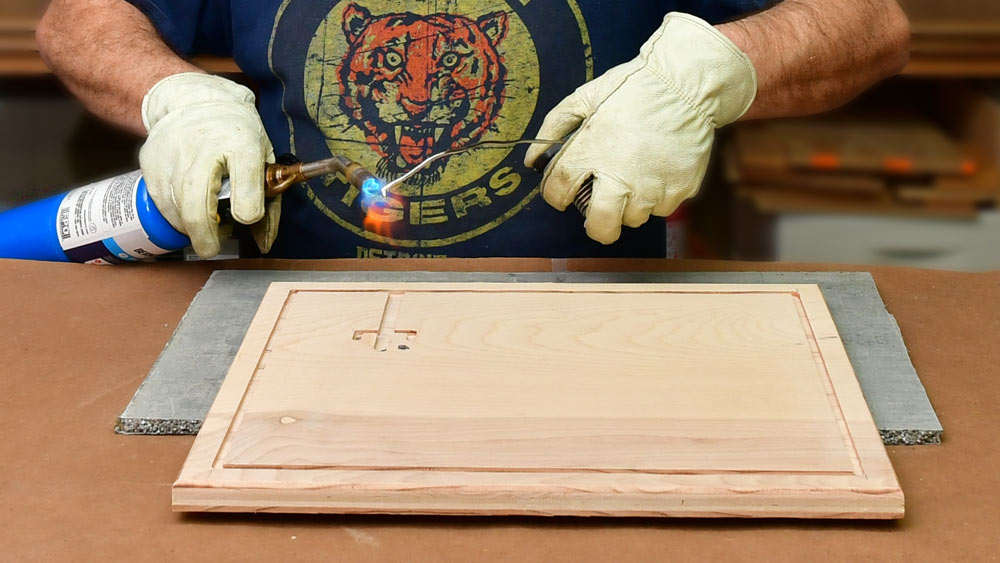
Holding the soft metal over the recessed wood channels, I let it drip,.. drip,.. drip down. It joined into a shimmering, molten blob, growing to fill the space.

A couple times, I let the torch get a little close to the wood and scorched it. No worries, I'd be roasting the whole piece as part of my antiquing process.
I intentionally overfilled the channels.

clumped
With the cactus filled, I started working my way around the decorative edge channel.
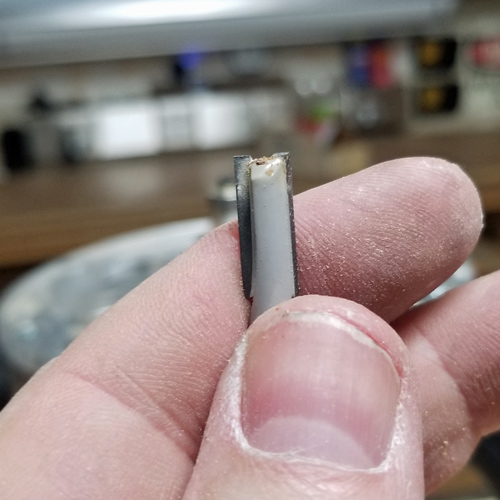
It took one, larger spool of solder to fill the entire board design. My creation was ugly as heck at this point. I left it to cool down for a while. Sandwich time.
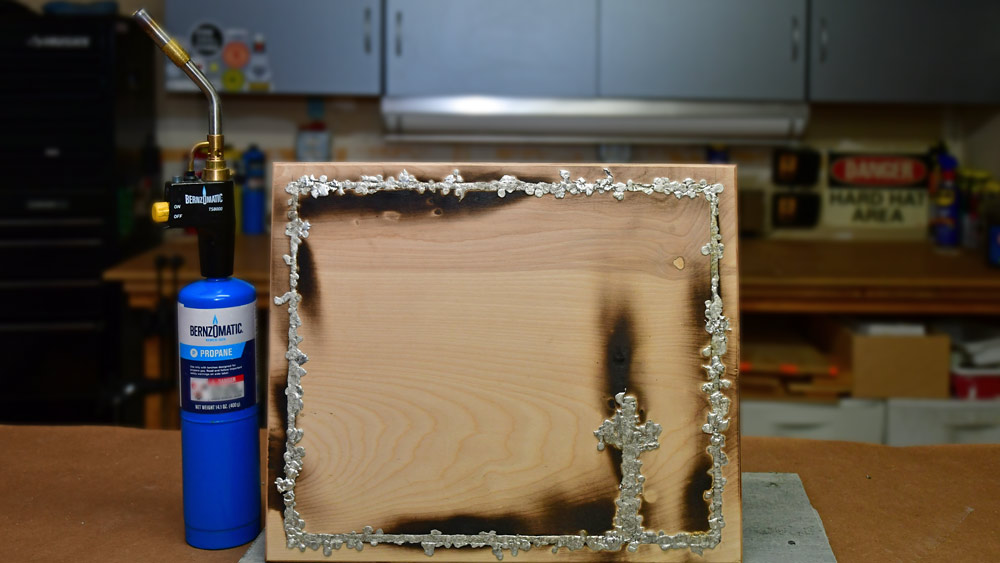
Well, that's ugly.
With the piece fully cooled, I returned to start grinding the lumpy solder down. I used a ¼ sheet sander with coarse, 60 grit sandpaper.
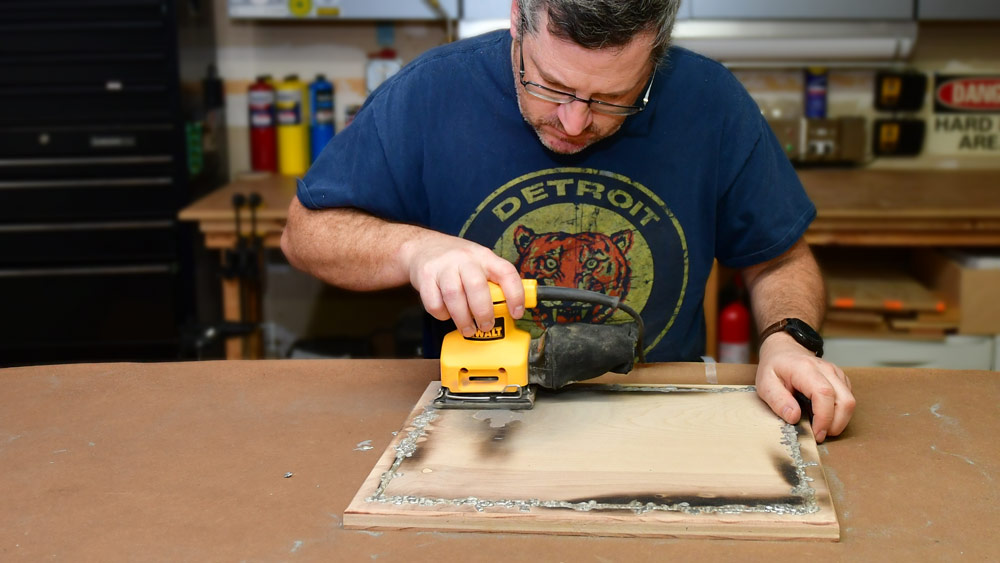
The ol' grind
I let the sander do the work without putting much muscle to it.
Since plywood is already smooth and flat, there's no reason to do any sanding of the wood at all. It's just a matter of working the solder down flat and even with the surface. It takes a while, so get comfy and turn up the tunes. The sanded solder dust is a lot heavier than wood and doesn't seem to get airborne like sawdust. It just makes a mess on the workbench that can be easily swept up.

Halfway down.
After sanding, the metal looks like it was cut and pieced into the wood like a jigsaw puzzle piece.

I took a slightly damp rag and wiped the piece down. This thing was going to look really cool.
If I hadn't have burned the wood, I could have clear coated the piece and called it done at that point. It would have a neat, natural look, but not what I had in mind.

A BRAND NEW rustic ANTIQUE
I wanted to make an old and battered looking piece. Plywood is just too pretty.
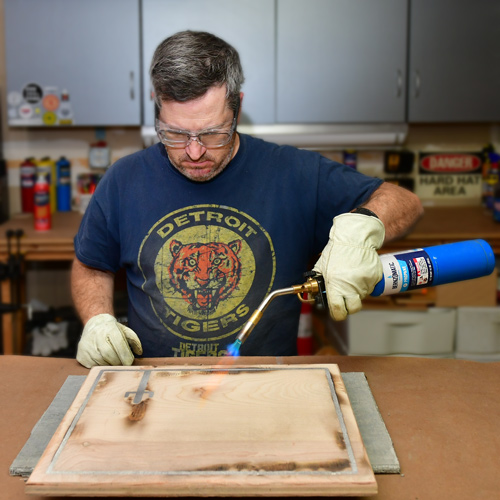
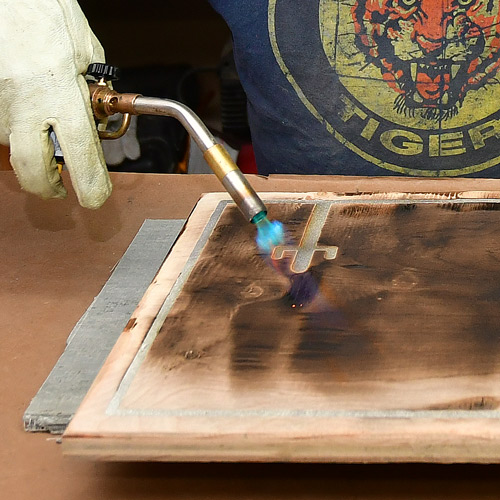
I fired up the TS-8000 again and turned the flame on the wood. I kept from spending too much time roasting near the inlays to avoid re-melting the solder. I gave the piece a dark, overall char and cooked some areas more than others to vary the effect.
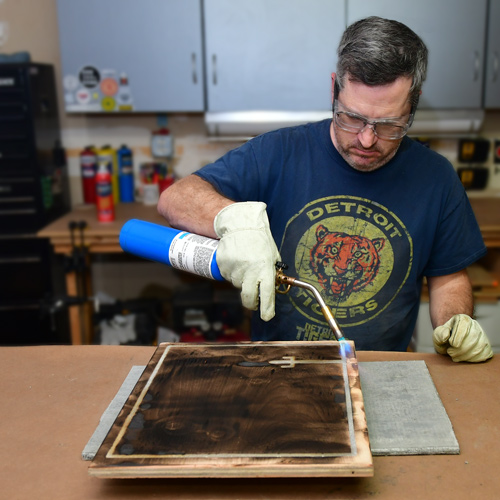
Next, I hit the surface with a random orbital sander and chewed most of the burned areas right back down. I varied the depth slightly to reveal some of the deeper layer of plywood grain.

I don't orbit often, but when I do, it's randomly.
With a ton of color variation and texture showing from my artificial weathering process, I wiped on some antique walnut stain, a combination polyurethane and stain product.

Bringing out the color
I overcoated the entire piece, metal and all. After the first coat, the distressed wood looked colorful and rich. The metal became dull, beneath the coat of stain.

1 coat of stain
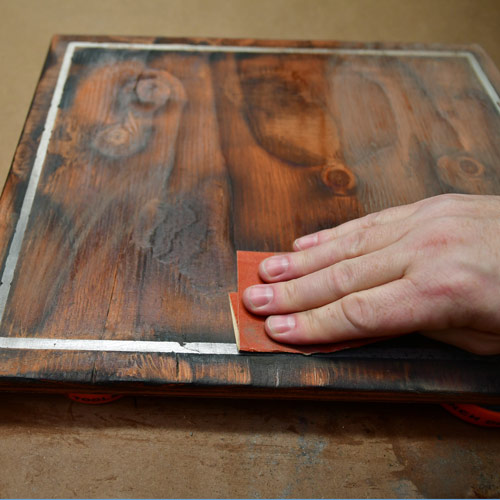
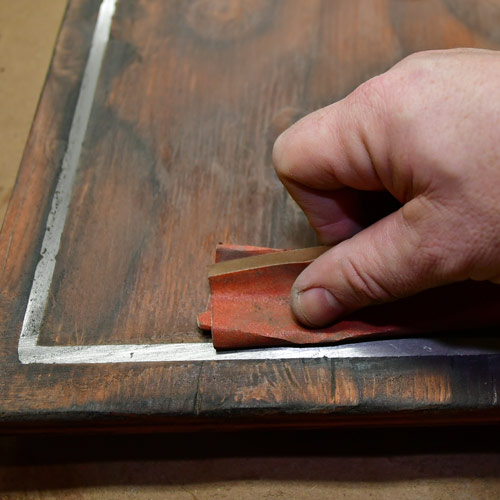
After a couple coats of stain dried, I gave them a quick, hand-sanding with 220 grit sandpaper. I paid special attention to cleaning the stain off the metal inlay. It brightened right back up.
Once the piece was sanded down again, I cleaned off the dust and applied a thick coat of the marine varnish I'd used on my pallet wood pirate flag project to create a monolithic surface. It filled the little cracks and splits I'd created in the aging process.

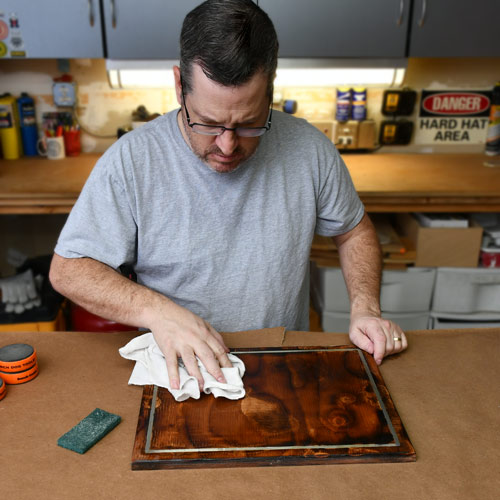
When the lacquer dried I gave it a quick rubdown with a fine#0 3M sanding pad to take out little blemishes, bubbles and streaks. I cleaned it up with a damp rag.

Building the Lap Pad
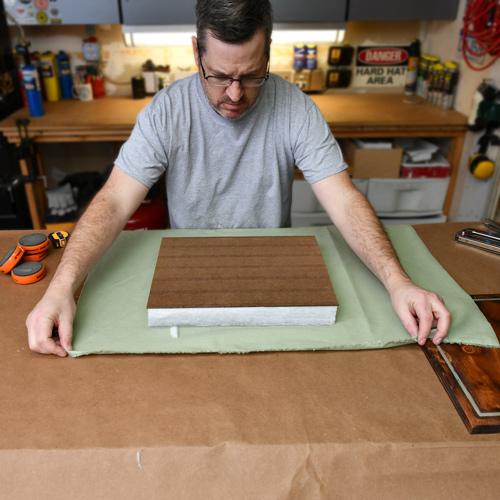
I don't have a clue how to sew, but I've came up with a working method to make a comfortable, good-looking lap pad. I started by cutting a piece of craft store simple foam cushion with our kitchen scissors. I sized it a couple inches smaller than the desktop.

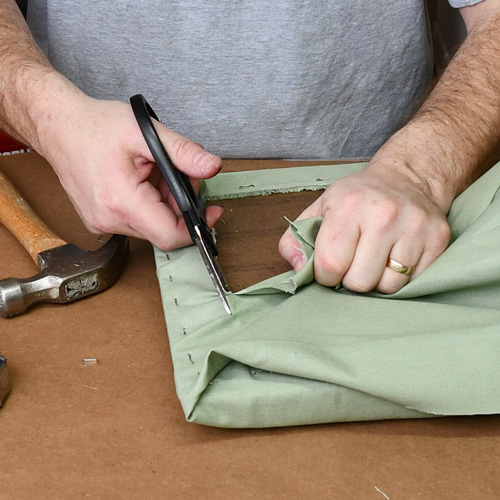
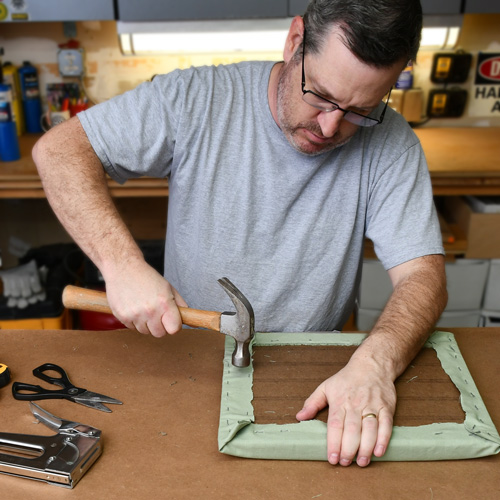
I laid a thin piece of hardboard (leftover beadboard from the closet built-in project) on top to the foam pad and stretched some light green fabric around it tightly. I used heavy staples around the entire perimeter and cut off the excess fabric. My hand stapler didn't quite drive the staples in all the way in so I hammered them.

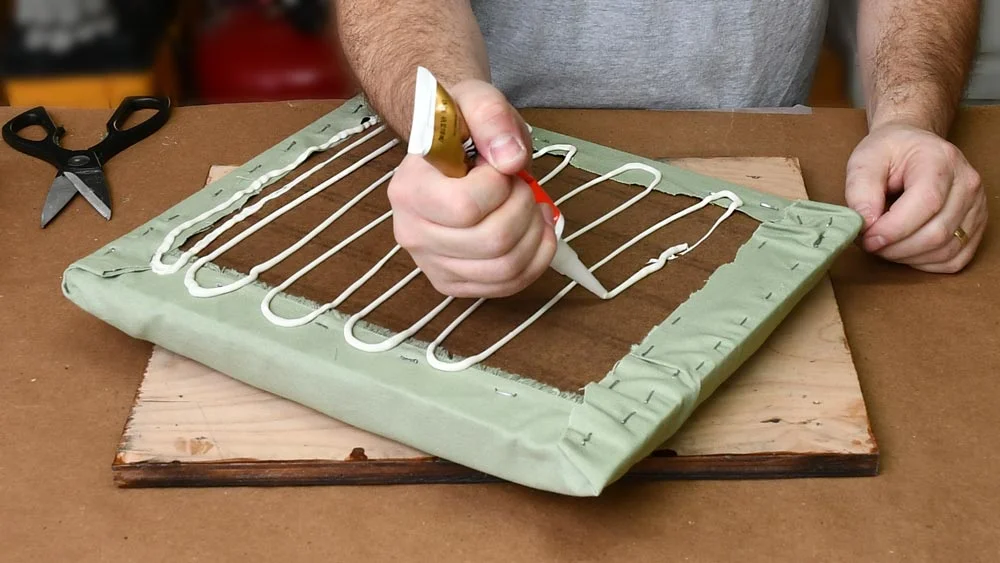
I squoze nearly an entire tube of Liquid Nails Wood Project Adhesive on the back side of the pad. I kept it away from the edges to avoid squish-out, but let it flow out onto the fabric edge to lock it in place.
Strusel
Reaching yet another point in the project when I have to leave it to dry, I put some weight on a piece of scrap wood to press the two pieces into the adhesive.

Weight for it.
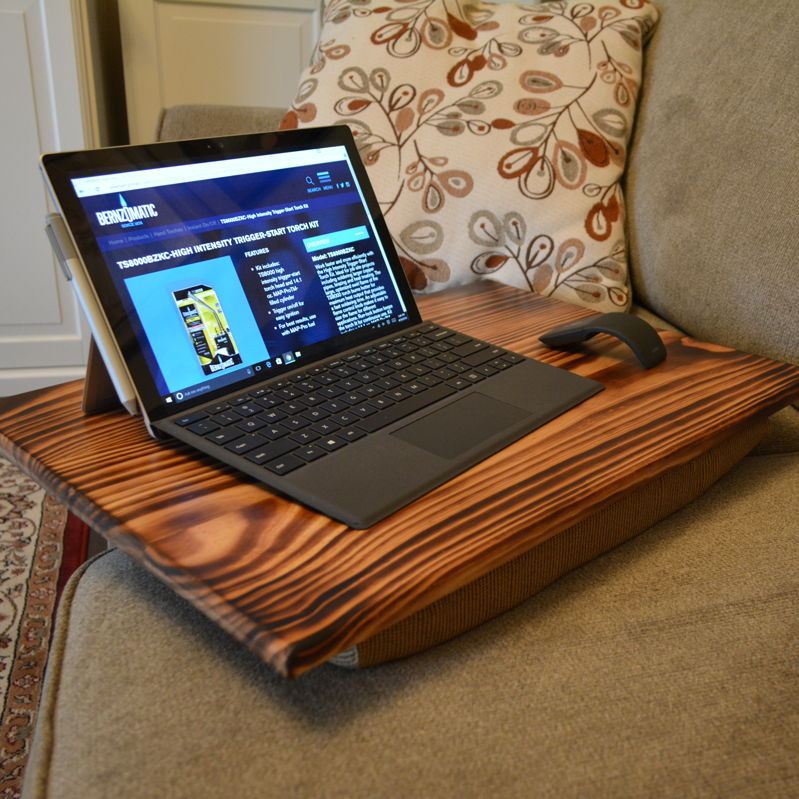
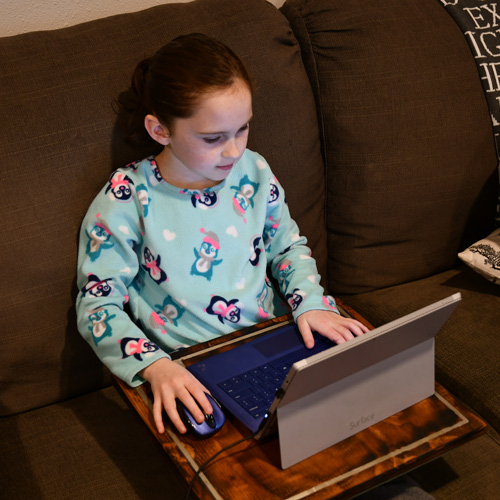
The Rustic Lap Desk with Decorative Metal Inlay
A few hours of drying time and it was complete. I set it down on the couch for a few minutes...

I'm going to grab my laptop
... and it was spotted by a gremlin who snatched it up.


Visit the Bernzomatic Torch Bearer Site and see what the other awesome Torchbearers are up to.

Similar Projects: