

Installing a Studor Vent (AAV) in the kitchen
I'm doing the trickiest side of our kitchen remodel now. Not only is it chock full of plumbing and electrical issues, we've also got framing to deal with. The little "window" to the family room is going to get enlarged, giving us as much open concept as this old house is going to allow. Unfortunately, it's going to cause problems with the drain venting that passes through that area. I've got the solution.
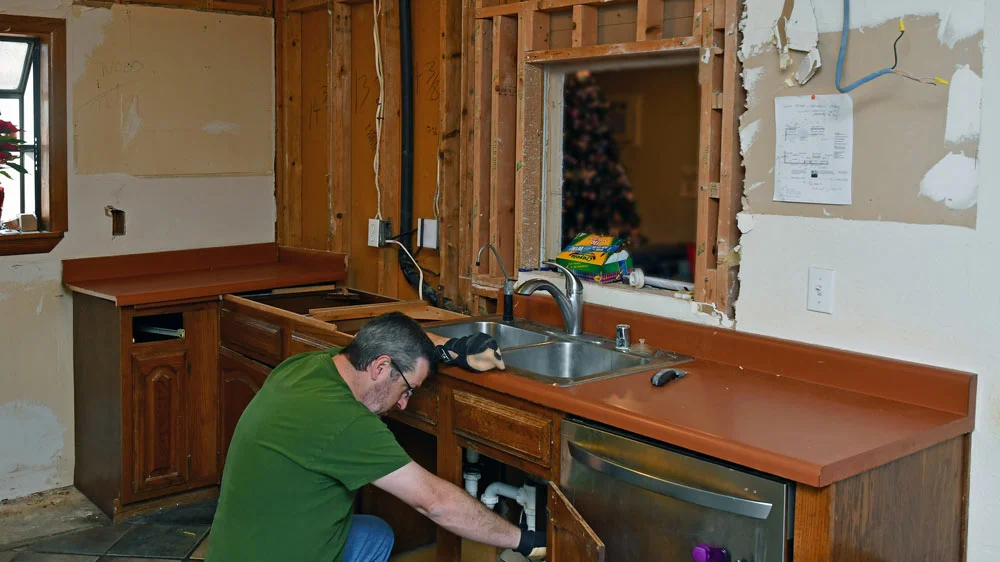
I had to get at the drain area and didn't want to work cramped inside the base cabinet. Last time, I showed how I replaced the water valves under the sink so that I could actually turn off water to remove the sink.
Water = Off
To open up the area, I disconnected the water feed and drain lines to the sink and dishwasher and lifted the entire countertop section off. It was an ungainly beast, the counter, sink, garbage disposal and everything else, in one piece. I figured it would be easier to put it back together at the end of the day if I didn't break it all into too many components. I pulled the dishwasher out of its cozy little nook as well.

Hernia risk = High
With the sink base out, I tore off the rest of the drywall in the area. The whole wall needs to be open for what I have in store for it in the near future anyway. I'm glad I got in there. Nonsense was within.

The Plumbing Vent Stack
So here's the deal; a drain needs an open airway for water to go down properly. It needs to be vented. Most of the time there is a T intersection from the drain line to the sink. The vent goes up through the roof and the waste water goes down to the sewer or septic system.
Here's a cool video from the illustrious This Old House, explaining the concept.
Ask This Old House plumbing and heating expert Richard Trethewey and Kevin O'Connor.
The drain / vent "T" is the setup in our 1970's kitchen. The drain goes down through the concrete slab and the vent line goes up through the ceiling. From the drain, the ventline offsets upward at a 45-degree angle to avoid the little "window" to the family room before punching out to the sky.

I stuffed a rag in the vent hole to keep sewer gasses out of my face.
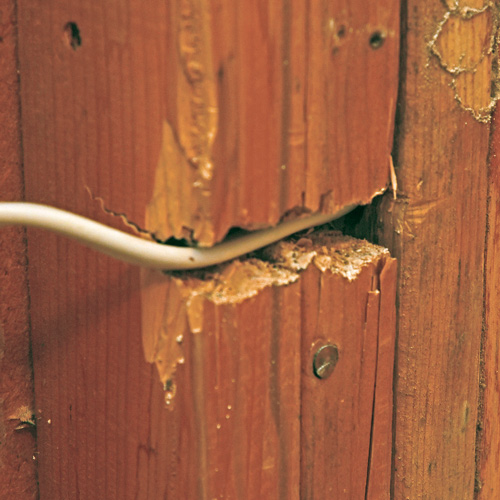
A 1 ½" ABS plastic pipe is pretty big compared to the 2x4 framing. It needed to be slid through a hole drilled through each wooden stud on its path upward and to the left. The hole should go right through the.. center.. of... each... stud...
Holy hell.


They'd torn the heck out of the studs when they burrowed through like the drunken pea-wits. I'm glad we don't have earthquakes here; the house would surely be a pile of kindling.
The Big Header
I'm going to replace the header over the "window" with a larger beam like the one that goes over the archway to the next room. It needs to be beefy and solid to properly support the roof in this room as well as the next room, You may recall seeing what that framing looked like when I remodeled the family room, an addition to the original back of the house.

To be clear, the "big header" refers to the beam, not my abnormally large cranium.
While the wall is open, I'm going to have to clean up a ton of issues my DIY'ing predecessors left behind. This is a serious, load-bearing wall and they hacked the heck out of it. They also left areas where supports,...didn't actually support, by a quarter inch or so.
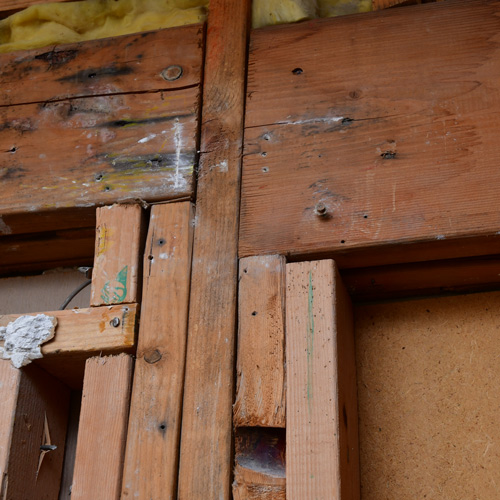
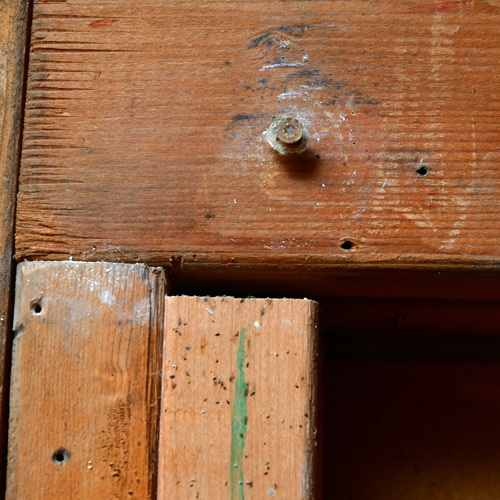
Chumps.
Later. I'll deal with all that later. I had to figure out how to get the vent line over and up through the roof without destroying all the framing I'd be installing (fixing).
The venting solution
I did a bunch of research online and came up with a fix to avoid having to send a vent pipe horizontally through all the framing again. I'm going to use the same approach that's used for kitchen islands with built in sinks, an air admittance valve (AAV). It lets air into the line, but keeps sewer gases from coming out.
I know it's probably controversial, but my personal opinion is that that venting sewer gases into one's kitchen is somewhat undesirable. There. I said it. I'm taking a stand with this one.
Out with the old
First, I had to remove the existing drain stack. There was even a drain clean-out plug pointing in the wrong direction. It was buried, facing backwards, into the thick wall, inaccessible and forgotten. Evidently, it was originally facing out the back wall of the house and could be accessed. Now it was deep inside drywall. Useless.
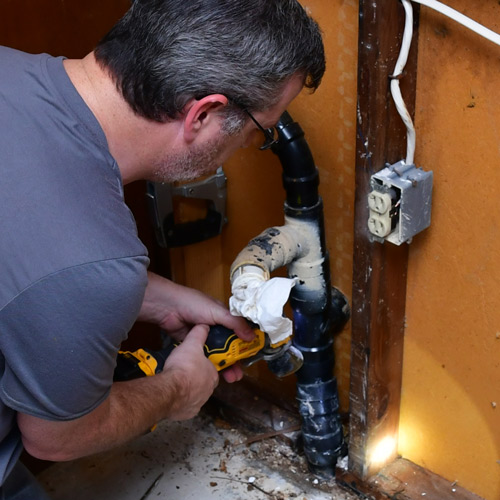
I chopped the upper vent line off with a hack-saw. That part was a piece of cake. The rest would be a challenge.
There was no lower section of straight pipe to cut through in order to leave something to attach new fittings onto. The fittings were just too close together. The bell ends (female) of the fittings were actually touching each other and glued tight.
I cut through at one of those points with a oscillating multi-tool. It cut / melted through the pipe quick and easy, leaving the scent of glued, plastic airplane models of my childhood.
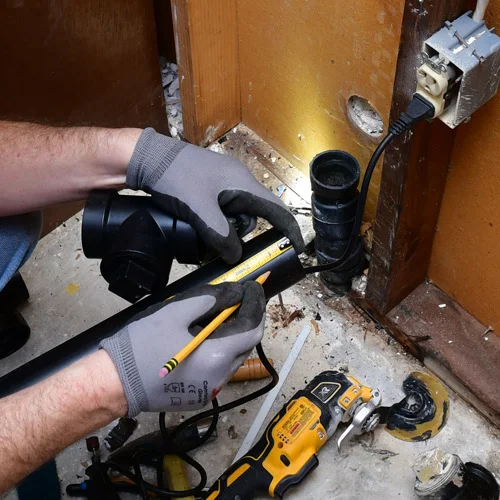
The tricky part - Gentle Demolition
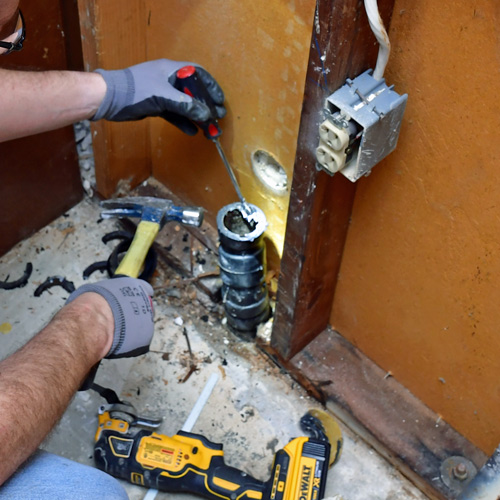
Since I'd lopped the pipe off right at the fitting, I'd need to clean out the bell-end of the existing fitting to stick a new piece of pipe in. Easier said than done. The glue that's used with this ABS plastic fuses it together pretty good. It looked like a solid, permanent mass.
I gently chipped and pried, transitioning between a sharp chisel and a slotted screwdriver. Whenever a little piece started coming free, I grabbed it with my needle nose pliers and twisted it out to avoid chunks of plastic from dropping down. They could potentially get caught in our drain lines and cause another whole big thing.
I finished it up using a rotary tool with a mini sanding drum. It was slow, tedious progress, but I managed to get all the pipe remnants out without cracking anything.


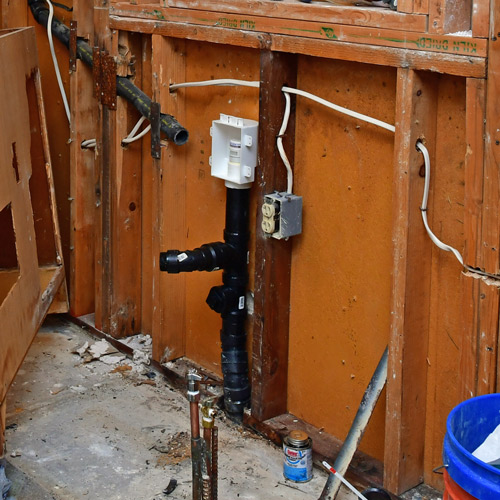
Installing The Air Admittance Valve Drain System
With the bell-end cleaned out and pretty, I thanked the DIY Gods that I hadn't broken anything. I could move forward without chipping into the concrete floor.
I slipped in a fresh piece of 2" ABS to check the fit.

I headed into the store for some parts.
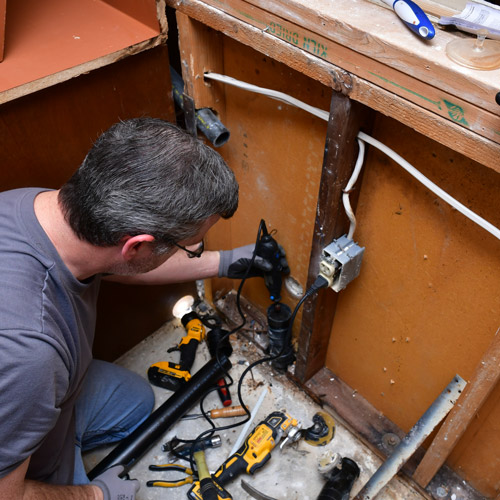
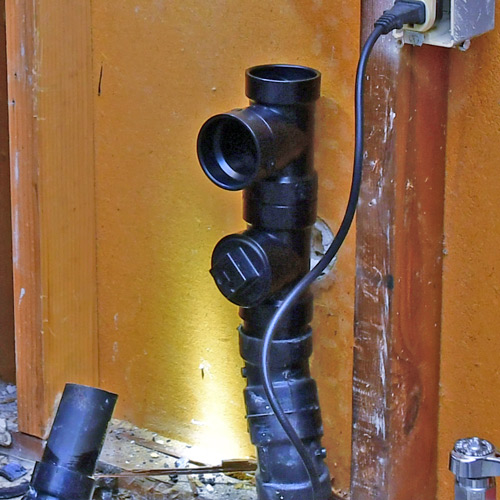
I measured, marked and cut the fresh pipe into the small lengths I needed. I dry-fit the whole new assembly including a cleanout, the drain "T", and the AAV valve box.
Black ABS glue is a bit like standard PVC glue, but it's a little stringy and you don't need the purple primer. I coated both mating surfaces with the lid swab.

Rubber gloves. Trust me.
The glue was strong stuff, quickly melting the mating pieces together. I twisted them slightly and held steady for a couple seconds. They weren't going anywhere after that.
Since I'm moving the sink about a foot to the left, I reversed the 45˚ elbow direction from the direction the old one had been facing.

Pinky out, if you want to be fancy.
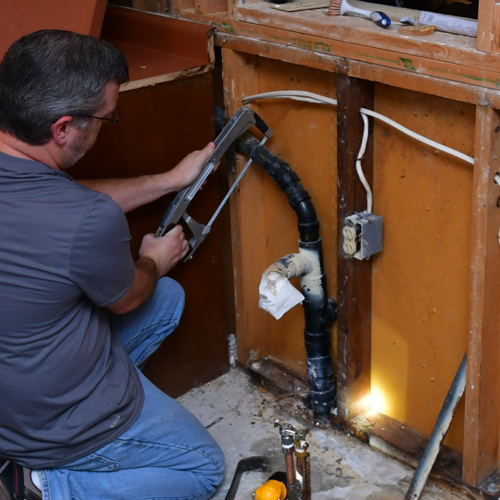
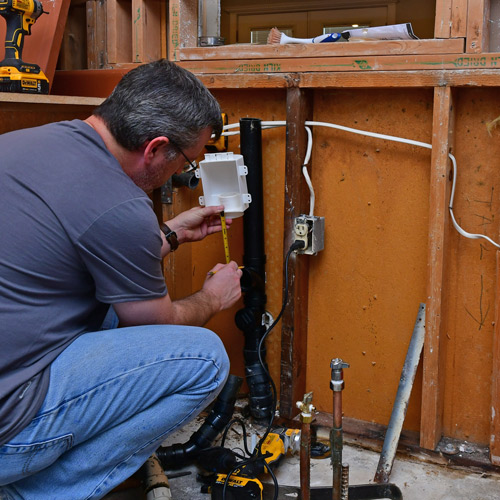
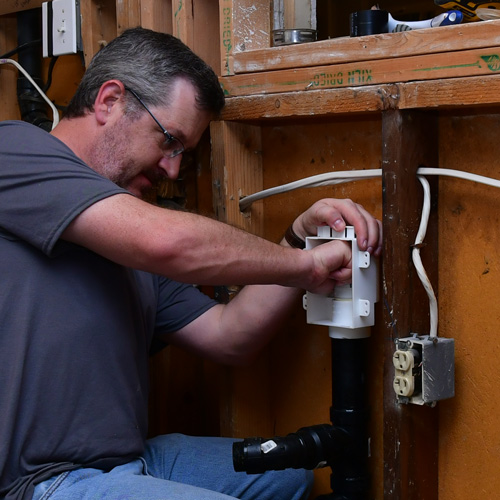
The AAV valve needs to sit 4" above the horizontal drain pipe. It can be done with an exposed, vertical stick of pipe inside the sink base cabinet, but since are installing a big farm sink, I don't know exactly how much room I'll have to play with behind the sink bowl.
I chose a Studor Vent kit that came with an in-wall enclosure box. It's recessed in the wall, but will get a louvered cover inside the cabinet to let air flow.

The kit comes with a temporary cap to seal the thing up and prevent ever-present crud from getting in during construction. I'm sure drywall dust won't do the innards of the one-way vent any favors.
Unfortunately, we need to keep using the kitchen sink as much as possible during the renovation so I threaded the valve in right away. I'll just have to cover it with a baggie or something when things get seriously messy.
My new drain vent system is complete. What a great solution these little AAV's are eh?
The easy PArt - Removing the old Vent Stack
With my fancy new solution in place, I turned to the existing vent line. It had to go.
Once again my handy oscillating multi-tool was the best beast to chew through the pipe. It's lightweight stuff and easy to cut with any hand saw, but tight in between wood studs in an existing wall, it's much quicker and easier to stab-cut with an oscillating blade.

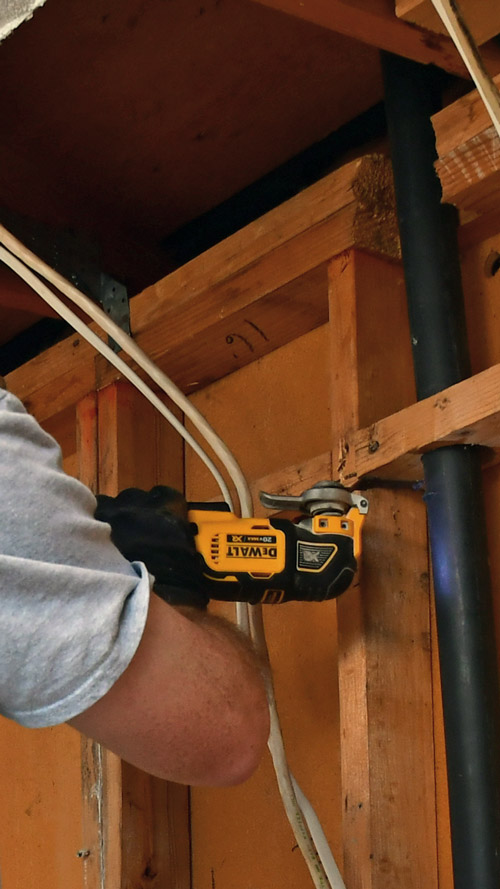
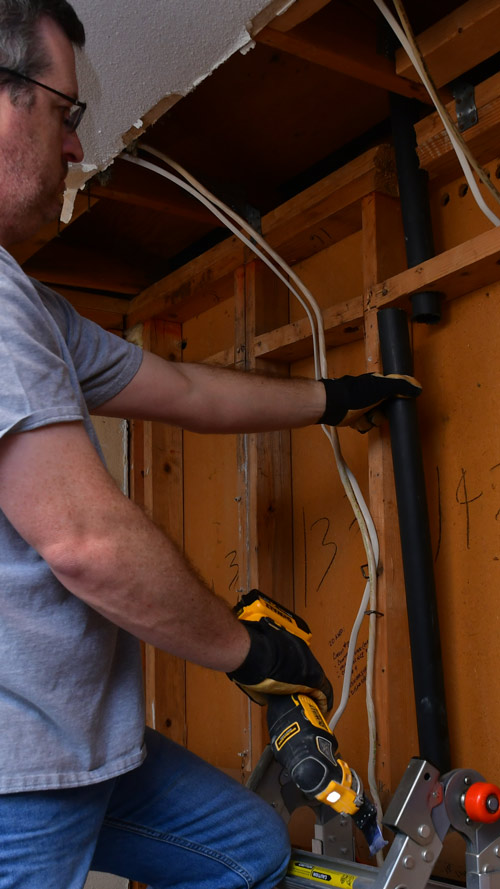
I had to slice the pipe in several places to get the lengths short enough to finagle out of the framing.

Just look at those gross, rusty metal plates.
I dropped the whole mess out of the wall. It only took a couple minutes.

Pile-O-ABS
I figured I could pull the roof-penetrating piece down from below. Surely there was one of those vent jacks or flashings out there that I could fold over and seal once the pipe slid free.

Unfortunately, it wouldn't budge when I tugged on it. I'd need to brave the horrors of a frigid winter rooftop to check it out.
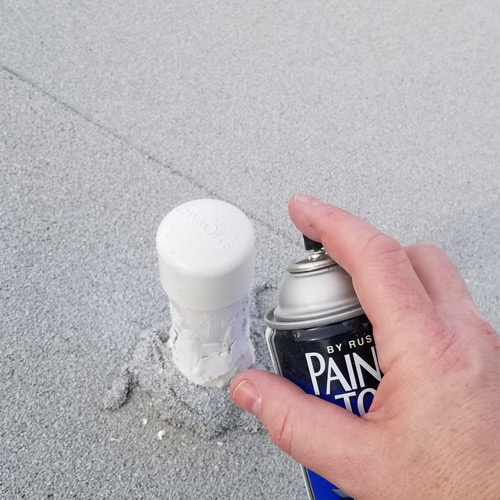
Sealing the Roof PEnetration
Bracing myself against onslaught of blue skies and a biting 78˚F calm day, I found the vent pipe as I cleared the peak of the roof.
No flashing whatsoever. It was simply a piece of PVC pipe sticking up through the roof with a glob of granule-coated sealant of some sort around it. I couldn't pull it out without risking damage to the roof.

Phoenix in the winter. Not fit for man nor beast.
I made my 7 billionth trip of the day to the hardware store and picked up a 1 ½" PVC cap. I used up the last of my PVC / Cement handy pack to glue it on and gave the assembly a quick toot of spray paint to lend a little extra UV protection.


That's it for the venting solution. It was a huge relief to find the Air Addmittance Valve solution. I really don't know what I could have done otherwise.
I can start pulling the electrical out of the wall and moving the plumbing feed lines now. I'll be framing before long.