

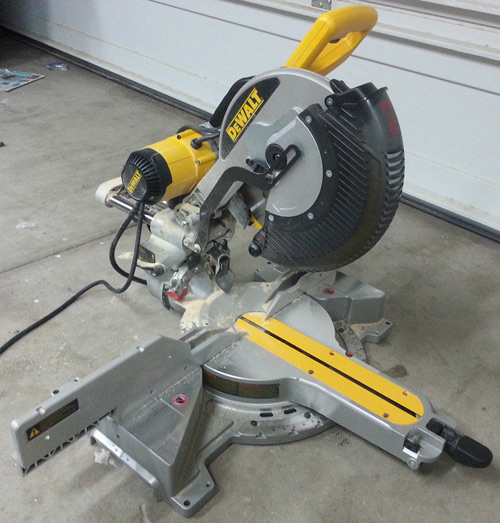
My loving family bought me a shiny new, black & yellow toy for Christmas. It was not exactly a surprise, because I was the gladiator that stormed into the arena of Black Friday mayhem to drag it, alone out of the carnage. My victory prize was a beautiful Dewalt 12" Double Bevel, Sliding Compound Miter Saw.
I'd used this model about a year ago when I took a community-ed wood working class, and I really liked it. I had borrowed a 10" Delta single-bevel miter saw to do the crown molding in the family room. The 10 inch miter saw was a sweet tool. I really wanted something similar for future projects, but wanted to kick it up a notch. It was the next workshop machine on my wish list. The price dropped down a couple hundred dollars, so it was time to strike. My work bench wouldn't fit it and It's not a work on the ground type of tool (although I did mess with it that way for some test cuts). Time to build a miter saw stand. I looked at a lot of plans, watched some YouTube videos, and flipped through some magazines.
Just the basics

There are some outstanding plans out there. I don't need a Cadillac; I want a basic truck, a somewhat inexpensive, workhorse without the heated mirrors and leather seats, but with plenty of storage, maybe cupholders.
I figured I'd make it 8 feet long, because I had 8' of wall space on the back garage wall. It would be a simple frame of easy to get, inexpensive 2 x 4's to make a 2 foot by 8 foot base frame.

Using my Craftsman drill & drive countersinking bit to face screw the base together.
I tried out a cheapo pocket hole jig initially, but it was just too flimsy, I couldn't adjust the location of the hole to the thickness of the wood. Don't buy this one. I switched to my old Craftsman countersink, drill & drive kit to face screw it together.
Now we're rolling!
To make it mobile for cleanup, I used heavy-duty, 3" locking swivel casters (wheels) like these, with a high weight rating. An added a 2x2 across the end to made the area large enough for the mounting plates on the casters.

Free Wheeling
More Wheels?

I also grabbed two non-locking castors, intending to make the whole rig a six-wheeler, but the garage floor is crowned right where I want to stick it. It would wobble terribly. It seems to sit just fine and doesn't bow into the middle with the four wheels.
After the first day, I had a base frame roughed in, with wheel's mounted as well as an outer frame constructed for the top. I'd add horizontal supports when I figured out where to add the verticals.

I'd been using the new miter saw, on the floor to cut the 2x4's. It was so much easier than using the table saw to crosscut unwieldy 8 foot long boards, even thought I had to rig up some out-feed supports to do it. Too bad I don't have a nice miter saw bench to work on yet.
I can tell I'll like it being mobile already. I pushed the thing out of the way to pick up screws, washers, and tools before hitting the whole area with the shop vac. My existing, main workbench is bolted to the wall which makes clean-up difficult.
Plywood
In my quest to be financially conservative on this less than polished piece, I pretty much tore through my stock of leftover screws. To screw the top and bottom sheets of plywood down I grabbed these green coated screws. I'm not sure what they are for since they are so short, maybe for building green fences? Either way, they were my absolute favorite price, free! They came with the house. (Either that, or I just wasted a pile of really expensive screws that came with a free house). It was a moment of nostalgia for me. When he was younger, Jack used to make armies out of these guys when I worked in the garage. He used to build phalanxes of brave camouflaged troops that would go into battle against the oppressive forces of those dastardly, drywall screws, in their fascist charcoal grey. He had a huge bin of real army men in his room, but he loved hanging out in the shop with Daddy, and riding the garage of Nazi scum.

The phalanx
Going Vertical
I prefabricated all the vertical boards by cutting them the same length and drilling a couple pocket holes in each end. I'd chucked that cheapo jig and upgraded to the top notch Kreg R3 Jr pocket hole system. (Here's my review).

Kreg Jig R3
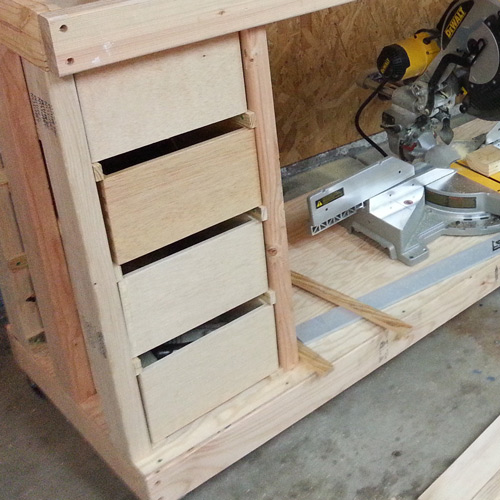
The basic frame snapped together in a matter of minutes. A pile of lumber transformed into a bench. On the right, I mounted a two drawer file cabinet. It's just a way to make the most of my limited floor space. I stuffed old woodworking magazines and tool manuals in here. It's a place to keep paperwork, protected from saw dust, oil, or paint that inhabit the workshop.

On the left , I built a rack to hold storage bins. I'm not calling them drawers because there's no hardware, they'll slip in and out on simple rails. I can carry the bin to wherever I'm working. They are much nicer than I need, because I'm a knucklehead. I made these beauties out of Baltic birch plywood, using dovetail joinery, for our hallway organizer project. They were perfect! Unbelievable, considering I'd never used a dovetail jig before. Buuuuuut,....
I neglected to allow for the thickness of the drawer slide hardware and had to abandon these, since they were an inch too wide. Moron.
I built their new home to fit them perfectly. I made the racking out of recycled pallet wood, with edges straightened on the jointer and ripped on the table saw. I kept the rails tight to the bins, using only the thickness of a washer to allow for movement. This way the bin can hang in the open position if needed.
In a very pleasant surprise, the height of the saw base is the same as a 2 x 4, exactly! I don't have to rip it down at all. I used 3/4" coated MDF board for the top working surface. It's smooth and will be easy to keep clean. Plus, you can write on it with a pencil and clean it off. I slipped another sheet below the saw to get the height correct.
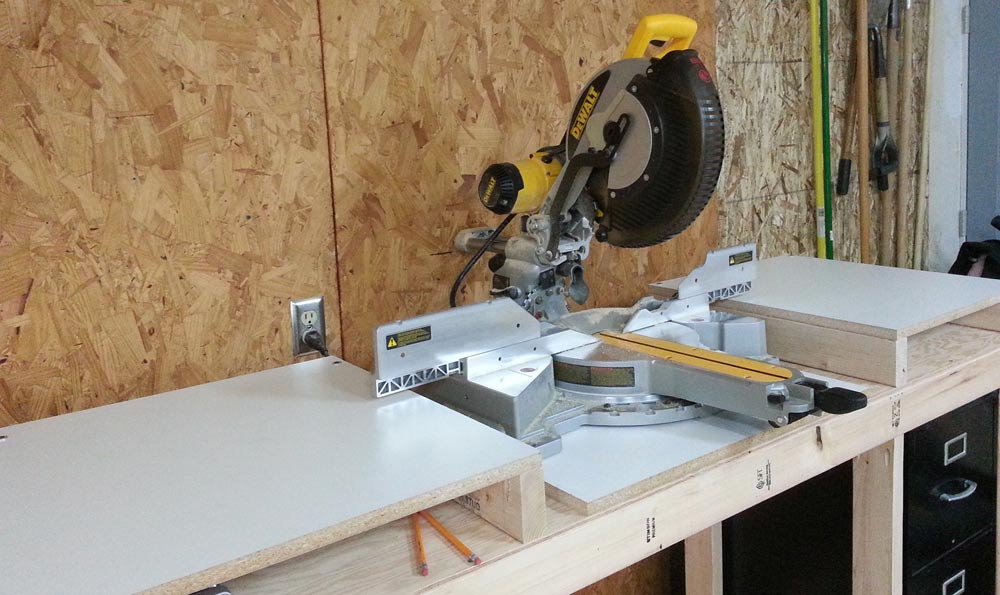
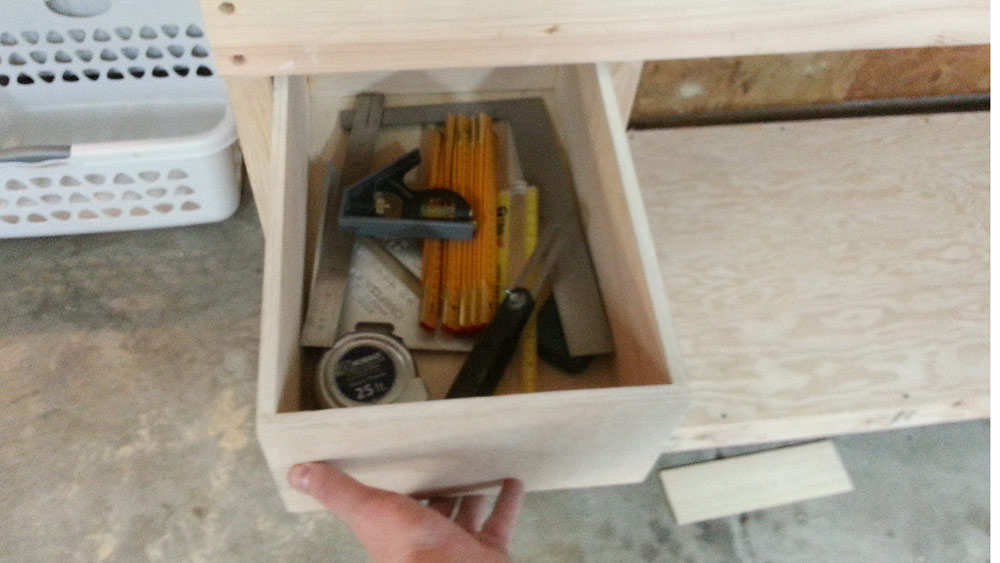
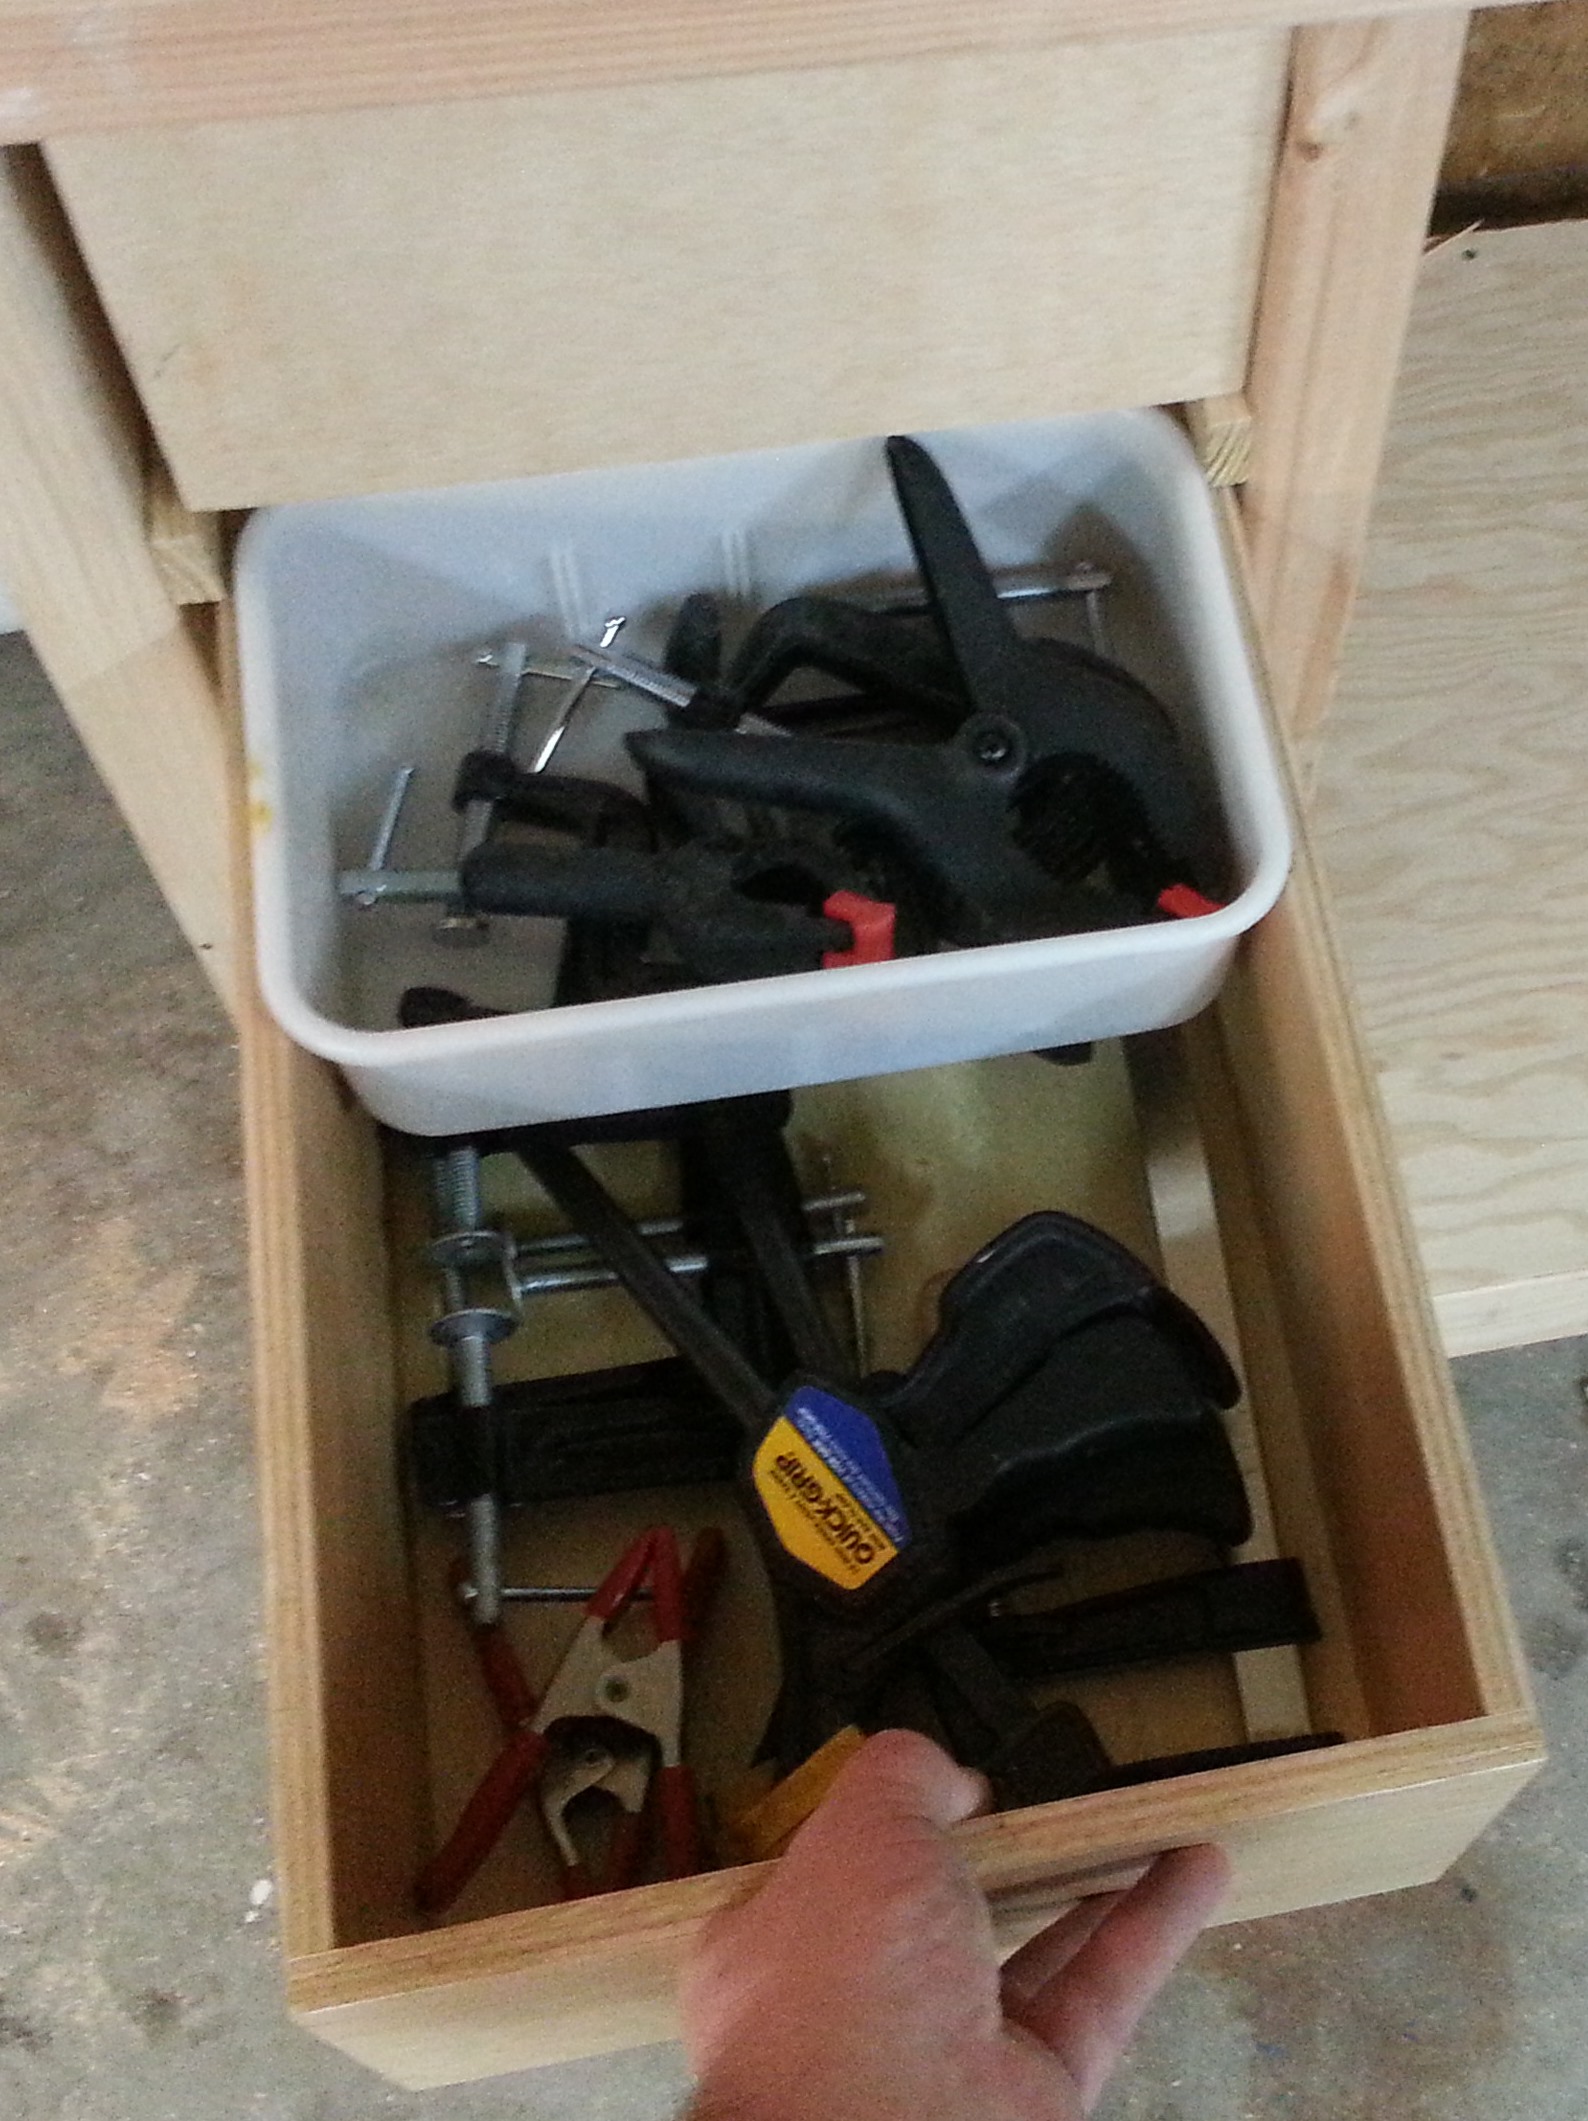
The void below the top makes three nice cubby holes to stick stuff. I have a way of losing tape measures, clamps, pencils, and stuff when the fever of creating stuff is upon me. This should help by giving me a designated catch-all spot.

I'm probably not going to finish the edges with the white iron-on edging (2018 update: It's been 5 years, never did it!); this is a workhorse table, not a piece of fine furniture. I'm done with this project for now, it's good enough so that I can use it for various projects, including the long overdue completion of the hallway organizer, which hasn't been touched in about nine months.
DONE! (-ish)

I am going to put a long fence on it in the near future, I want to have some decent precision and also have the ability to clamp a stop block for repetitive cutting (2018 update: It's been 5 years, never did it!). I'm also going to install some lighting above this area, it's a little dim with the garage door closed (2018 update: It's been 5 years, never did it!). At some point, I need to address dust collection (2018 update: It's been 5 years, never did it!). This baby flings sawdust like you wouldn't believe. You can see from the pictures, that I share my workshop with the family laundry facilities, an odd, but very common Arizona practice. I need to control the sawdust so close to the laundry.
I think this turned out pretty good for what I put into it. It probably cost about $50 bucks.
Recipe:
Combine 1 sheet of 1/4" plywood, 10 2x4x8 kiln dried studs, two 2'x4' pieces of 3/4" coated MDF, and screws and scraps you have laying around. Measure carefully. Cut many times. Mix it up with various portions of fine toolsmanship. Presto, done! (Well, almost done. I just have to get back to it and finish all those un-done parts later.)
The model.
I did a sketchup model of the bench, with a complete parts list. Check it out.


Update
5 years after the construction of this bench, it's still in the same design. No extended fence, no additions. I've been using the hell out of it, as is.

Bamboo Flooring

Crown Molding

2x6 Facia Board
I guess what I've really done is pile more crap on and around the bench,... and make sawdust while my hair turns more and more gray.

2018: Cutting a 2x10